Ring Intercom einrichten und installieren
Sicherheits- und Konformitätsinformationen zu Ring Intercom
Sicherheits- und Konformitätsinformationen zu Ring Intercom (5F99F2)
Kompatibilität prüfen
Schritt 1: Ring-App herunterladen
Lade die App "Ring - Always Home" herunter:
- iOS:
- Android:
- Internet:
Erstnutzer:
- Öffne die Ring-App.
- Tippe aufKonto erstellen.
- Befolge die Einrichtungsanweisungen.
Mehr dazu, wie du ein Ring-Konto erstellen kannst.
Schritt 2: Akku vorbereiten
- Nimm die Abdeckung des Ring Intercom-Geräts ab.
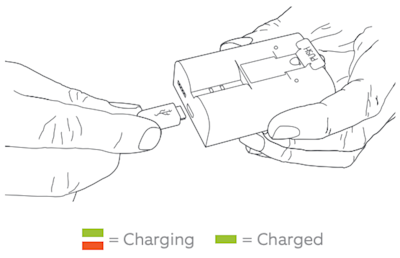
- Nimm den Akku heraus und lade ihn auf. Schließe das Ladekabel an den Ladeanschluss des Akkus an. Während des Ladevorgangs leuchten zwei farbige LEDs am Akku, eine dauerhaft grüne und eine gelbe. Lade den Akku auf, bis nur noch die grüne LED leuchtet.

Mehr zum Aufladen des Akkus für Ring Intercom.
Schritt 3: Ring Intercom in der Ring-App einrichten
Befolge diese Schritte, um Ring Intercom in der Ring-App einzurichten.
Einrichten und Scannen des QR-Codes
- Öffne die Ring-App, um zum Haupt-Dashboard zu gelangen.
- Tippe unten im Bildschirm aufGerät einrichten.
- Tippe aufSchlösser und Zugriffsgeräte.
- WähleRing Intercomaus.
- Tippe aufIch bin bereit zum Scannenund scanne den QR-Code.
Den QR-Code des Ring Intercom-Geräts findest du auf der Produktverpackung, auf der Vorderseite des Geräts nach dem Entfernen der Abdeckung oder in der Kurzanleitung. Wenn Probleme beim Scannen auftreten, tippe auf Du kannst den QR-Code nicht scannen? und gib die fünfstellige PIN unter dem QR-Code ein.
Standort und Gerätenamen für Ring Intercom festlegen
- Wähle, ob du Standortdienste zulassen möchtest, wenn du dazu aufgefordert wirst.
- Gib deine Adresse ein oder wähle eine Adresse aus, die du bereits verwendet hast.
- Wähle einen Namen für Ring Intercom. Du kannst die vorgeschlagene Option verwenden oder einen eigenen Namen festlegen.
Mehr zu Ring-Geräten und deiner Adresse.
Mit dem WLAN verbinden
Achte darauf, dass du dich in der Nähe deines Routers befindest und dein WLAN-Passwort zur Hand hast.
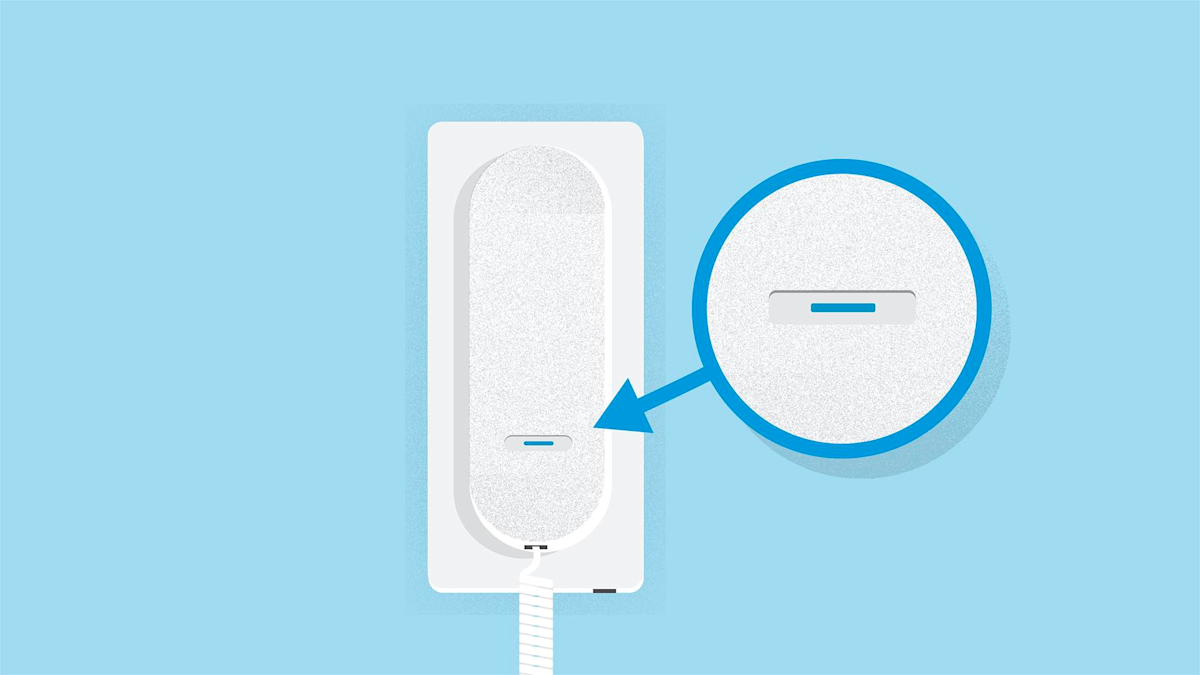
- Warte, bis die Gegensprechanlage in den Einrichtungsmodus wechselt. Tippe aufDas Licht blinkt blau.
- Tippe unter iOS aufAnmelden, wenn die Ring-App dich auffordert, dem Ring-WLAN-Netzwerk beizutreten. Unter Android sollte dein Gerät automatisch eine Verbindung zum Ring-WLAN-Netzwerk herstellen.
- Wähle dein WLAN-Netzwerk aus.
- Gib dein WLAN-Passwort ein und tippe aufWeiter.
Wenn während der Einrichtung Probleme auftreten, erfährst du hier, wie du Probleme bei der Geräteeinrichtung beheben kannst.
Schritt 4: Einrichten der Zugangssteuerungsfunktionen
Funktionen konfigurieren:
- : Erlaube Zustellfahrern innerhalb eines kurzen Zeitfensters Pakete abzulegen.
- : Erlaube Freunden und Familienmitgliedern, dein Ring Intercom-Gerät zu nutzen
- : Lasse deine Ring-Geräte wie ein Team zusammenarbeiten. Wenn eines eine Bewegung erfasst, helfen die anderen mit, indem sie Videos aufzeichnen und ihre Leuchten einschalten.
Ring Intercom installieren
Befolge diese Schritte, um dein Intercom-Gerät zu installieren.
Schritt 1: Entferne die Abdeckung deiner vorhandenen Gegensprechanlage
Bei einer Schraube:
- Nimm den Hörer ab.
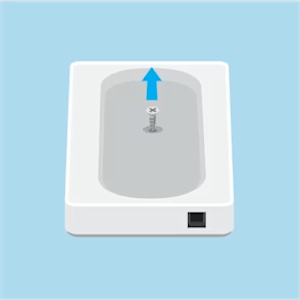
- Entferne die Schraube mit einem Kreuzschlitzschraubendreher.
- Ziehe die Blende ab.

Bei einer versteckten Entriegelung:
- Setze den Schraubendreher auf die Entriegelung.
- Drücke den Schraubendreher nach unten, um die Blende zu entfernen.

Bei einem Abziehmechanismus:
- Nutze einen Schlitzschraubendreher.
- Drehe und heble die vordere Abdeckung mit dem Schraubendreher auf.

Schritt 2: Ermittle die Marke und das Modell deiner aktuellen Gegensprechanlage
Gehe dazu wie folgt vor:
- Sieh dir deine Gegensprechanlage an. Der Markenname befindet sich in der Regel auf der Kunststoffabdeckung.
- Die Modellnummer findest du im Bereich der Drähte auf der Steuerplatine, auf der Rückseite oder auf Aufklebern. Wenn du sie nicht finden kannst,
Schritt 3: Verdrahte die Gegensprechanlage
- Nimm das Kabel aus der Ring Intercom-Verpackung, wie in der Ring-App gezeigt.
- Die Ring App zeigt dir, wie du die Drähte für deine jeweilige Gegensprechanlage anschließt.
- Führe diese Schritte aus, um das Kabel anzuschließen.
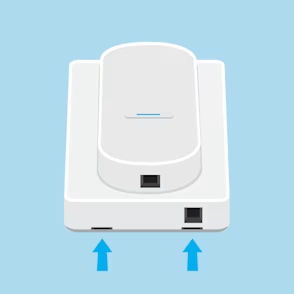
- Verbinde das Kabel mit dem Ring Intercom-Gerät.
- Setze die Abdeckung wieder auf die Gegensprechanlage an der Wand.
Schritt 4: Montiere Ring Intercom
Bringe Ring Intercom mit doppelseitigem Klebeband oder Schrauben an der Wand neben der Gegensprechanlage an. Wähle die Position nahe genug aus, sodass sich das Kabel anschließen lässt.
Befestigung mit Klebeband (bei glatten Wänden):
Das Gerät wird mit einem starken Klebeband auf der Rückseite geliefert. Dieses Klebeband funktioniert am besten auf flachen, glatten Wänden. So nutzt du es:
- Reinige die Oberfläche mit Spiritus oder Alkohol.
- Wähle die gewünschte Position für das Gerät aus.
- Entferne die Schutzfolie vom Klebeband.
- Drücke es 30 Sekunden lang fest an.
Schraubbefestigung (für unebene Oberflächen):
Auf unebenen Oberflächen benötigst du zur Befestigung des Ring Intercom-Geräts möglicherweise Schrauben. So verwendest du die Schrauben:
- Nimm die vordere Abdeckung ab.
- Halte das Gerät an die Stelle, an der du es montieren möchtest.
- Bei Holzwänden:Verwende den mitgelieferten Schraubendreher, um die Schrauben zu befestigen.
- Bei Ziegel-, Beton- oder Gipswänden:Markiere die Stellen, an denen du Löcher bohren musst, und verwende eine Bohrmaschine mit einem 6-mm-Bohrer. Setze bei Bedarf Dübel ein. Richte dein Gerät an den Löchern aus und verwende den mitgelieferten Schraubendreher, um die Schrauben zu befestigen.
- Bringe die Abdeckung wieder an.
Lasse das Gerät eingeschaltet, da es möglicherweise Updates herunterladen muss. Teste über die Ring-App, ob alles korrekt funktioniert.
Entfernen der Ring Intercom und des doppelseitigen Klebebandes
So entfernst du das doppelseitige Klebeband von der Wand:
- Greife das Gerät mit einer Hand, während du mit der anderen Hand langsam an den durchsichtigen Laschen ziehst. Folge dabei der Richtung des Klebebandes.
- Ziehe das Klebeband einige Zentimeter heraus und halte es dabei so nah wie möglich an der Stelle, an der das Klebeband die Wand berührt.
- Ziehe langsam weiter, bis das gesamte Klebeband entfernt ist.
Brauchst du Hilfe?
Wende dich an das Support-Team für Ring Intercom. Bevor du dich an den Support wendest, mache deutliche Fotos von Folgendem:
- Der Außenseite deiner Gegensprechanlage
- Dem Inneren deiner Gegensprechanlage; stelle dabei sicher, dass die Verdrahtung und die Bezeichnungen der Klemmen deutlich sichtbar sind.
Halte diese Fotos bereit, wenn du dich an uns wendest.
Vordere Abdeckung der Gegensprechanlage:

Abbildung mit entfernter vorderer Abdeckung:

