Set up and install Ring Intercom
Safety and compliance information for Ring Intercom
Safety and compliance information for Ring Intercom (5F99F2)
Check compatibility
Step 1: Download the Ring app
Download the "Ring-Always Home" app:
- iOS:
- Android:
- Web:
First-time users:
- Open the Ring app.
- TapCreate Account.
- Follow the setup instructions.
Learn more about creating a Ring account.
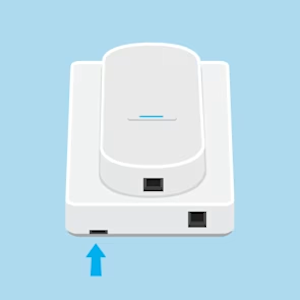
Step 2: Prepare the battery
- Remove Ring Intercom cover.
- Remove and charge the battery. Connect the charging cable to the battery's charging port. While charging, your battery displays two coloured lights, a solid green and an amber light. Charge the battery until only the green light remains lit.
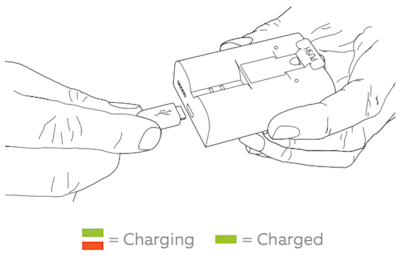
Learn more about charging the battery for your Ring Intercom.
Step 3: Set up Ring Intercom in the Ring app
Follow these steps to set up Ring Intercom in the Ring app.
Setting up and scanning the QR code
- Open the Ring app to the main dashboard.
- TapSet Up a Deviceat the bottom of the screen.
- TapLocks & Access Devices.
- SelectRing Intercom.
- TapI’m Ready To Scanto scan the QR code.
Find your Ring Intercom's QR code on the product box, the front of the device after removing the cover, or in the Quick Start Guide. If scanning fails, tap Set Up Without Scanning and enter the five-digit PIN found below the QR code.
Setting up your Ring Intercom's location and name
- Choose whether you want to allow Location Services, if asked.
- Type in your address or pick one you've used before.
- Choose a name for your Intercom. You can use the one it suggests or make up your own.
Learn more about Ring devices and your address.
Connecting to wifi
Make sure you are near your router and have your wifi password ready.
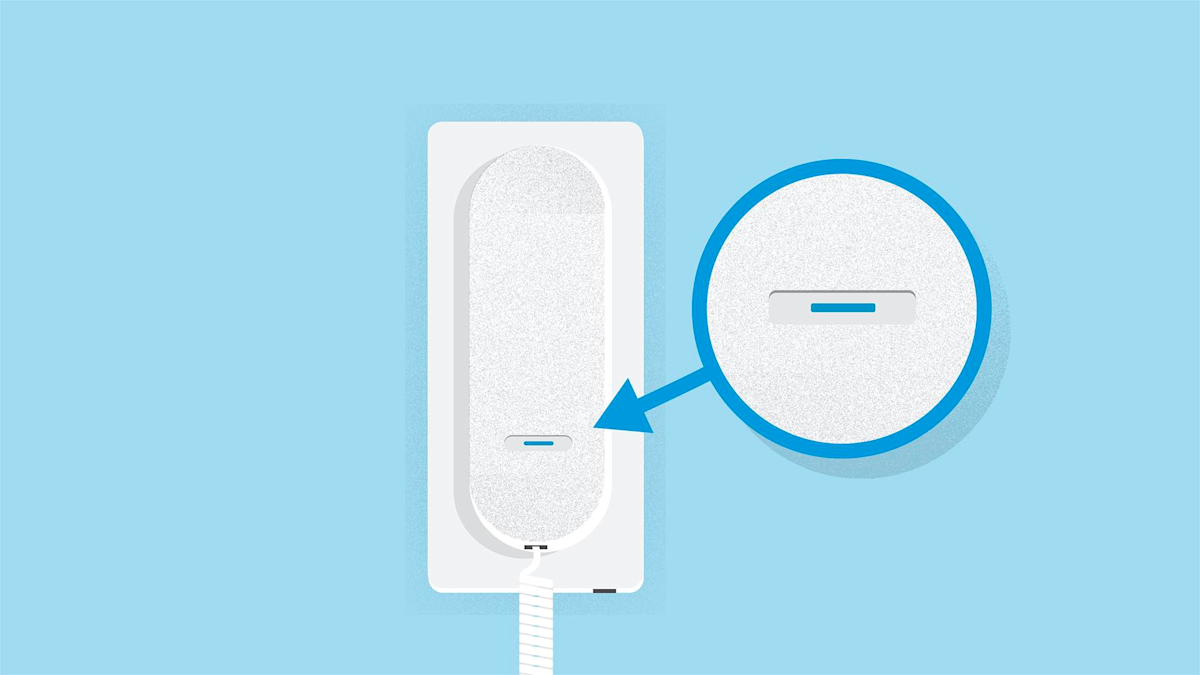
- Wait for your Intercom to enter setup mode. TapThe Light is Flashing Blue.
- For iOS, tapJoinwhen the Ring app asks to join the Ring wifi network. For Android, your device should automatically connect to the Ring wifi network.
- Select your wifi network.
- Enter your wifi password and tapContinue.
If you have any trouble during setup, learn how to fix device setup issues.
Step 4: Set up Access Control features
Configure features:
- : Give drivers a short window of time to drop off your packages.
- : Let friends and family use your Ring Intercom.
- : Allow your Ring devices to work together like a team. If one sees movement, the others help out by recording videos and turning on their lights.
Install your Ring Intercom device
Follow these steps to install your Intercom.
Watch the video guide for installing Ring Intercom
Step 1: Remove the cover of your existing intercom system
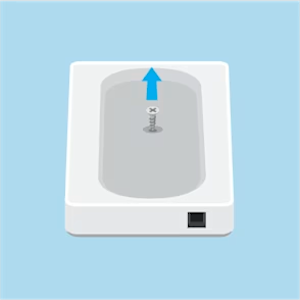
For the screw:
- Remove handset from the hook.
- Remove the screw with a Phillips head screwdriver.
- Pull off the faceplate.
For the hidden tab:
- Place the screwdriver on the tab.
- Push down on the screwdriver to remove faceplate.
For the pull off:
- Insert flat-head screwdriver.
- Twist and pry off the front cover using the screwdriver.
Step 2: Find the brand and model of intercom you currently have
Here's how to find out:
- Look at your intercom handset. The brand name is usually on the plastic cover.
- To find the model number, check near the wires on the control board, on the back, or on any stickers. If you’re having trouble finding this,
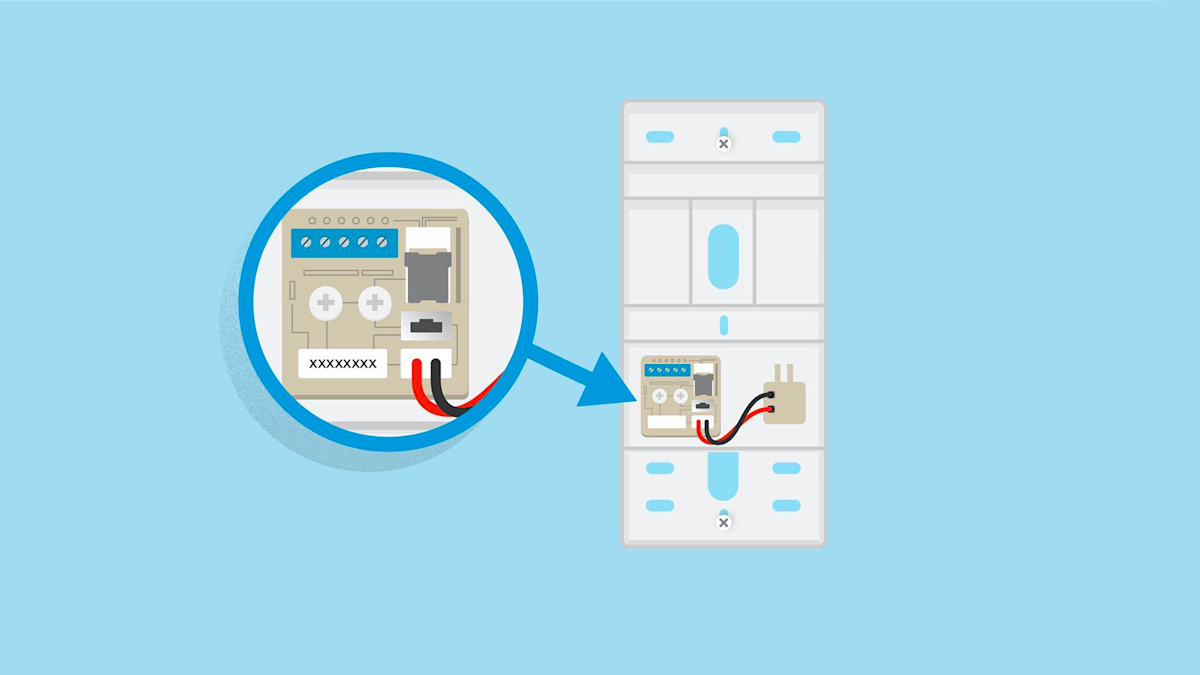
Step 3: Wire your Intercom
- Take the cable from your Ring Intercom box, as indicated in the Ring app.
- The Ring app will show you how to connect the wires for your specific intercom.
- Follow those steps to connect the cable.
- Plug the cable into your Ring Intercom.
- Put the cover back on your intercom on the wall.
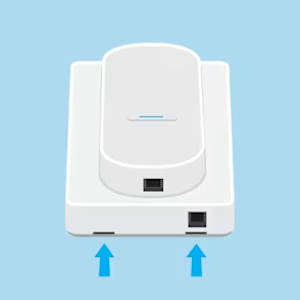
Step 4: Mount your Intercom
Mount your Ring Intercom to the wall beside your handset using double-sided tape or screws. For mounting location, make sure you're close enough to connect the cable.
Tape mount (for smooth walls):
Your device comes with strong tape on the back. This tape works best on flat, smooth walls. Here's how to use it:
- Clean the surface with methylated spirit.
- Choose where you want your device.
- Remove the backing from the tape.
- Press firmly for 30 seconds.
Screw mount (for difficult surfaces):
You might need to use screws to put up your Ring Intercom if installing on a difficult surface. To use the screws:
- Remove the front cover.
- Hold the device where you want to mount it.
- For wood walls:Use the screwdriver we gave you to put in the screws.
- For brick, concrete, or stucco walls:Mark where you'll need to drill holes, and use a power drill with a 6mm drill bit. Insert wall anchors if needed. Line up your device with the holes and use the screwdriver we gave you to put in the screws.
- Replace the cover.
Leave your device turned on as it might need to download updates. Use the Ring app to test that everything works okay.
Removing Ring Intercom and double-sided tape
To remove your Ring Intercom's double-sided tape from the wall:
- Grip the device with one hand while using your other hand to pull the transparent tabs slowly, following the tape's direction.
- Pull the tape out several centimetres, keeping your grip close to where the tape meets the wall.
- Continue pulling slowly until all tape is removed.
Need help?
Contact the Ring Intercom Support team. Before you contact support, take clear photos of:
- The outside of your intercom
- The inside of your intercom ensuring the wiring and the terminal markings are clearly visible
Have these photos ready when you contact us.
Front cover of intercom:
Picture with front cover removed: