Installing Ring Video Doorbell Wired
Setting up your Video Doorbell Wired is simple. Scroll down for a step-by-step guide.
Get instructions on how to hardwire Video Doorbell Wired and replace your existing doorbell
To install your device with the included AC Plug-In Adapter
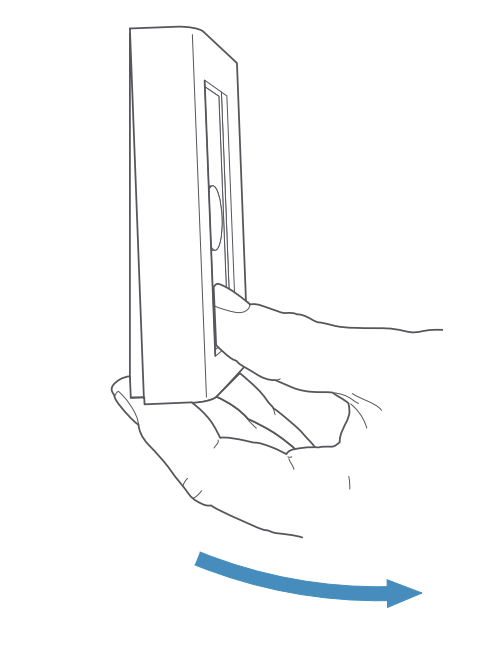
1. Remove the faceplate
Grasp the bottom of the faceplate and pull to remove.
2. Mark the screw holes
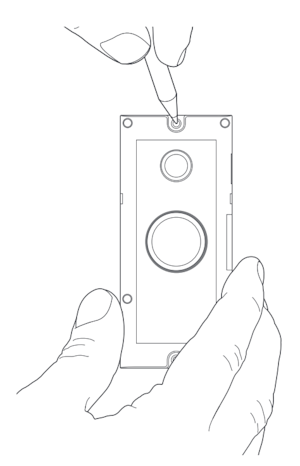
Using your Ring Video Doorbell as a template, mark the location of the two mounting holes on your wall.
3. Install the anchors (optional)
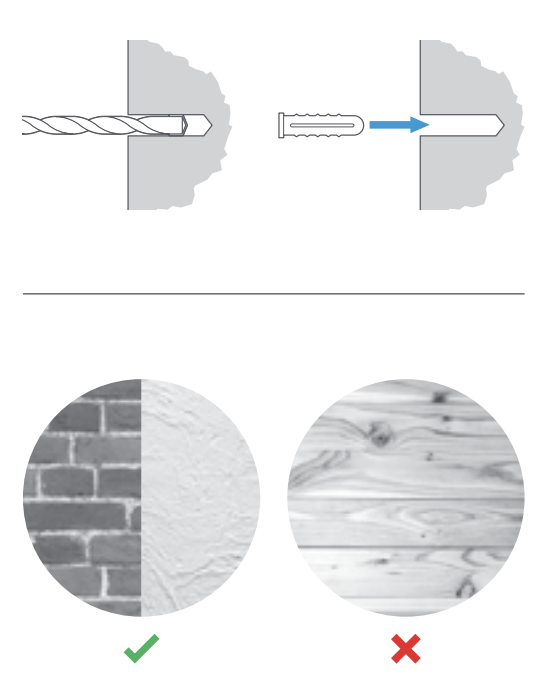
On stucco, brick, or concrete, use a 1/4" masonry bit to drill holes in your wall, then insert the included wall anchors. (If you’re installing on wood or siding, you can skip this step.)
4. Connect the Plug-In Adapter wires
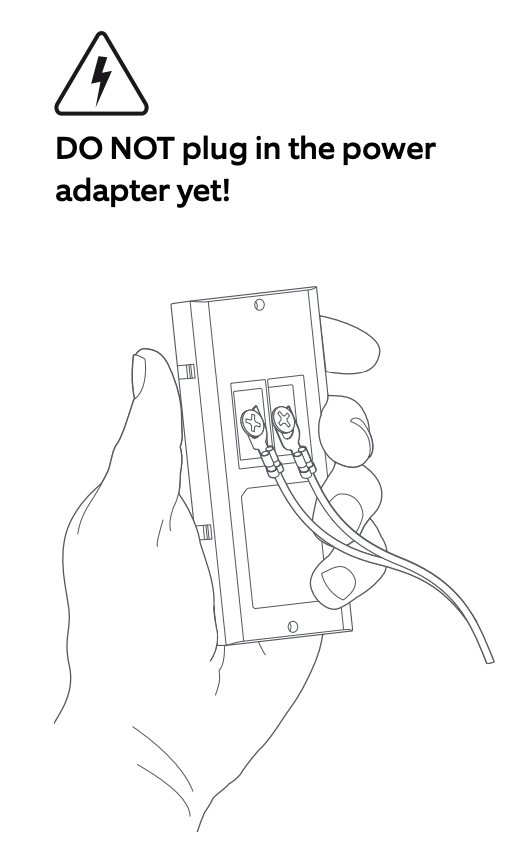
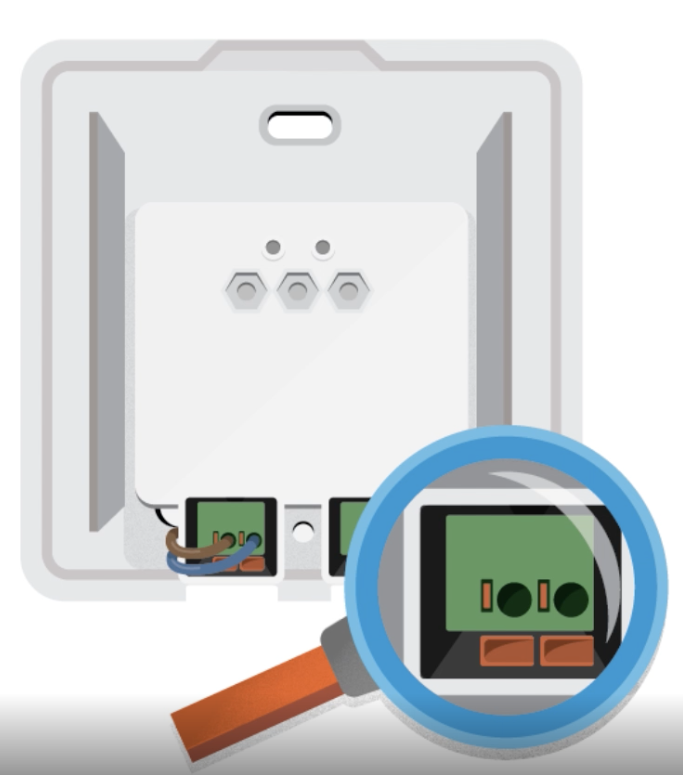
Attach the power wires from the Plug-In Adapter to the terminals on the rear of your doorbell. It doesn’t matter which wire connects to which terminal.
5. Screw in your Ring Video Doorbell
Mount your Ring Video Doorbell with the two included mounting screws. If you ran the wire through your wall, be sure to feed any excess wiring into the wall first.
DO NOT USE any screw other than the included mounting screws when securing your Ring Video Doorbell. If you are running the wire up your wall (instead of through it), DO NOT over-tighten the screws.

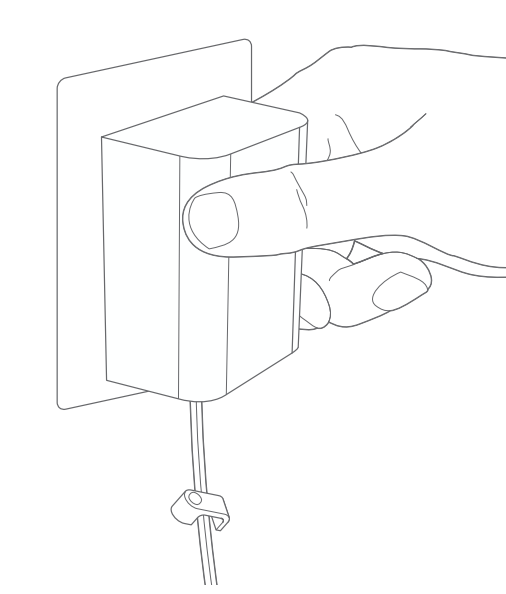
6. Plug in the power adapter
Choose a socket as close to your door as possible. It may take a moment for your Ring Video Doorbell to power on. You’ll know it’s ready once it lights up and speaks to you.
7. Secure your Ring Video Doorbell
Re-attach the faceplate, then use the included screwdriver to drive the small security screw into the bottom of your Ring Video Doorbell.
CAUTION! If you use the wrong screws to secure the Video Doorbell, you could damage the battery during installation, create a fire hazard, and be seriously injured.

To hardwire your Video Doorbell Wired and replace an existing doorbell
For your safety, only use an existing doorbell transformer within the range specified below or compatible Ring accessories to power your device.
For connecting to an existing doorbell system:
- Hardwired transformer (8 to 24 VAC, 50/60Hz, 8VA to 40VA)
Ring accessories are sold separately and may include:
- DIN Rail Transformer (24Vdc, 420mA)
- Plug-In Adapter (24Vdc, 500mA)
Using incompatible power sources can damage your device and cause electric shock.
Note: You must hire a qualified electrician to hardwire your Video Doorbell Wired.
Before you begin
Make sure you have all of the required hardware included in your package:
Bag A
- (2) 1" long mounting screws

- (2) wall anchors

Bag B
- (2) 3/16" security screws

Bag C
- (1) Jumper cable

Note: Tools needed for installation (not included):
- 6mm masonry drill bit (optional)
- PH2 Phillips Screwdriver
1. Find your doorbell chime
Ring your existing doorbell and listen for the chime. If it rings, we know your existing doorbell system is working. When installed, your existing doorbell chime will no longer function, so you will need to use a Ring Chime, Chime Pro or Alexa-enabled speaker if you wish to hear a doorbell chime inside your home in addition to the notification on your phone or tablet.
Follow the sound to find your chime and make a mental note of the location. We'll return to your existing doorbell chime soon.
2. Turn off power at the consumer unit
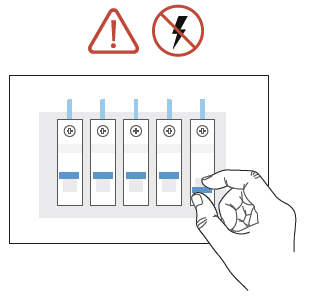
This is essential to keeping you and your new Ring Video Doorbell safe during installation. If you're not sure which breaker controls your doorbell chime, turn off the master breaker for your home. Press your doorbell button to verify the power for your doorbell is off. If the doorbell chime doesn’t sound, the power should be off.
CAUTION: You must consult a qualified electrician to carry out the installation process.
3. Grab the included jumper cable

The jumper cable disables and isolates your existing doorbell chime. This is necessary for your Ring Video Doorbell to get the power it needs, but it means your doorbell chime will no longer ring.
To hear alert sounds throughout your home, you can add the Ring Skill to any Alexa-enabled speaker, or add a Ring Chime to your system.
4. Remove the cover from your doorbell chime
After you've located your doorbell chime and turned off the power at the consumer unit, remove the cover from your chime and set it aside for now.
If your existing chime looks like the below (commonly made by Deta or other manufacturers with volt-free designs) then your chime is not compatible, and will need to be replaced with a Ring DIN Rail Transformer (2nd Generation) by a qualified electrician.
If your existing chime is powered directly with 230V and does not include a step down transformer to lower the voltage to 8 to 24 VAC then your system is not compatible with your Ring Video Doorbell Wired, and will need to be replaced with a Ring DIN Rail Transformer (2nd Generation) by a qualified electrician.
If you need an enclosure for your transformer, Ring’s Enclosure for DIN Rail Transformer is designed to house your DIN Rail Transformer. It blends into the background while being large enough to cover the footprint of your existing chime.
Please note: Step 5 is different based on whether your doorbell transformer is installed outside or inside your existing chime.
5. Bypass your doorbell chime
If your chime is separate from your transformer
To identify this you will need to locate the transformer, which is often installed in or near to your main electrical fuse board. It may be labelled doorbell transformer and needs to be low voltage (8 to 24 VAC) to power your Ring Video Doorbell Wired.
If the transformer is not rated at 8 to 24 VAC, it is not compatible with Video Doorbell Wired and will need to be replaced with a Ring DIN Rail Transformer (2nd Generation) by a qualified electrician.
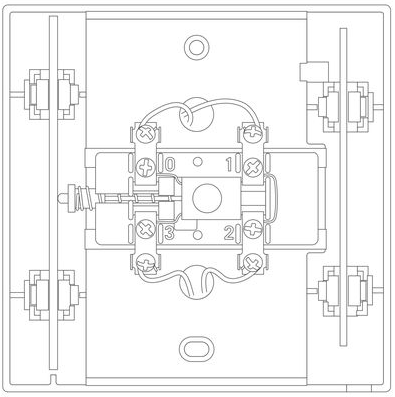
You may want to take a photo of your existing chime wiring before you begin, in case you ever want to restore it to normal.
Prepare the wires

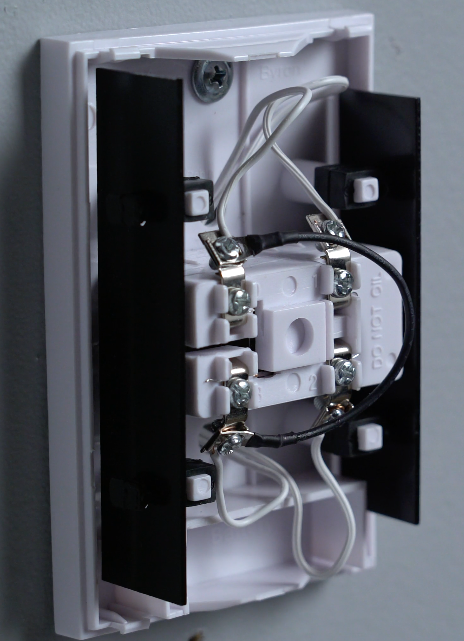
Look for terminal screws with wires connected. In order to provide power to your new doorbell we must bypass the wires that are connected either side of the doorbell mechanism.
In the example below, the terminals 0 and 3 are across the doorbell mechanism, and terminals 1 and 2 are connected via a jumper wire between the two terminals. Loosen the screws of the two terminals that are either side of the solenoid/coil in the case of the example terminals 0 and 3. If your chime looks different, please consult your chime installation manual to identify the terminals either side of the solenoid/coil.
Tips for identifying which side is your doorbell mechanism


Here you can see a small wire on the right side. This is joining the two cables together, so this is not the side that connects to the doorbell mechanism.
Connecting the jumper cable
The jumper cable has connectors on either end, which you should position around the screws on your chime before tightening the screws.
If your doorbell transformer is installed inside your doorbell chime
You can identify whether your doorbell has an inbuilt transformer by the presence of high voltage cabling entering your chime along with markings that indicate high voltages of 230V. These cables are often secured inside the transformer housing. For the doorbell installation we will only alter the low voltage cabling.
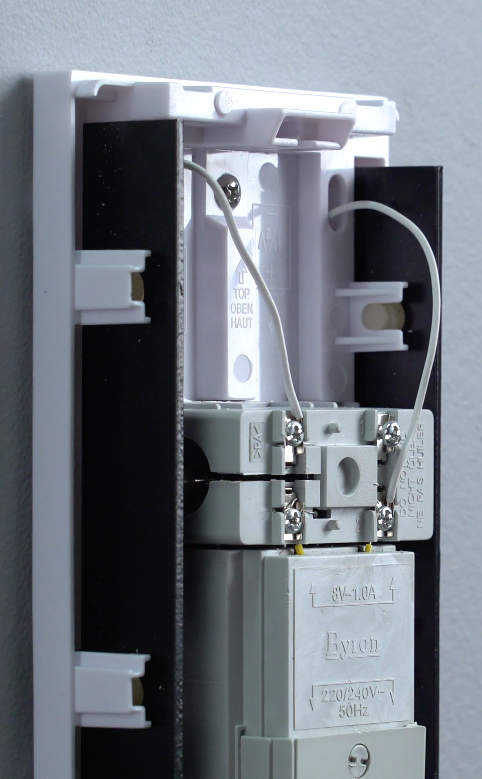
You’ll see thin insulated wires connected to two terminal screws inside. One will be connected to the transformer directly and the other will be connected to one side of the doorbell mechanism. In the case of the example below, terminal 2 is connected to the transformer and terminal 0 to the other side of the doorbell mechanism.
To power your new doorbell, you need to bypass the doorbell mechanism by removing the wire from the doorbell mechanism and connecting it to the second terminal on the transformer, in this example terminal 3.
Tips for identifying your transformer
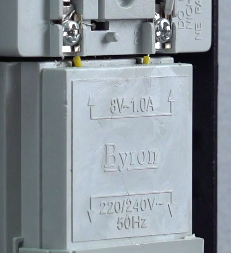
Here the transformer is at the bottom of the chime. You can see the markings which show mains voltage is connected at the bottom, and outputs 8V to the doorbell mechanism above.
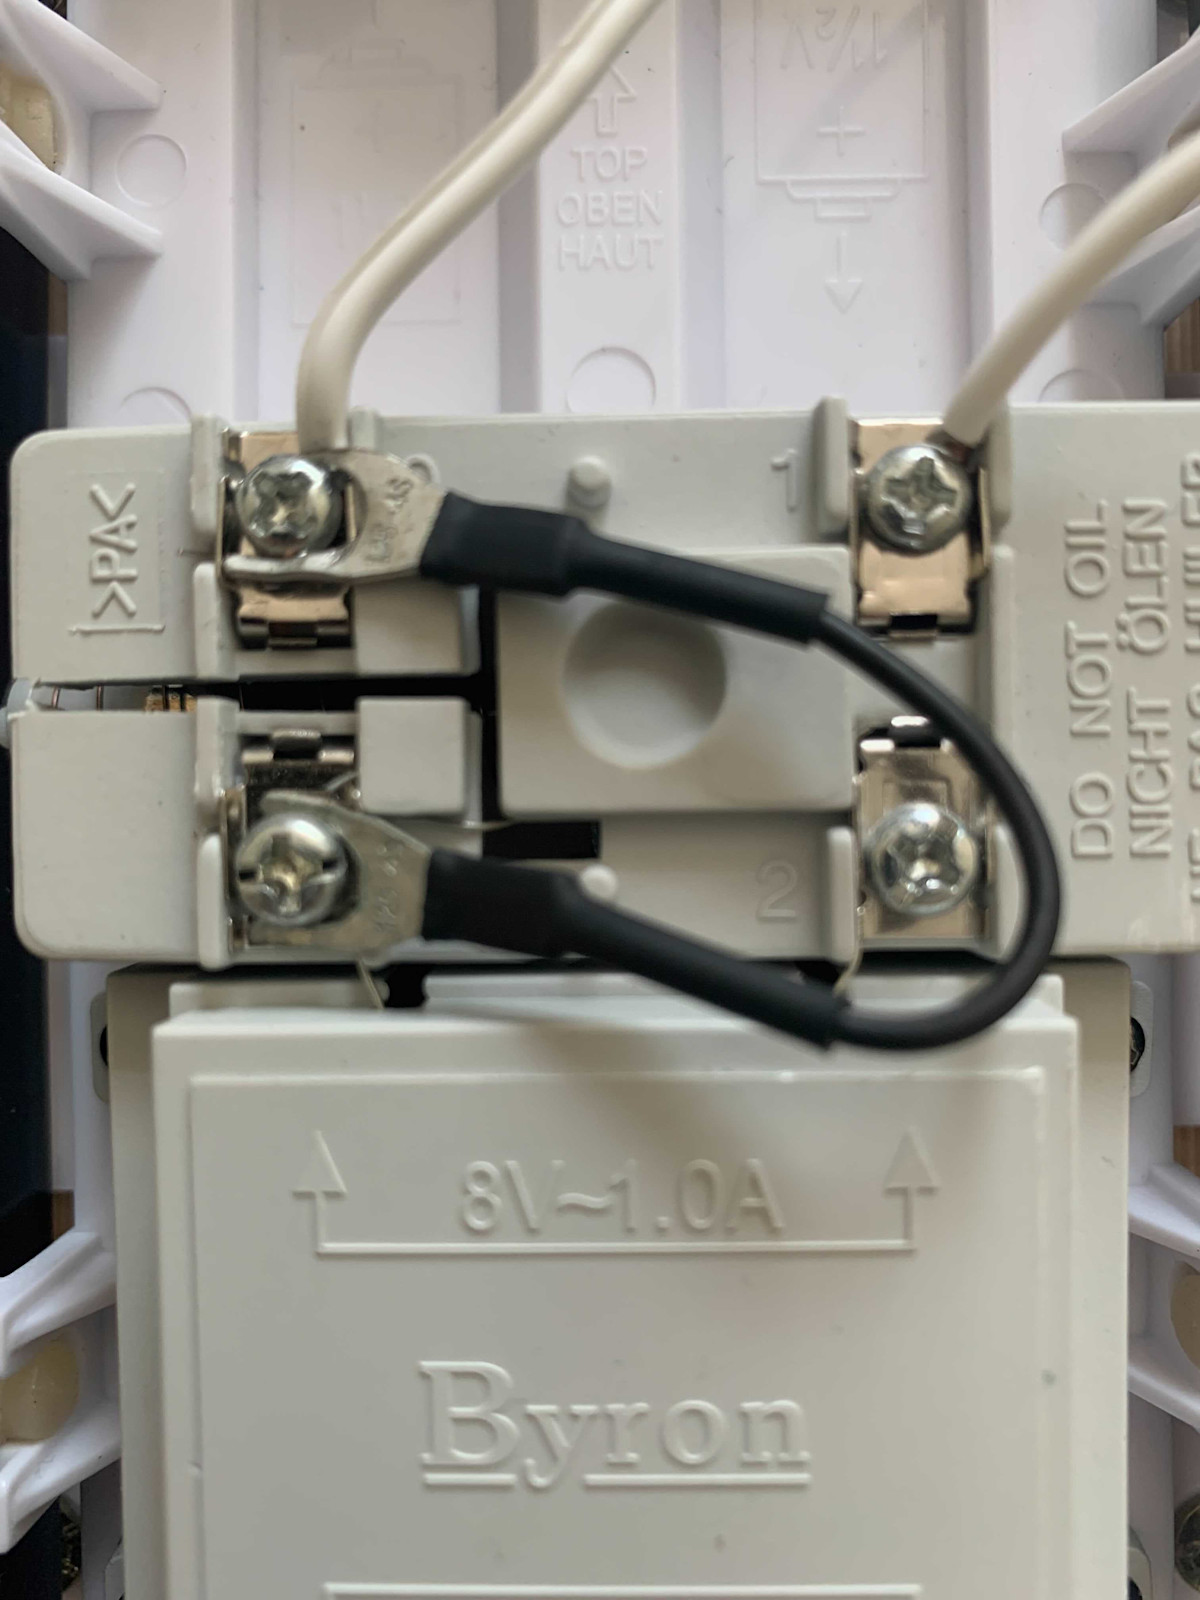
Connecting the jumper cable
The jumper cable has connectors on either end, which you should position around the screws on your chime before tightening the screws.
6. Place the cover back on your chime

If you ever uninstall your Ring Video Doorbell, be sure to restore your chime wiring to its original state to avoid damaging your doorbell system.
7. Uninstall your existing doorbell button
Once you’ve removed it from your wall, disconnect the wires. Make sure the wires don’t fall back inside your wall, so you can access them later.
8. Remove the faceplate from your Ring Video Doorbell
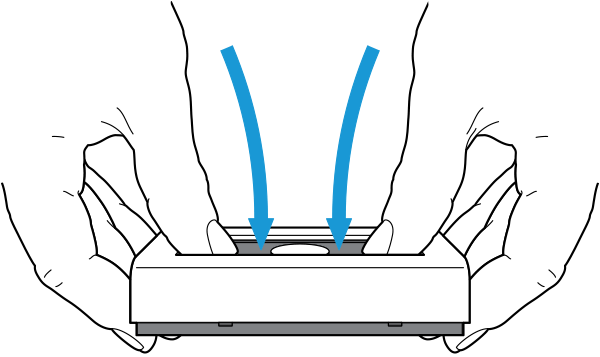
To do this, grasp the bottom of the faceplate and pull while pushing in on the centre of the doorbell.
9. Mark the screw holes

Using your doorbell as a template, mark the location of the two mounting holes on your wall.
10. Install the anchors from Bag A (optional)
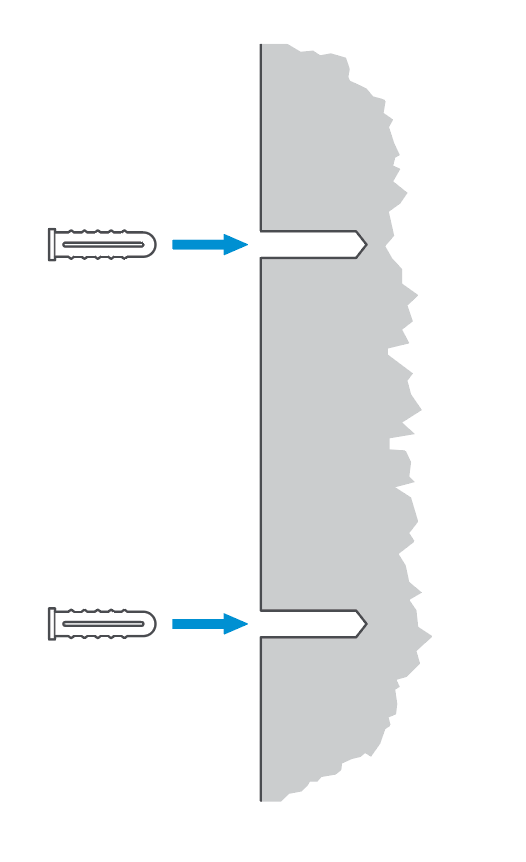
On stucco, brick or concrete, use a 1/4" (6mm) masonry bit to drill holes in your wall, then insert the included wall anchors.
Note: If you're installing on wood or siding, you can skip this step.
11. Connect the doorbell wires

Loop one doorbell wire around each of the screw terminals on the rear of your Video Doorbell Wired, then tighten the terminals to secure.
12. Screw in your Ring Video Doorbell using hardware in bag A
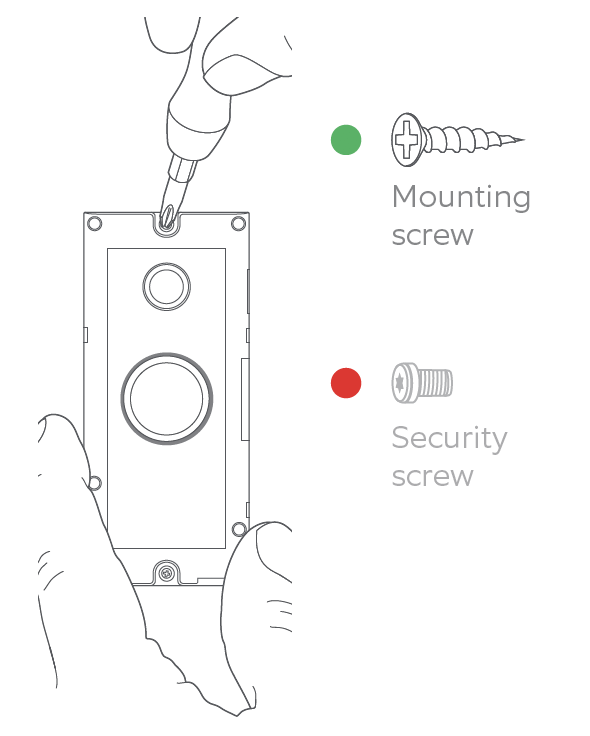
Mount your Video Doorbell Wired with the two included mounting screws. If you ran the wire through your wall, be sure to feed any excess wiring into the wall first.
Note: DO NOT USE any screw other than the included mounting screws when securing your Ring doorbell.
Note: If you are running the wire up your wall (instead of through it) DO NOT over-tighten the screws.
13. Restore power at the consumer unit
It may take a moment for your Video Doorbell Wired to power on. You'll know it's ready when it lights up and speaks.
14. Secure your Ring Video Doorbell using screw in bag B
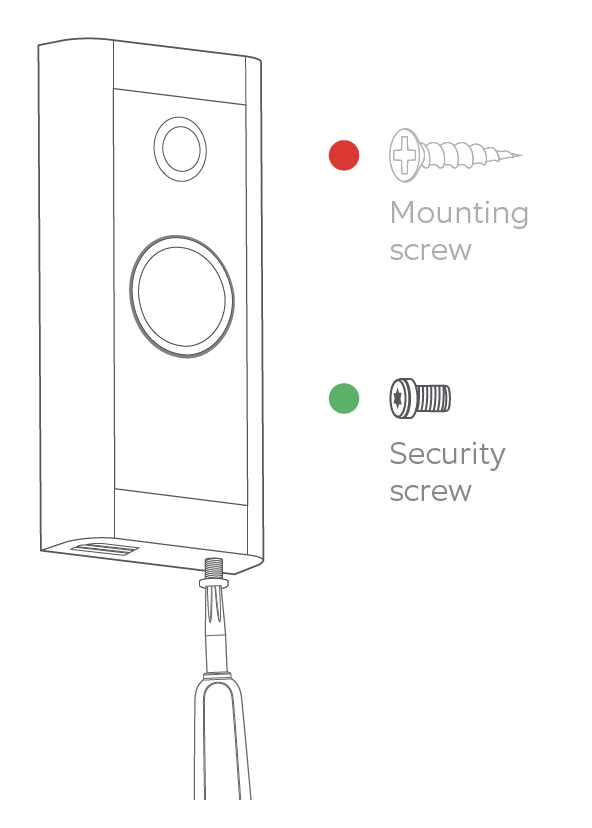
Re-attach the faceplate, then use the included screwdriver to drive the small security screw from bag B into the bottom of your Video Doorbell Wired.
CAUTION: If you use the wrong screws to secure the Video Doorbell Wired, you could damage the doorbell during installation, create a fire hazard and be seriously injured.
Note: DO NOT USE any screw other than the included short security screw from bag B.
Set up your Video Doorbell Wired in the Ring app
Notes for professional installers
Ring Video Doorbell Wired is compatible with most standard 8 to 24VAC doorbell transformers. When sourcing a new transformer we recommend a transformer that is 8VA minimum, and must be less than 40VA. Using incompatible power sources can damage your device and cause electric shock.
