
Hardwiring your battery-powered Ring doorbell
Installation must be carried out by a qualified electrician. Refer to your local laws and building codes before performing electrical work; permits plus professional installation may be required by law.
For your safety, only use an existing doorbell transformer within the range specified below or compatible Ring accessories to power your device.
For connecting to an existing doorbell system:
- Hardwired transformer (8 to 24 VAC, 50/60Hz, 5VA to 40VA)
Ring accessories are sold separately and may include:
- Plug-In Adapter (24Vdc, 500mA)
- Solar Charger (5.2Vdc, 100mA or 109mA)
- Solar Panel (5Vdc, 380mA/480mA/800mA)
Using incompatible power sources can damage your device and cause electric shock.
You can hardwire your doorbell to receive power directly from your home’s electrical supply. Learn more about the options available for hardwiring your device:
- Hardwireto an in-home chimeto hear the chime when the doorbell is pressed.
- Hardwiredirectly to a doorbell transformerorbypass an in-home chime.
Step 1: Charge the battery
Make sure the battery is fully charged before installation. Connecting the doorbell to a power source (existing wiring, transformer, or Plug-In Adapter) will provide a trickle charge to the battery. Learn more about charging your doorbell’s battery.
Step 2: Prepare the installation area
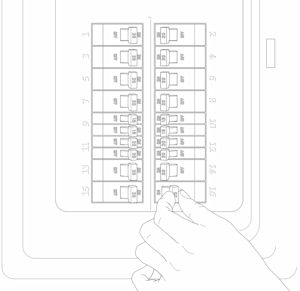
- Turn off power at the circuit breaker.
2. Remove any doorbell buttons and disconnect them from the doorbell wires.
3. Remove any Ring doorbells, mounts, and brackets from the wall.
Doorbell with a built-in battery | Doorbell with a removable battery |
|---|---|
 |  |
Step 3: Bypassing an in-home chime or hardwiring directly to a transformer
Bypassing an in-home chime:
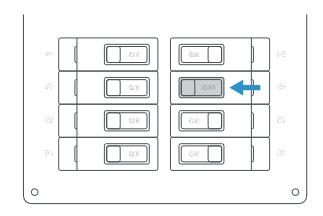
- Remove the two wires from the terminal screws inside the chime.
- Twist the two wires from the in-home chime together manually or use a wire nut.
Hardwiring directly to a transformer:
- The majority of battery doorbells do not need any changes to the wiring.
- For Video Doorbell 2 and Video Doorbell (1st Gen) you will need to install a
Step 4: Preparing the mounting position
If using a Wedge Kit, Corner Kit, or mounting bracket with your device, install before mounting the doorbell.
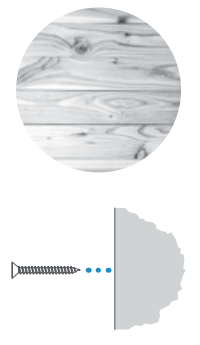
Installing on a wood surface
Drill and wall anchors are not needed.
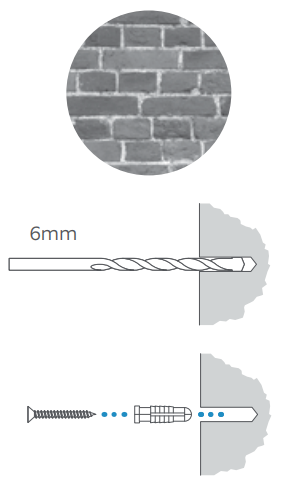
Installing on a masonry surface
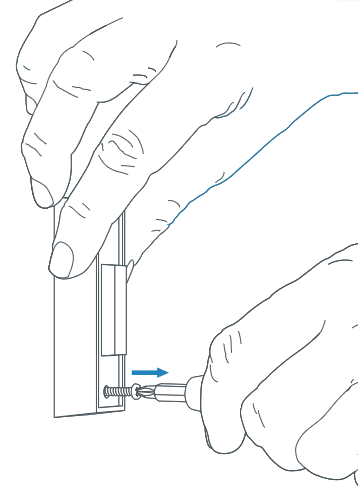
- Using the marked screw hole locations, drill pilot holes using a 6 mm drill bit.
- Insert the included wall anchors.
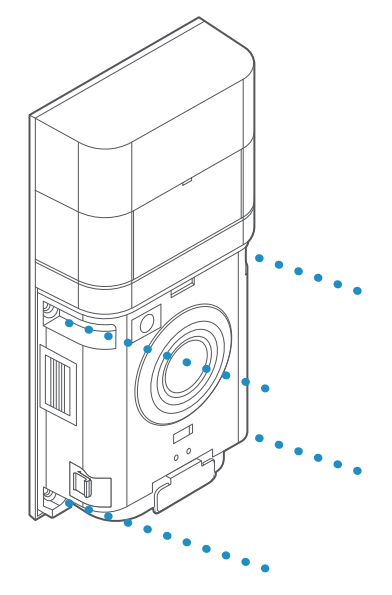
Step 5: Connect the doorbell wires or Plug-In Adapter
Using doorbell or transformer wires
Loop one wire around each of the screw terminals on the rear of your Ring doorbell.
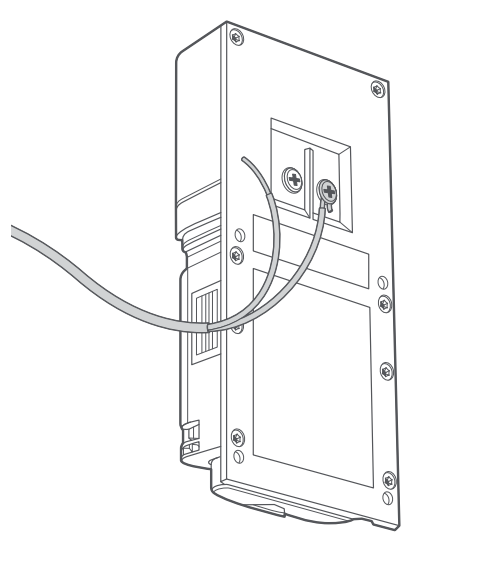
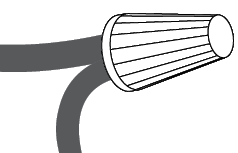
- If your doorbell wires are too short, you can attach the included wire extenders using the included wire nuts.
Using Plug-In Adapter
Insert the plug-in adapter connectors underneath the terminal screws on the rear of your doorbell, then tighten the terminals to secure.
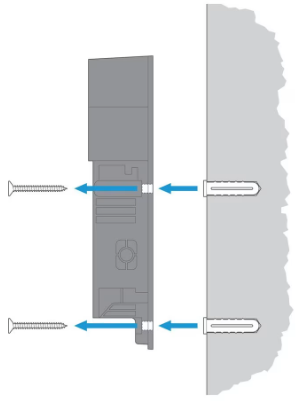
Step 6: Mounting the doorbell
- Feed any excess wiring and wire nuts back into the wall, then secure your Ring doorbell to the wall using the included mounting screws.
- Put the battery back into the device.
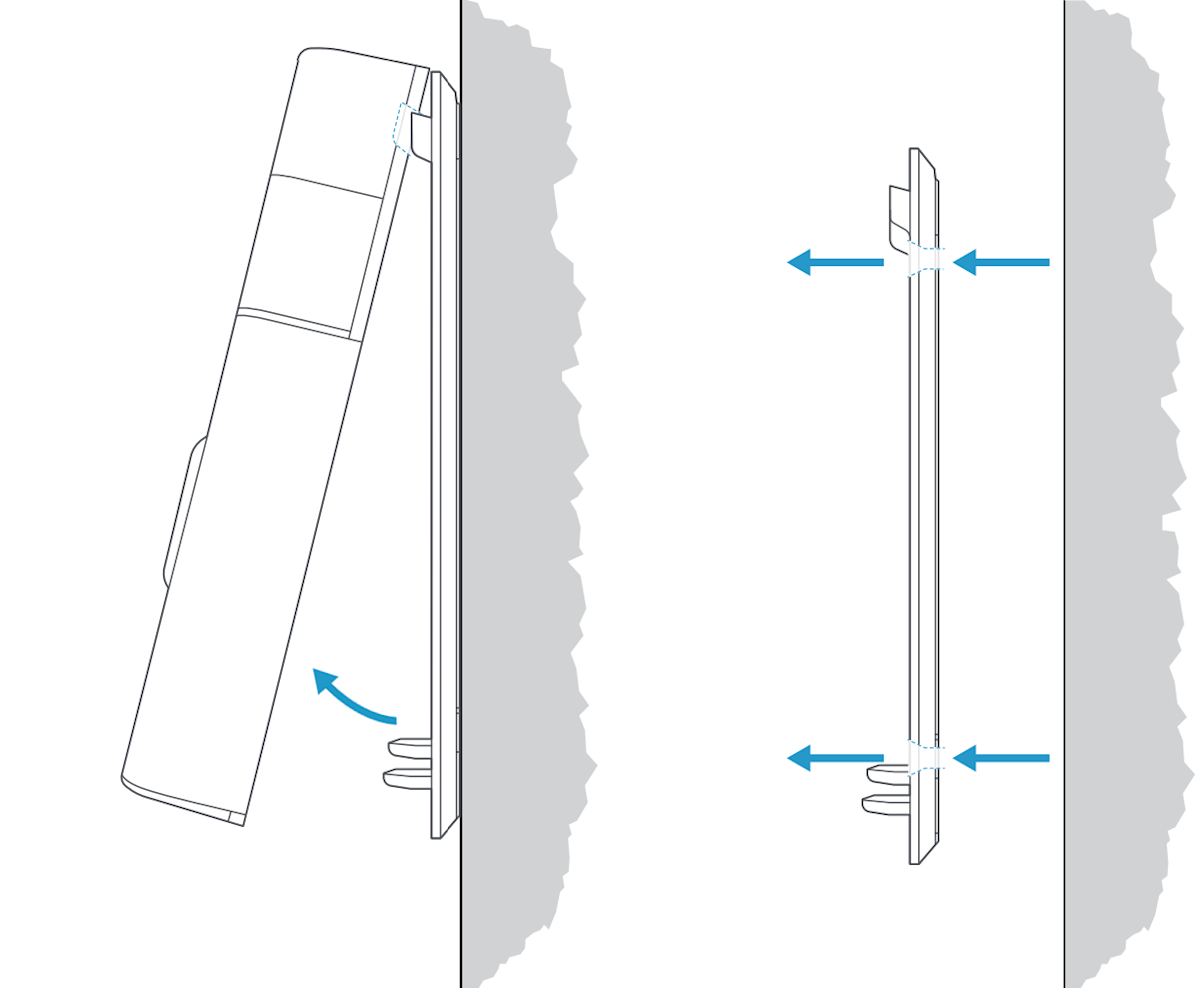
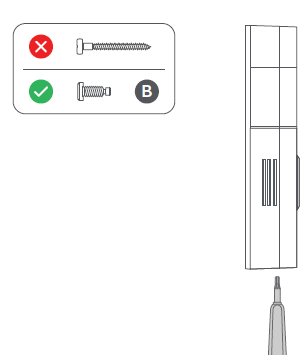
Step 7: Securing your Ring doorbell
Re-attach the faceplate, then use the included screwdriver to insert and tighten one of the 4.8 mm Security Screws. CAUTION! If you use the wrong screws to secure the faceplate, you could damage the battery during installation, create a fire hazard, and be seriously injured.
Step 8: Restoring power at the breaker
It might take a moment for your doorbell to power on. It will light up when it’s ready. Learn more about doorbell light patterns.
Step 9: Setting up your doorbell in the Ring app
If your doorbell is not yet connected to your Ring account, open the Ring app, select Set Up a Device, and follow the in-app instructions.
Step 10: Adjusting in-home chime settings
Important! Select the correct In-home Chime Settings in the Ring app to prevent device damage. In the In-Home Chime Settings of your Ring app, change the Chime Type:
- If you have a mechanical chime, pick “Mechanical”
- If you have a digital chime, select “Digital”
- If you are using a Plug-In Adapter, have bypassed a chime, or are hardwiring directly to a transformer, set it to “No chime” or “None”
If it is connected to an in-home chime, try ringing your Ring doorbell. If it does not sound right, check our guide for configuring and troubleshooting your in-home chime.