Installing and using Ring Alarm Contact Sensor
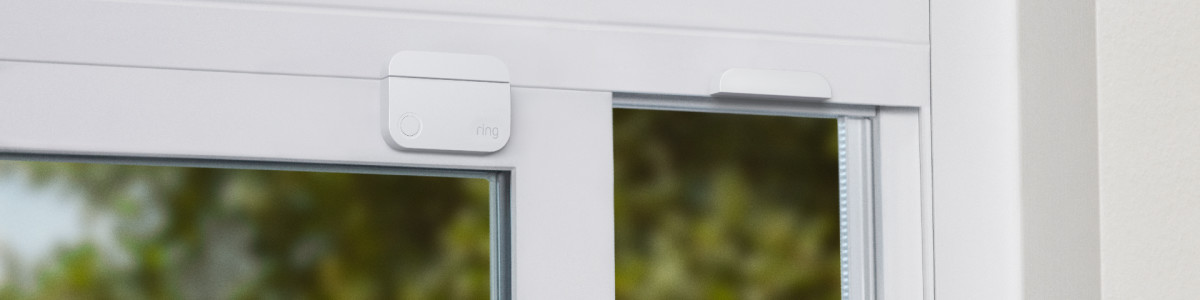
Ring Alarm Contact Sensors let you know when someone opens or closes your doors and windows. Each Contact Sensor has two parts, a sensor and a magnet, that easily install with double-sided tape.
Installation manuals
View or download the user manual for Ring Alarm Contact Sensor (1st Generation) - (English - US/CAN).View or download the technical manual for Contact Sensor (1st Gen) - (English - US/CAN).View or download the user manual for Ring Alarm Contact Sensor (2nd Gen) - (English - US/CAN).View or download the user manual for Ring Alarm Contact Sensor (2nd Gen) - (Europe).View or download the technical manual for Ring Alarm Contact Sensor (2nd Gen) - (English - US/CAN).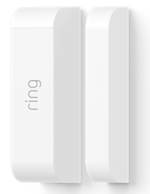 | 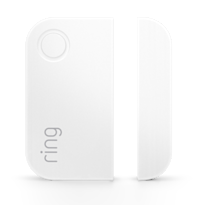 |
Contact Sensor (1st Gen) | Contact Sensor (2nd Gen) |
Contact Sensor features
- Armed modes: Your Contact Sensor triggers your Ring Alarm when someone opens a door or window while the system is armed. By default, your Ring Alarm Contact Sensors are armed when using both Away and Home Mode1.
- Entry and Exit Delay: If your Contact Sensor placement is set to Main Door, you canto have enough time to leave after arming or entering and disarming1.
- Bypass Sensors: If a Contact Sensor is open or offline at the time of arming, or if you want to leave a window open, you canto leave it unarmed.
- Alerts and history: Get alerts when a door or window is opened, and review Contact Sensor activity history1in the app.
Additional Contact Sensor specifications
Contact Sensor (1st Generation)
- Sensor and magnet should be no more than ½ in. (1.2 cm) apart when the sensor is closed.
- Add a second magnet for a window open option.
- Uses one CR123a 3V battery (included).
Contact Sensor (2nd Generation)
- Sensor and magnet can be up to 1 in. (2.5 cm) apart when the sensor is closed.
- Button on the front to help with easy troubleshooting.
- Green LED light for softer light at night.
- Mounting tape included on the back of the sensor.
- Uses two CR 2032 coin cell batteries (included).
Setting up your Contact Sensor
Before installing your Contact Sensor, set it up in the Ring app. Learn more about setting up and managing your Alarm devices in the Ring app.
Adjust placement settings
During setup, you will be prompted to choose where you are installing your Contact Sensor. You can choose one of three placement settings, which can be adjusted later:
- Main Door:For doors you enter and exit from most often. When arming Ring Alarm in Away mode, you canto allow you to exit from that door. When armed, opening the door with this Contact Sensor will trigger the Entry Delay so you can disarm your Alarm system before the alarm sounds.
- Secondary Door:For doors you enter and exit less often than your Main Door. When armed, Ring Alarm will sound immediately when opened.
- Window:For windows only. When armed, Ring Alarm will sound immediately when opened.
Adjust the placement settings after setup
Open the Ring app to the main dashboard.
Tap the Alarm tile under Devices.
Tap Connected Devices.
- Tap the Contact Sensor you want to adjust.
- Tap theDevice Settingstile.
- TapPlacementand choose the desired placement.
- TapSave.
Installing your Contact Sensor
The Contact Sensor has two parts; the slimmer part is the magnet, and the larger part is the sensor. Install the magnet to the door or window itself, and install the sensor to the door frame or window frame. Get tips on installing your Contact Sensor on different types of door trims and window frames.
Tips for installing your Contact Sensor
- Don’t use the Contact Sensor outdoors or in environments with extreme hot or cold temperatures.
- Don’t use the Contact Sensor inside detached garages, warehouses, or sheds. Alarm devices should always be used in the same building as the Base Station.
- Don’t use the Contact Sensor near water or chemicals.
Follow these steps to physically install your Outdoor Contact Sensor:
Contact Sensor (2nd Gen)
- Make sure the mounting surface is clean and dry before peeling the backing off of the adhesive strip.
- Install the sensor and magnet on a door or window and frame by pressing it into place for 20 seconds.
- Make sure there is no more than 1 in. (2.5 cm) between the sensor and magnet when the door or window is closed.
If you need to screw the Contact Sensor to the surface, you will need to use your own hardware. Use four 5 mm anchors and four 3 x 21 mm screws.
Contact Sensor (1st Gen)
- Confirm the backplate is connected to the Sensor.
- Make sure that the mounting surface is clean and dry before peeling the backing off of the adhesive strip.
- Install the sensor and magnet on a door or window and frame by pressing it into place for 20 seconds.
- Make sure there is no more than ½ in. (1.25 cm) between the sensor and magnet when the door or window is closed.
If you need to screw the Contact Sensor to the surface, use the included screws to attach the removable backplates to the mounting surface. Then, attach the Contact Sensor parts to the backplates that are mounted.
Replacing the batteries in your Contact Sensor
Learn how to replace the batteries in your Alarm devices.