Installing Spotlight Cam (1st Gen) for Battery, Solar, and Wired
This article provides step-by-step instructions to install your Spotlight Cam (1st Gen) for battery, solar, or wired plug-in.
Installation manuals
View or download the user manual for Spotlight Cam Battery (1st Gen).View or download the user manual for Spotlight Cam Wired (1st Gen).Installing Spotlight Cam (1st Gen) Mount device or hardwiring kit
- If you need to install your Spotlight Cam (1st Gen) Mount device,
- If you need to install your Spotlight Cam (1st Gen) Wired hardwiring kit,
Watch the video guide for installing a Spotlight Cam (1st Gen) for Battery or Solar
Watch the video guide for installing a Spotlight Cam (1st Gen) for Wired
Hardware included
- Mounting screws
- Mounting anchors
- Mounting bracket
- Ring screwdriver
- Cable clips (Wired and Solar)
Tools needed
- Philips head screwdriver
- Drill with 6mm (1/4") drill bit (optional)
Step 1: Charging the Quick Release Battery
Charge the Quick Release Battery included with your Spotlight Cam (1st Gen) Battery or Solar.
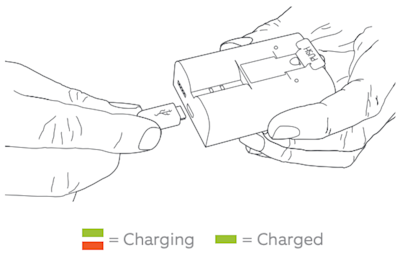
Insert the battery into your Spotlight Cam (1st Gen)
- Press the button on the battery compartment to open your Spotlight Cam (1st Gen).
- Push the Quick Release Battery into the compartment until it clicks into place.
- Press compartment door firmly until it clicks shut.
Step 2: Setting up Spotlight Cam (1st Gen) in your Ring app
Connect Spotlight Cam (1st Gen) to wifi through Ring app before mounting.
Step 3: Positioning Spotlight Cam (1st Gen)
Check the positioning guide before installing. For solar or wired models, make sure the camera has access to:
- Power outlet for wired plug-in model
- Direct sunlight for solar model
Step 4: Mounting plate orientation
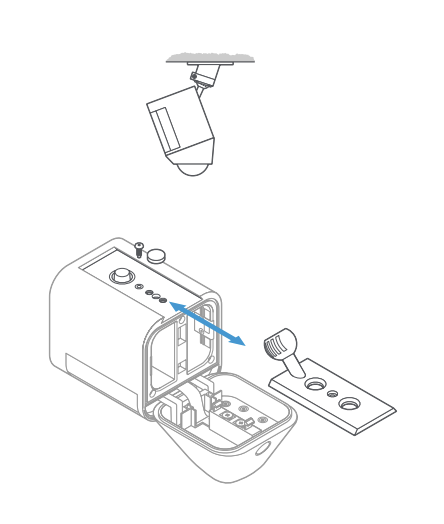
Mount the Spotlight Cam (1st Gen) on a wall or eave using the adjustable mounting plate. You might need to adjust the direction of your mounting plate depending on the location.
Change the direction of your mounting plate
- Press the rear button to open the battery compartment.
- Remove the screw and weather seal.
- Press the release button and slide out the mounting plate.
- Insert the plate in the desired direction.
- Tighten the security screw.
- Place the weather seal in the unused hole.
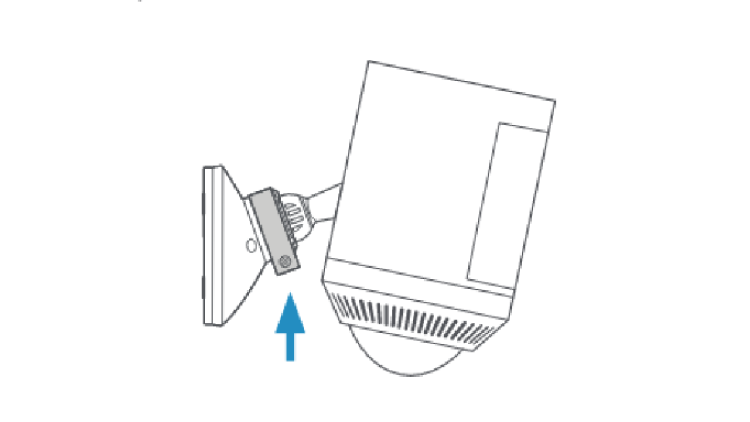
For wall mounting: The ball socket should face down.
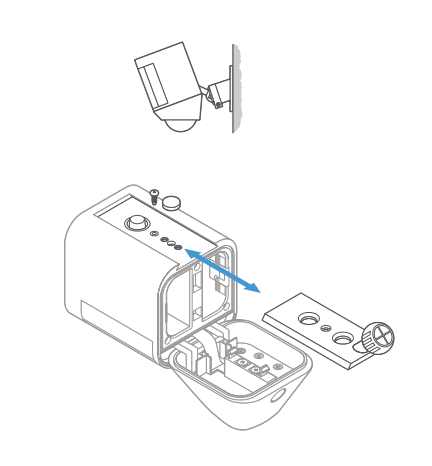
For overhang mounting: The ball socket should face up.
Step 5: Installing the mounting plate and Spotlight Cam (1st Gen)
Before installation, mark the mounting hole positions using the mounting bracket.
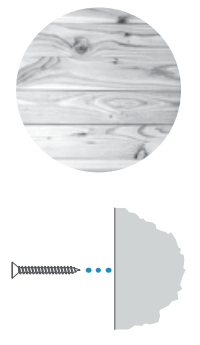
If installing on a wood surface, screw the mounting plate directly into the wall.
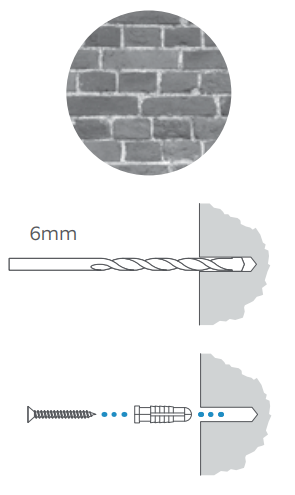
If installing on a masonry (concrete, brick, or stucco) surface, mark four screw holes using the plate as a guide. Drill pilot holes using a 6mm (1/4") drill bit. Insert the included wall anchors, then drive the four mounting screws through the mounting plate into the wall anchors.
Step 6: Connecting external power options
Connect Spotlight Cam (1st Gen) Wired
Plug your Spotlight Cam (1st Gen) Wired into your preferred outlet. Secure the 20 ft (6 m) power cable using provided clips. The power cable can be painted to match the wall.
- For masonry:use provided bit to drill, insert anchors, then add screws.
- For wood:screw clips directly into wall.
Step 7: Attaching Spotlight Cam (1st Gen) to the mount
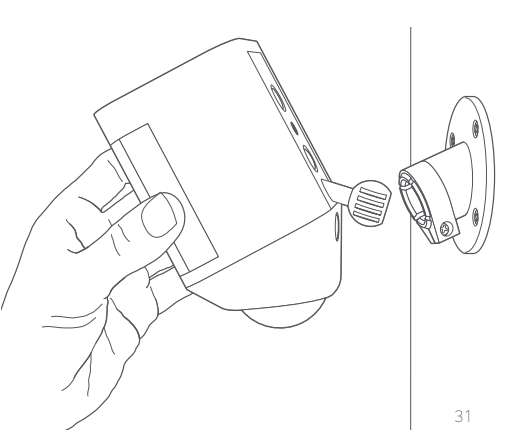
Push your Spotlight Cam (1st Gen) ball joint onto the ball socket of the mount. Use Live View in the Ring app to adjust camera angle. Tighten the security screw to lock it in the desired position.
