Installing Video Doorbell Elite
Watch the video guide for installing Elite Power Kit
Watch the video guide for installing Video Doorbell Elite
Download the manual for Ring Video Doorbell Elite.Hardware included
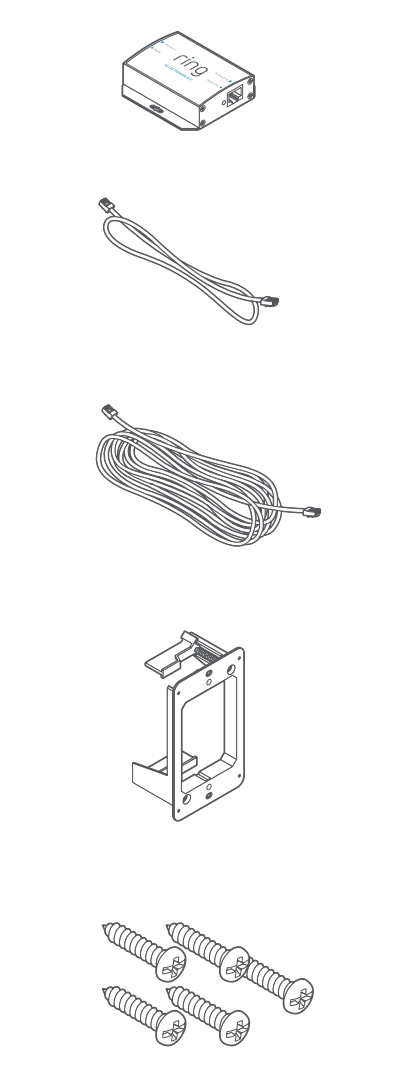
- Elite Power Kit
- 90 cm Ethernet Cable
- 15-metre Ethernet Cable
- Elite Mounting Bracket
- Mounting Screws
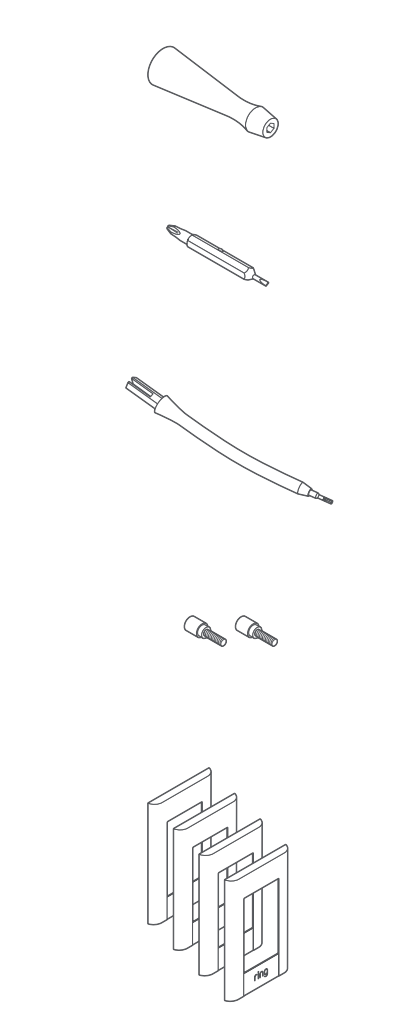
- Screw Bit
- Screwdriver Handle
- Flexible Bit
- Security Screws
- Faceplates
- AC Power Adapter
 |  |
Step 1: Wiring the Elite Power Kit
The Elite Power Kit is a Power over Ethernet (PoE) injector which gives your Ring Elite power and allows you to connect it to your router at the same time.
- Connect the provided adapter to the Elite Power Kit.
- Plug the provided AC adapter into a standard power outlet.
- Use the 90 cm Ethernet cable to connect your internet access point to theInternet Inport on the Elite Power Kit.
- Run the included 15-metre cable from theTo Doorbellport to the doorbell.
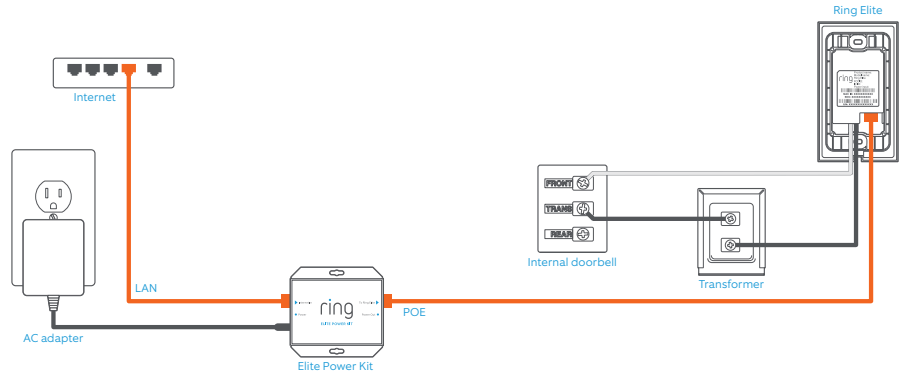
Step 2: Installing the mounting bracket
If you already have a junction box, you do not need to use the included mounting bracket. If you do not have a junction box:
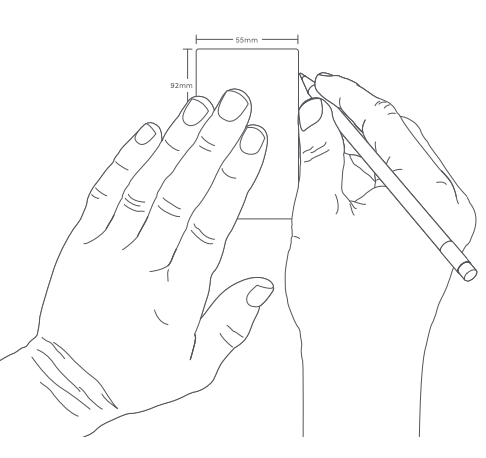
- Trace the outline of the supplied template. Then, cut a rectangular hole in your wall to make room for the Elite Mounting Bracket.
2. Feed any existing wires through the hole in the mount.
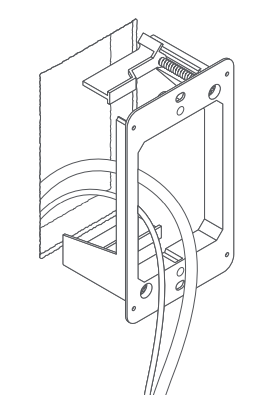
3. Use a screwdriver to tighten the screws. The wing clamps will rotate as the screws turn, locking the bracket to the wall.
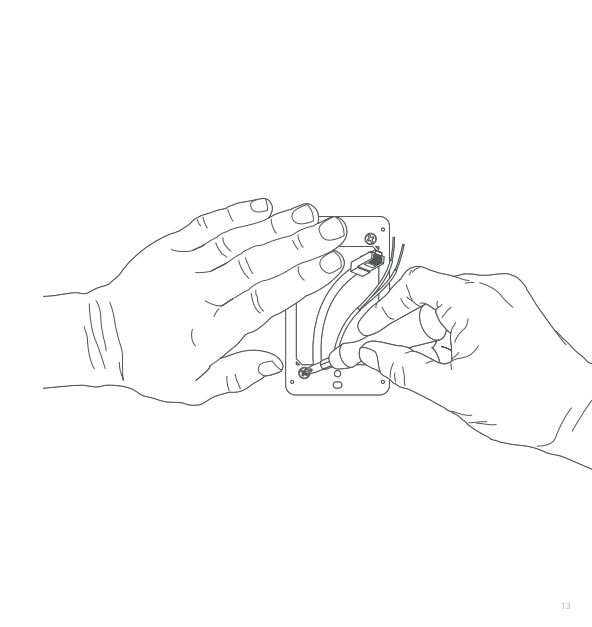
Step 3: Plugging in the Ethernet cable
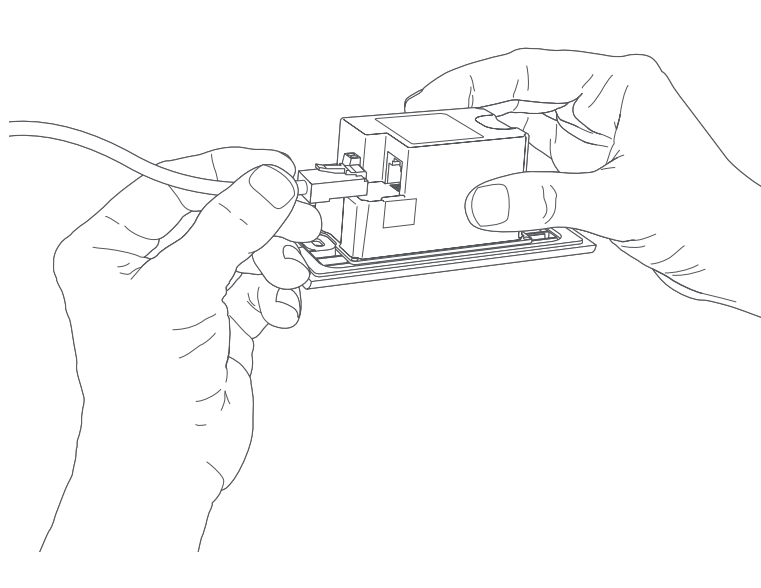
The Video Doorbell Elite must be connected to power using Power over Ethernet.
Plug the Ethernet cable into the Ethernet port on the back of the doorbell. When connected to power, the front light on the doorbell will begin spinning, indicating that the device is in setup mode.
Step 4: Connecting the doorbell to an in-home doorbell chime (optional)
Wiring Video Doorbell Elite to an existing in-home doorbell is optional if you want your existing in-home chime to ring. Make sure you have a compatible transformer and in-home doorbell chime prior to connecting to existing wiring. Learn more about the requirements for hardwiring your doorbell.
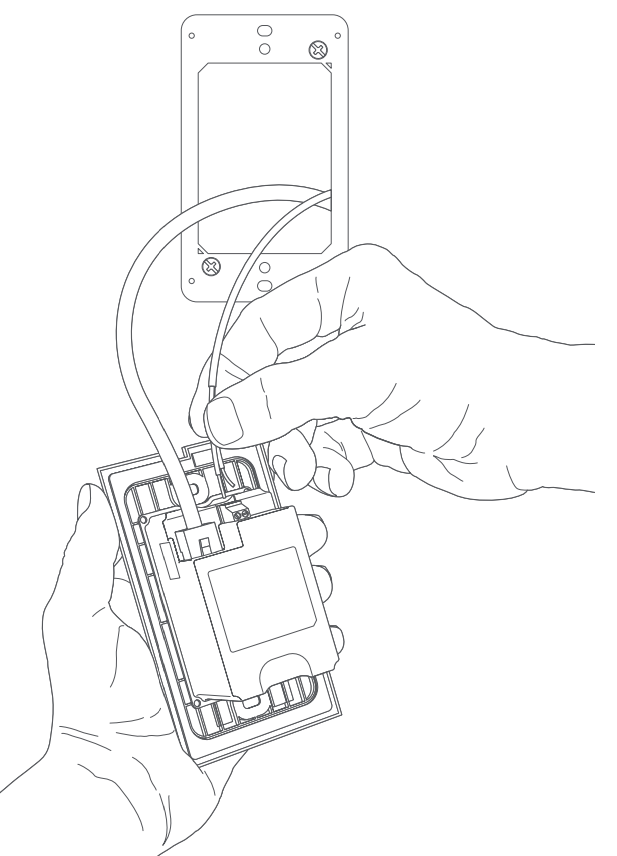
- Shut off power at the breaker, then connect your doorbell wires to the wire connectors next to the Ethernet port.
- Use the included flat-head screwdriver to secure the wires in the screw holes.
Step 5: Placing the doorbell into the bracket
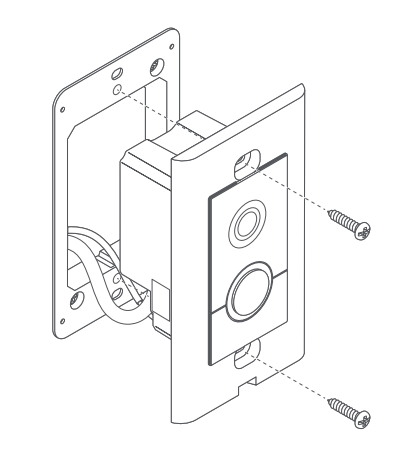
- Tuck the wires into the wall. Then, angle the doorbell and insert it into the bracket with the top leaning toward you.
- Insert two of the included screws into the holes on the bracket.
- Use a screwdriver to tighten the screws and secure the device.
Step 6: Setting up the doorbell in the Ring app
Learn more about setting up your doorbell in the Ring app.
Step 7: Securing the doorbell
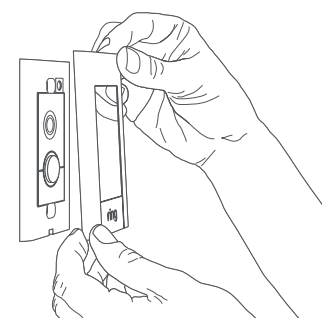
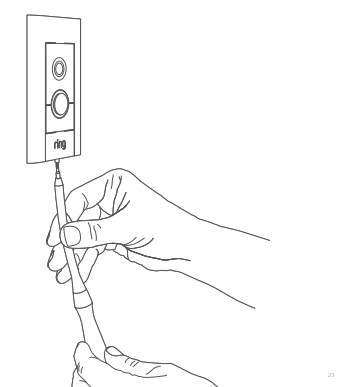
Place one of the included faceplates on your Video Doorbell Elite. Then, use one of the provided security screws and the flexible screwdriver bit to lock it into place.
