Ring Spotlight Cam Battery Installation
Safety and compliance information for this product
Installing your Ring Spotlight Cam Battery is a simple process. The steps below will help you prepare and mount your Spotlight Cam.
Step One - Charge the battery
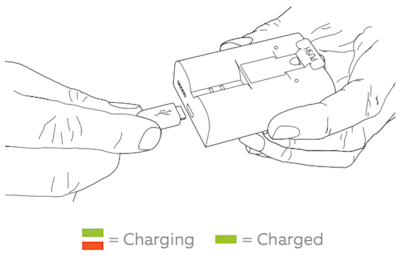
Before installing your Spotlight Cam, the included battery needs to be charged by using the included orange USB cable. Please note that the amount of time it takes for the battery to charge will vary depending on whether the USB cable is plugged into a wall socket or a USB port in a computer or other device.
Note: Both the red and green lights on top of the battery will illuminate while charging, but only the green light will be lit once fully charged.
Step Two - Insert the battery
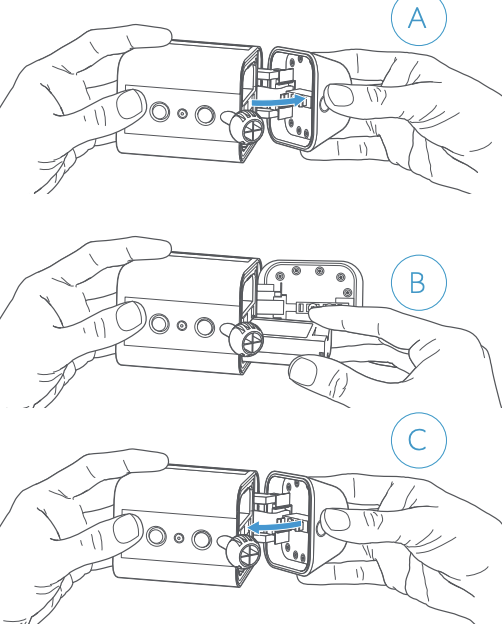
Follow these steps to insert the battery into your Spotlight Cam:
- Press the white button to open the battery compartment on your Spotlight Cam.
- Push the battery into the compartment until it clicks into place.
- Firmly close the battery compartment door
- Note: It may take a bit of pressure to completely close the compartment door. Be sure to push on it until you hear the click that indicates the compartment is closed.
You will only need one battery for your Spotlight Cam to work properly. If you want extended battery life though, or want to avoid down time while charging the battery, a second battery is available for purchase.
Step Three - Set up your Spotlight Cam in the Ring app
Before physically installing your Spotlight Cam, it's important to set it up in your Ring app. Learn how to do the in-app setup.
White light flashing? If the light on the bottom of your Spotlight Cam flashes after setup, it’s updating its internal software. The update process can take up to a few minutes. The light stops flashing when the update is complete.
Step Four - Select your location to install your Spotlight Cam
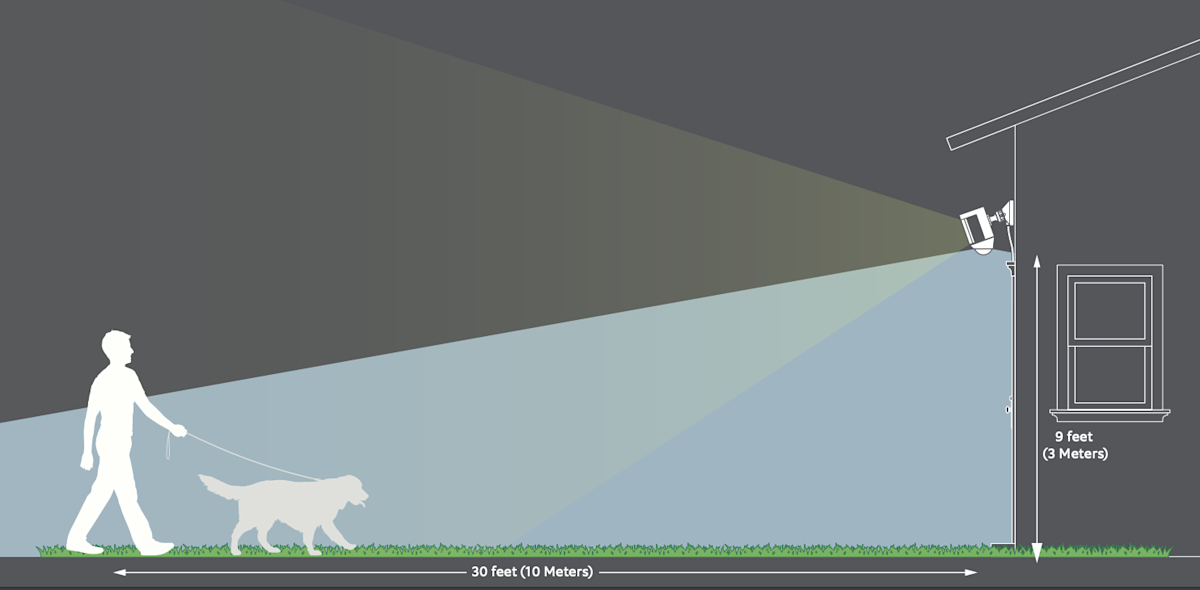
Select a location to install your Spotlight Cam. It's important when selecting a location to remember that Spotlight Cam is designed to be placed at an optimum height of 2.7 metres with the motion detector parallel to the ground. This will put the motion sensor in a perfect position to detect human-sized objects at up to 9 metres.
If installing on a wall: Before installing Spotlight Cam on a wall, insert the mounting plate with the ball socket pointing down.
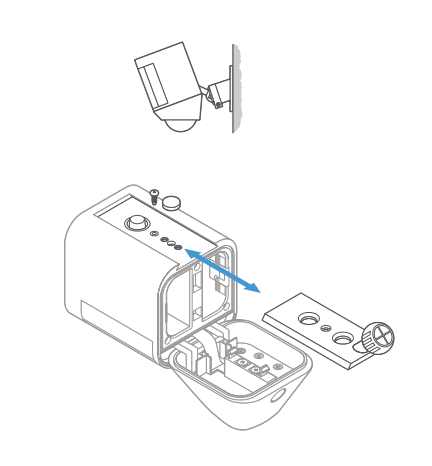
If installing on an eave: Before installing Spotlight Cam on an eave or overhang, insert the mounting plate with the ball socket pointing up.
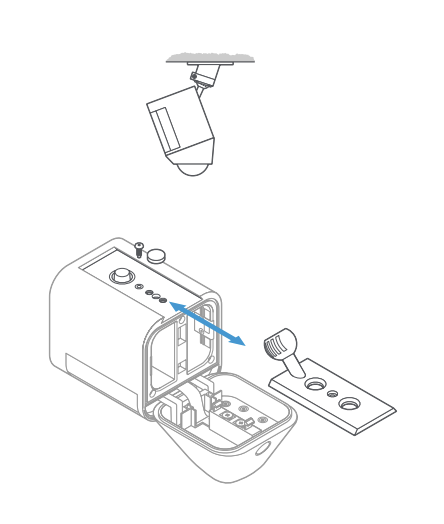
Step Five - Identify a mounting plate orientation
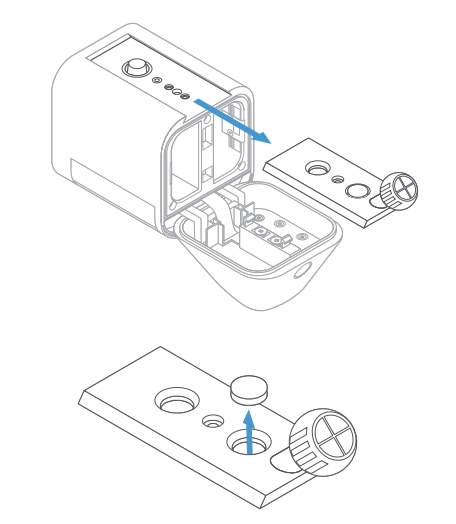
Spotlight Cam comes with a mounting plate that, depending on its orientation, allows you to mount it on a wall or under an overhang. To mount your Spotlight Cam on a wall, insert the mounting plate with the ball socket pointing down. To mount on an overhang, insert the mounting plate with the ball socket pointing up.
If you need to change the direction of your mounting plate:
- Press the button on the back of the unit to open the battery compartment.
- Remove the security screw and weather seal.
- Press the release button and slide the mounting plate out.
- Insert the mounting plate in the direction you want.
- Tighten the security screw.
- Insert the weather seal in the unused hole.
Step Six - Install the mounting bracket
Note that the "arm" of the mounting bracket can face either up or down, so experiment until you find what you like best. Use the bracket to mark your holes.
If installing on a masonry surface like stucco or brick, use the provided drill bit to make your holes, then insert wall anchors before installing the screws. If installing on a wooden surface, use the install screws to screw the mounting bracket directly into your wall.
Mark your holes using the mounting bracket as a guide.
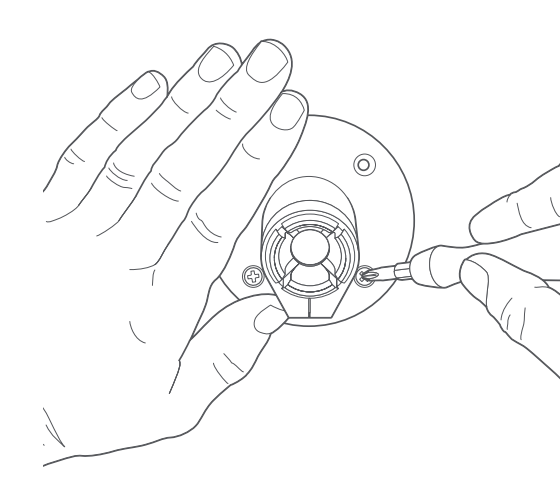
Step Seven - Mount the Spotlight Cam
After installing your bracket, remove the security screw and push the ball on the back of Spotlight Cam into the socket until it pops into place. Position the camera with the motion detector parallel to the ground.
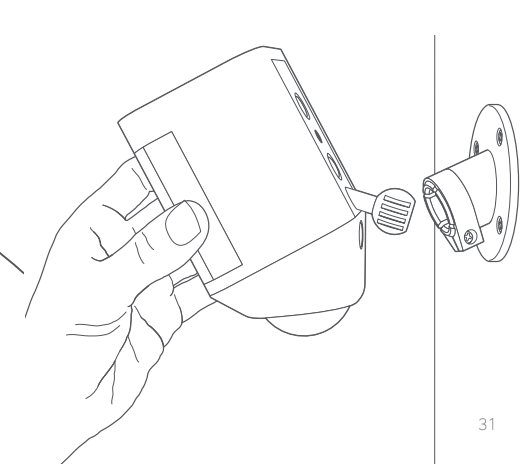
Step Eight - Position the camera
Using the live feed on your phone, position Spotlight Cam to your desired view. Once you are happy, tighten the security screw on the right side to fix the Spotlight Cam into position.
If you have a Ring Solar Panel
Mark the holes: Select an install location where Solar Panel can get at least 1 hour of direct sunlight a day. Mark the holes using the mounting arm as a template
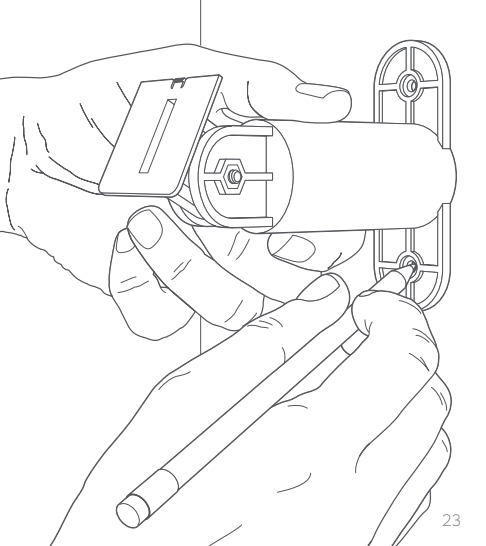
Install wall anchors (optional): If installing on a hard surface (such as stucco or brick), use the included drill bit to pre-drill the mounting holes, then insert the wall anchors. If installing on wood or siding, skip this step.
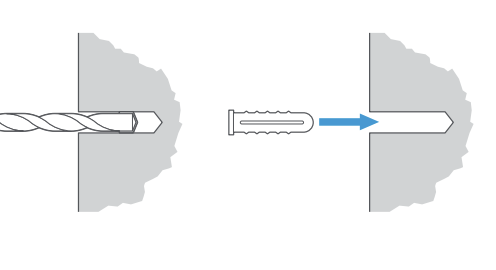
Screw in the mounting arm: Drive the included mounting screws into your wall (or the wall anchors, if installing on a hard surface) until the mounting arm is secure.
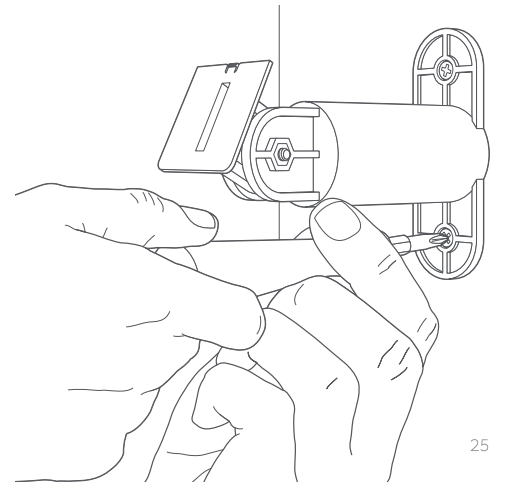
Attach the Solar Panel: Slot the Solar Panel onto the mounting arm, and make sure it’s secure.
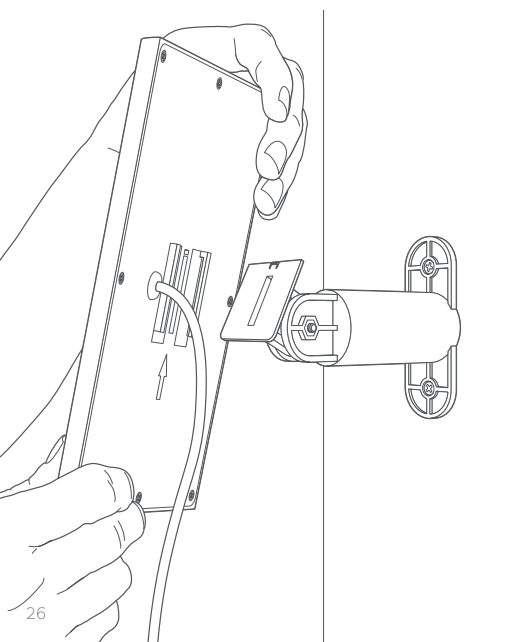
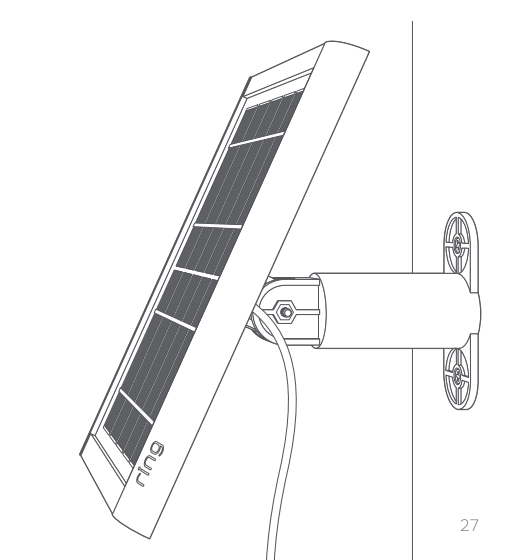
Adjust the panel angle: Loosen the screw on the mounting arm and adjust the panel to your desired angle, then re-tighten the screw to secure your setting.
Remove the seal: Remove the weatherproofing seal on the rear of your Spotlight Cam. Then, slot the mounting plate back into place.
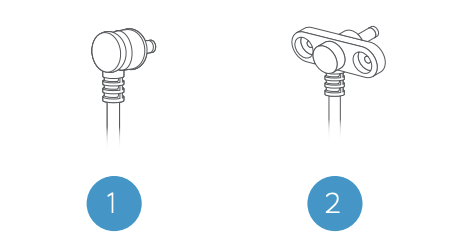
Plug in your Solar Panel: If your Solar Panel plug looks like example 1, simply insert it into the power port on the rear of your Spotlight Cam. Press the plug in firmly, until you feel it click into place. You’re all set! If your Solar Panel plug looks like example 2, skip to the next page.
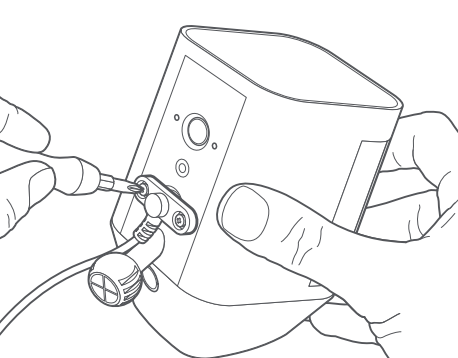
If your plug has screw tabs: Insert the plug into the power port on the rear of your Spotlight Cam. Secure the plug with the included short screws. Do not use any other screws to secure the plug.
Attach Spotlight Cam to the mounting bracket: First, fully loosen the metal collar on the bracket using the phillips end of the included screwdriver. Then, push the ball into the socket until it snaps into place.

