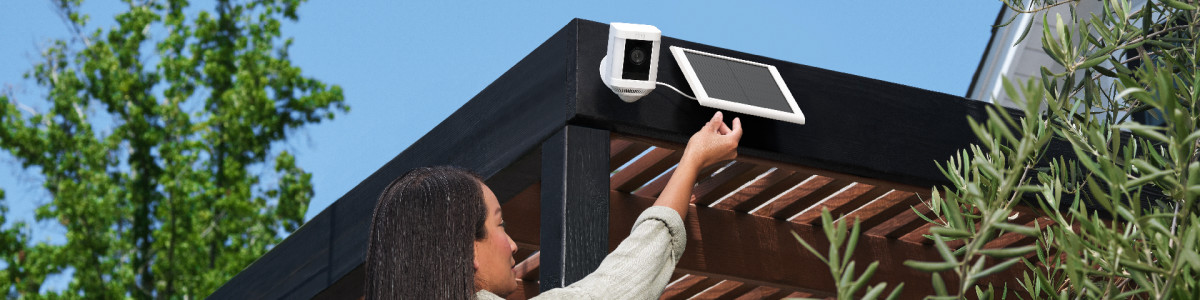
How to install your Spotlight Cam or Stick Up Cam Solar Panel
Physically installing and connecting your Spotlight Cam Solar Panel to your Spotlight Cam Battery is a simple process. Simply scroll down for a step-by-step guide.
Note: You should complete the setup of your Spotlight Cam Battery in your Ring app before installing the Spotlight Cam Solar Panel.
Set up your Spotlight Cam/Stick Up Cam Battery in the Ring app.
Step One: Select your install location
When selecting your installation spot, be sure to choose a spot that gets reliable sun exposure every day. Spotlight Cam Solar Panel can keep your Spotlight Cam Battery charged with just a few hours of direct sunlight per day.
Step Two: Line up your Spotlight Cam Solar Panel
To properly line up your Spotlight Cam Solar Panel:
- Using the Solar Panel mounting arm as a template, mark the screw holes on your chosen surface with a pencil.
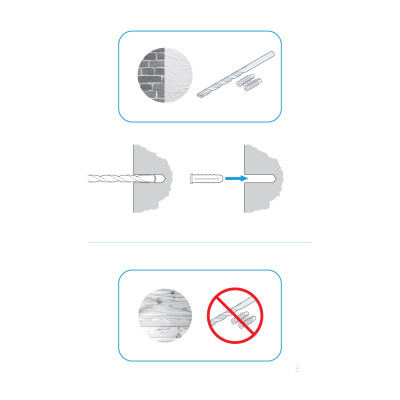
Step Three: Drill holes Optional: Use a drill to drill holes where you marked the position of the mounting holes.
- If you are mounting the Spotlight Cam Solar Panel on brick, concrete, or stucco, put the included plastic anchors into the holes. You may need to use a hammer to get the anchors in.
- If you are mounting the bracket on wood or vinyl, just use the included screws.
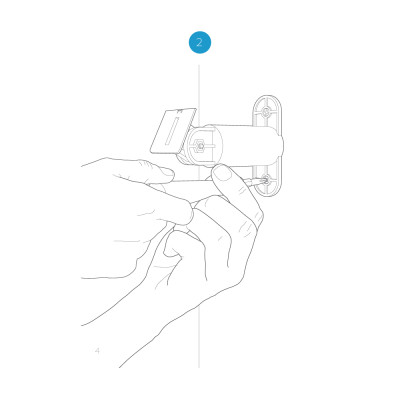
Step Four: Put up the mounting arm
Secure the mounting arm to the wall with the included screws. Tighten until snug.
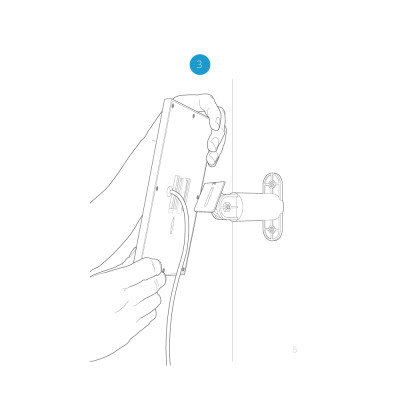
Step Five: Put up the Solar Panel
Slide the solar panel onto the mounting arm. Make sure it's seated securely.
Note: If you'd like to adjust the angle of the solar panel for better sun coverage, loosen the adjustment screw on the mounting arm, set your desired angle, then re-tighten the screw.
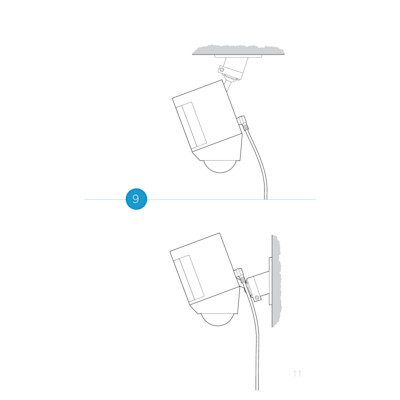
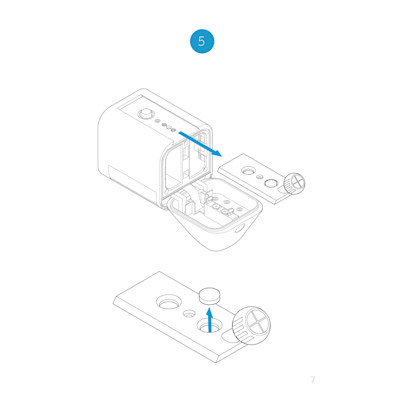
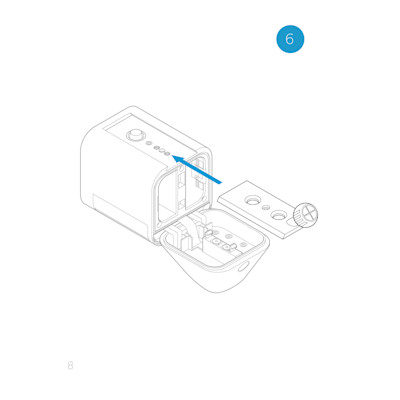
Step Six: Pop out the weatherproofing plug
You will need to remove the mounting plate on your spotlight cam, pop out the weatherproofing plug and then replace it.
- Press the button on the bottom to open the battery compartment.
- Press the button on the back of the Spotlight Cam, and slide the mounting plate out of its slot.
- On the mounting plate, pop the rubber weatherproofing plug out of its hole.
- Slide the mounting plate back into its slot on the back of the Spotlight Cam until it clicks into place.
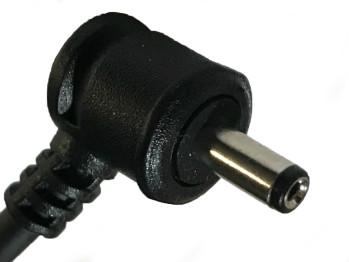
Step Seven: Plug the Solar Panel charging cable into the Spotlight Cam
- Route the charging cable from your Solar Panel into the power connector on Spotlight Cam.
- Remove the centre plug.
- Plug the snap ring barrel charging cable into the power connector on Spotlight Cam.
Step Eight: Mount the Spotlight Cam
Insert Spotlight Cam into its mounting bracket, set the desired angle, then tighten its adjustment screw.
Note: Make sure to charge and insert the included battery into your Spotlight Cam. Spotlight Cam Solar Panel keeps your battery charged but does not replace it.