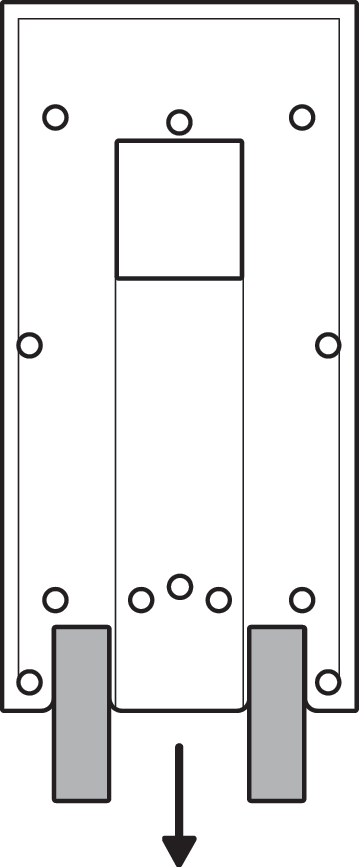
Installing No-Drill Mount for Battery Doorbells
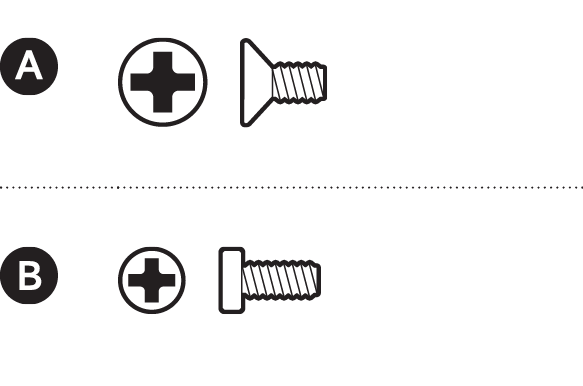
Hardware included
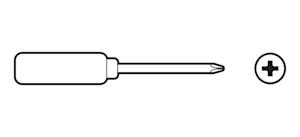
Tools needed
Install a doorbell without a mounting bracket
1. Choose a smooth, even mounting surface, and wipe it clean.
Note: Do not install on glass.
2. Remove the protective strips from the adhesive tape.

3. Hold the mount against the mounting surface for five minutes and allow an hour for it to adhere.
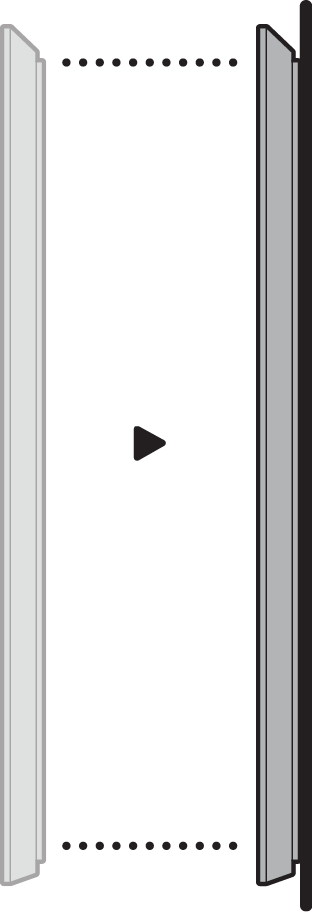
4. Remove your doorbell’s faceplate.
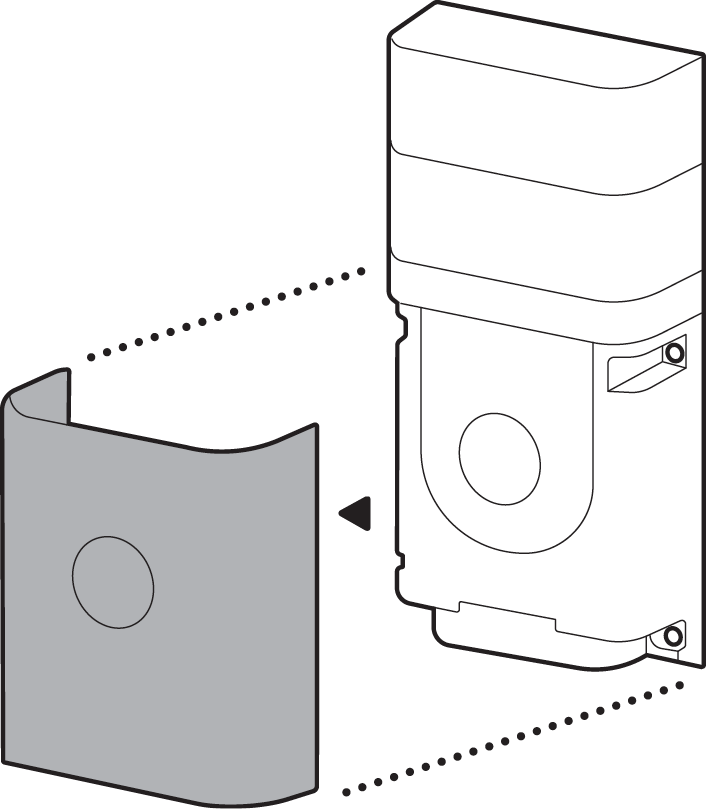
5. Attach your doorbell using the four included mounting screws.
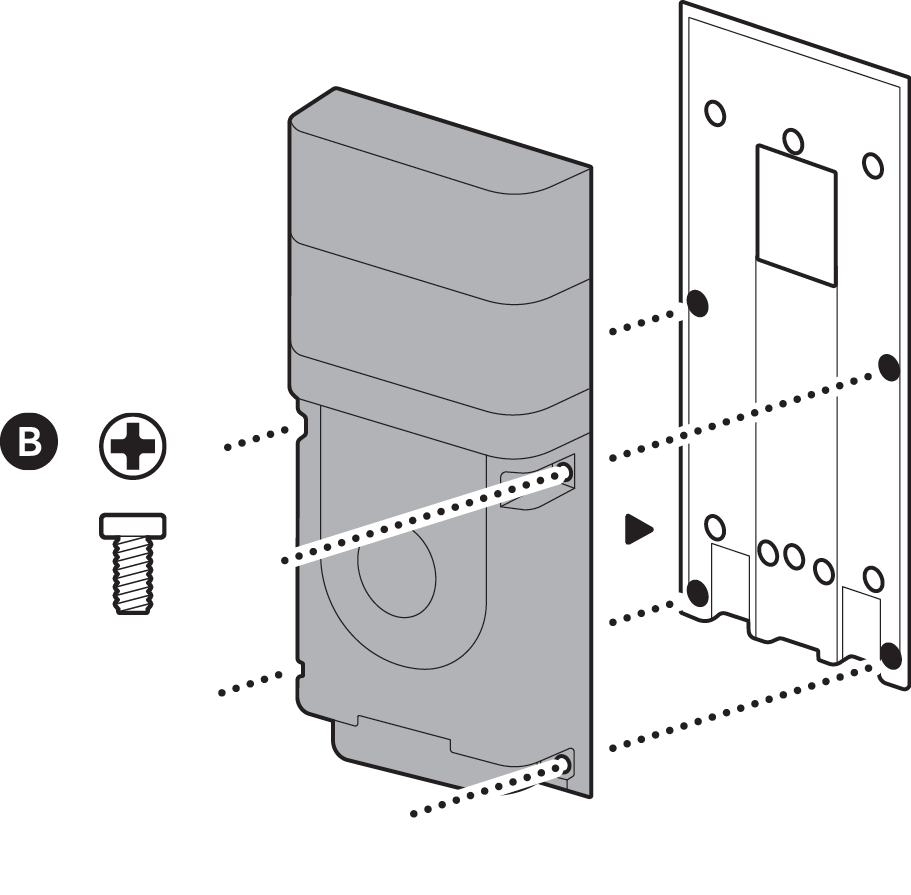
6. Refer to your doorbell setup guide to secure your doorbell.
Install a doorbell with a mounting bracket
1. Choose a smooth, even mounting surface, and wipe it clean.
NOTE: Do not install on glass.
2. Remove the protective strips from the adhesive tape.

3. Hold the mount against the mounting surface for five minutes and allow an hour for it to adhere.

4. Attach the mounting bracket using the four included mounting screws.
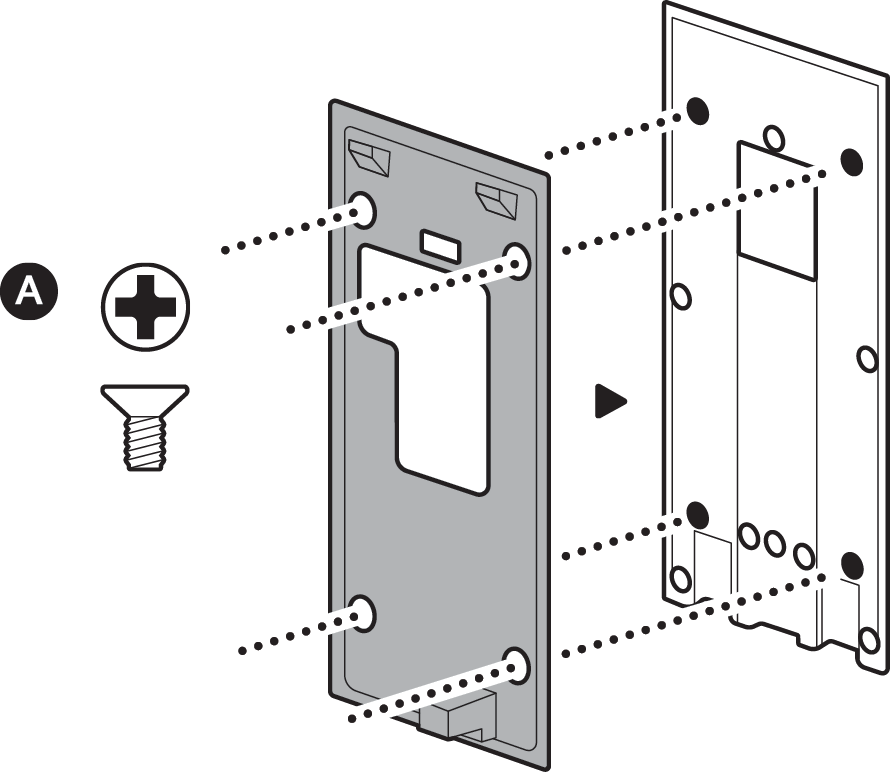
5. Attach your doorbell to the mounting bracket.
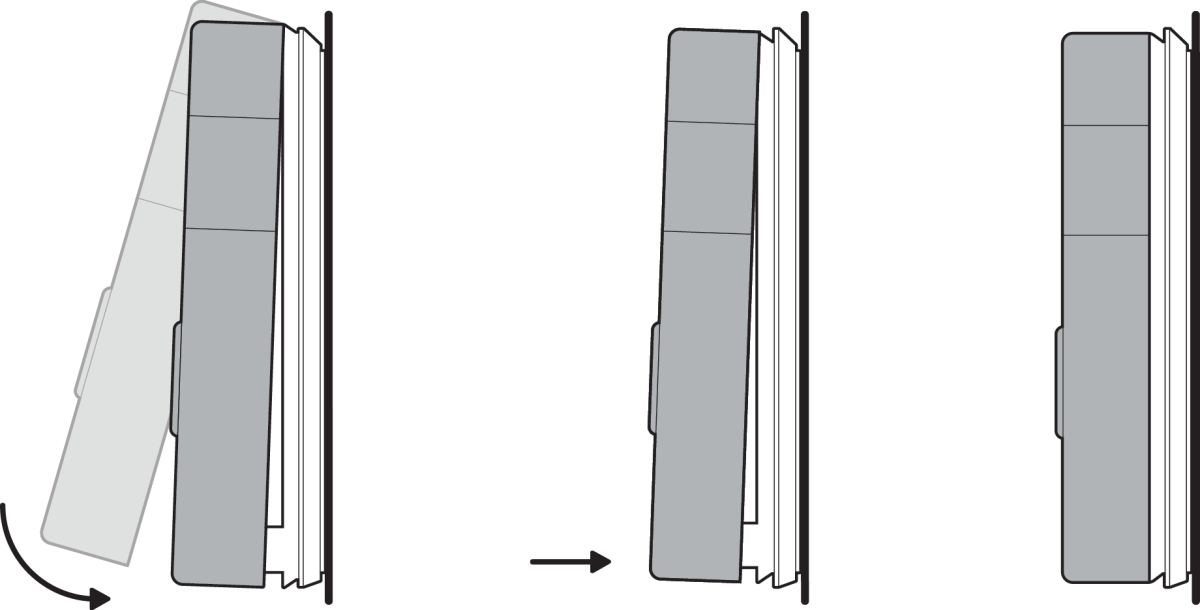
6. Refer to your doorbell setup guide to secure your doorbell.
Install for a doorbell without a mounting bracket on a Wedge or Corner Kit
1. Choose a smooth, even mounting surface, and wipe it clean.
Note: Do not install on glass.
2. Remove the protective strips from the adhesive tape.

3. Hold the mount against the mounting surface for five minutes and allow an hour for it to adhere.

4. Attach the Wedge or Corner Kit using the two included bracket screws.
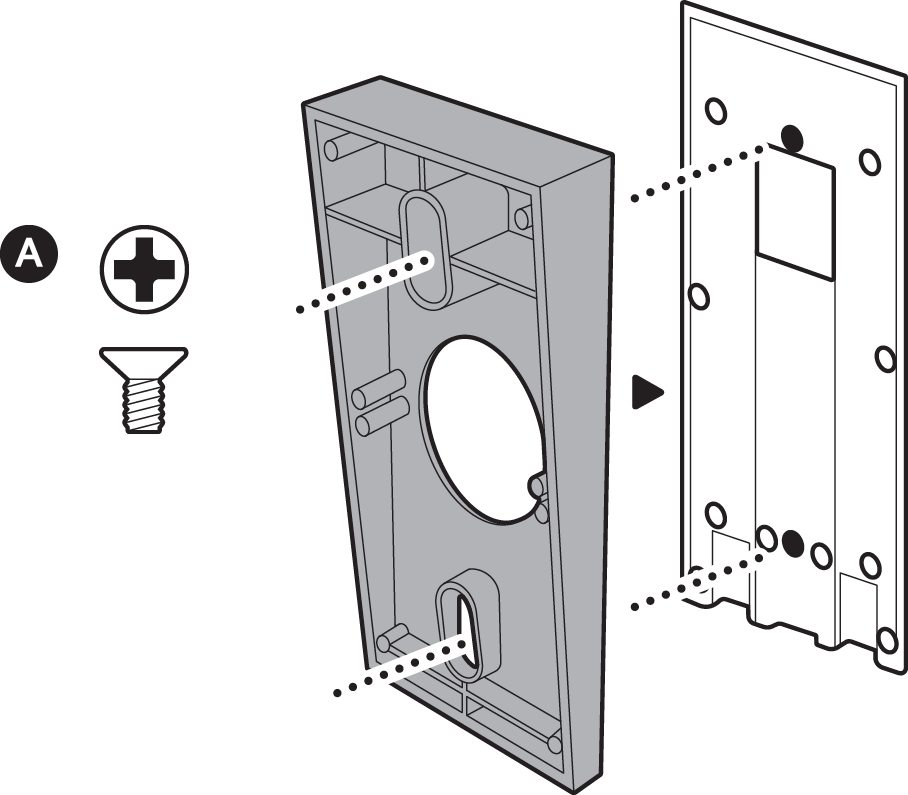
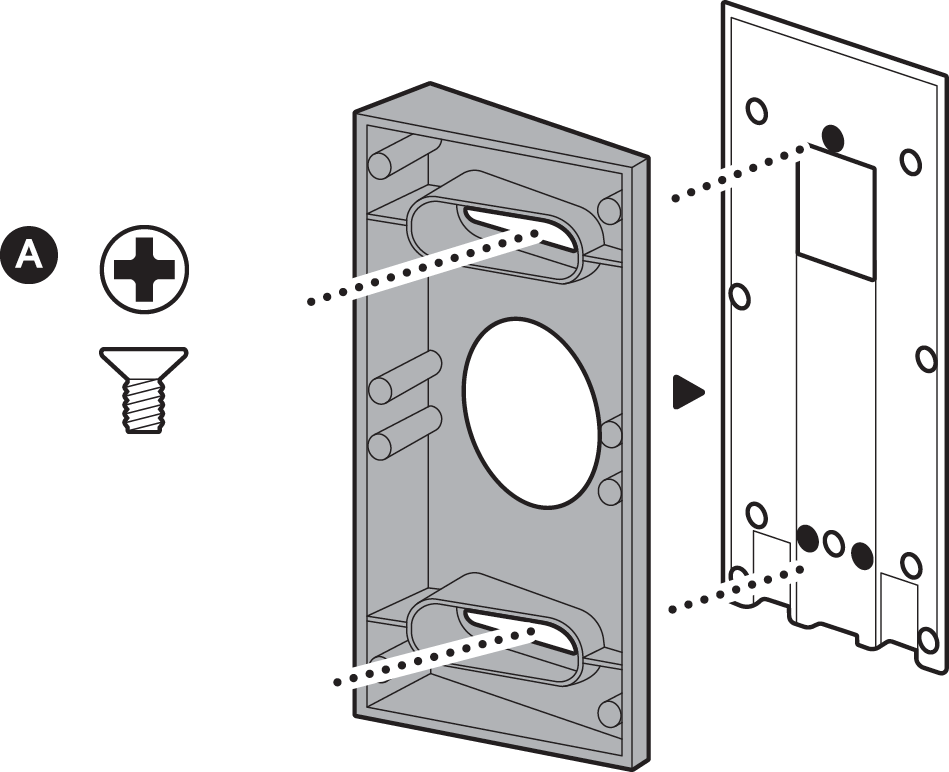
Note: If installing on a Wedge Kit, insert screw into a threaded hole on either side of the bottom opening. For best results, only use one Wedge or Corner Kit.
5. Remove your doorbell’s faceplate.

6. Attach your doorbell using the four included mounting screws.
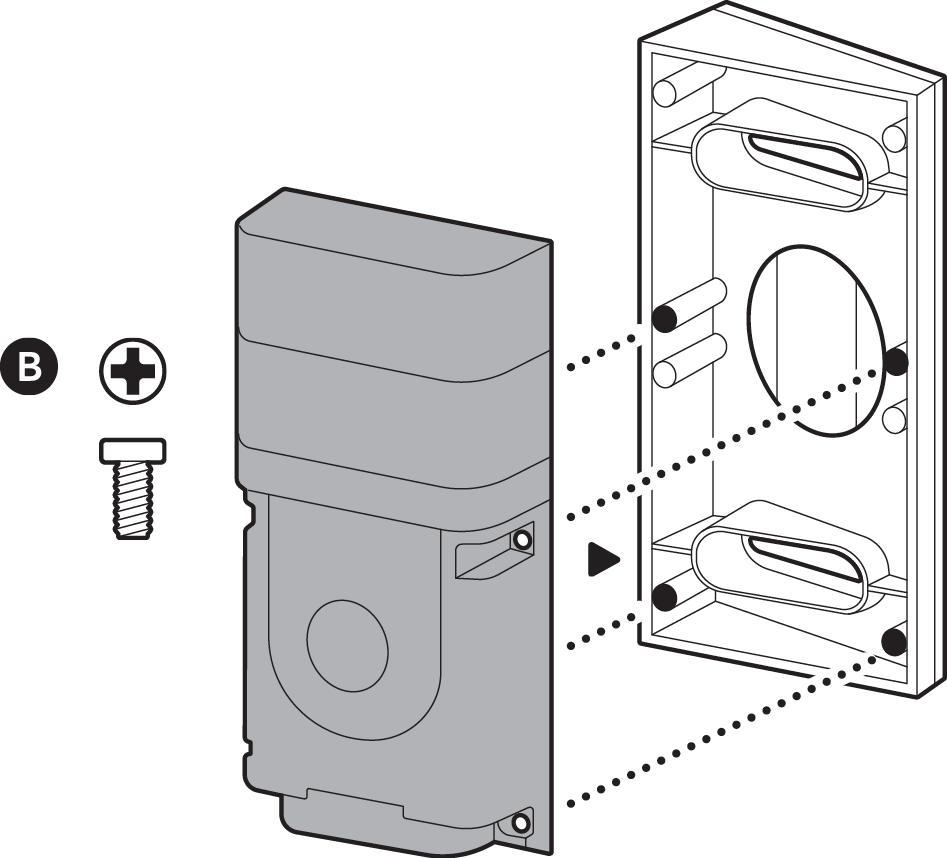
7. Refer to your doorbell setup guide to secure your doorbell.
Install a doorbell with a mounting bracket on a Wedge or Corner Kit
1. Choose a smooth, even mounting surface, and wipe it clean.
Note: Do not install on glass.
2. Remove the protective strips from the adhesive tape.

3. Hold the mount against the mounting surface for five minutes and allow an hour for it to adhere.

4. Attach the Wedge or Corner Kit using the two included bracket screws.


Note: If installing on a Wedge Kit, insert screw into a threaded hole on either side of the bottom opening. For best results, only use one Wedge or Corner Kit.
5. Attach the mounting bracket using the four included mounting screws.
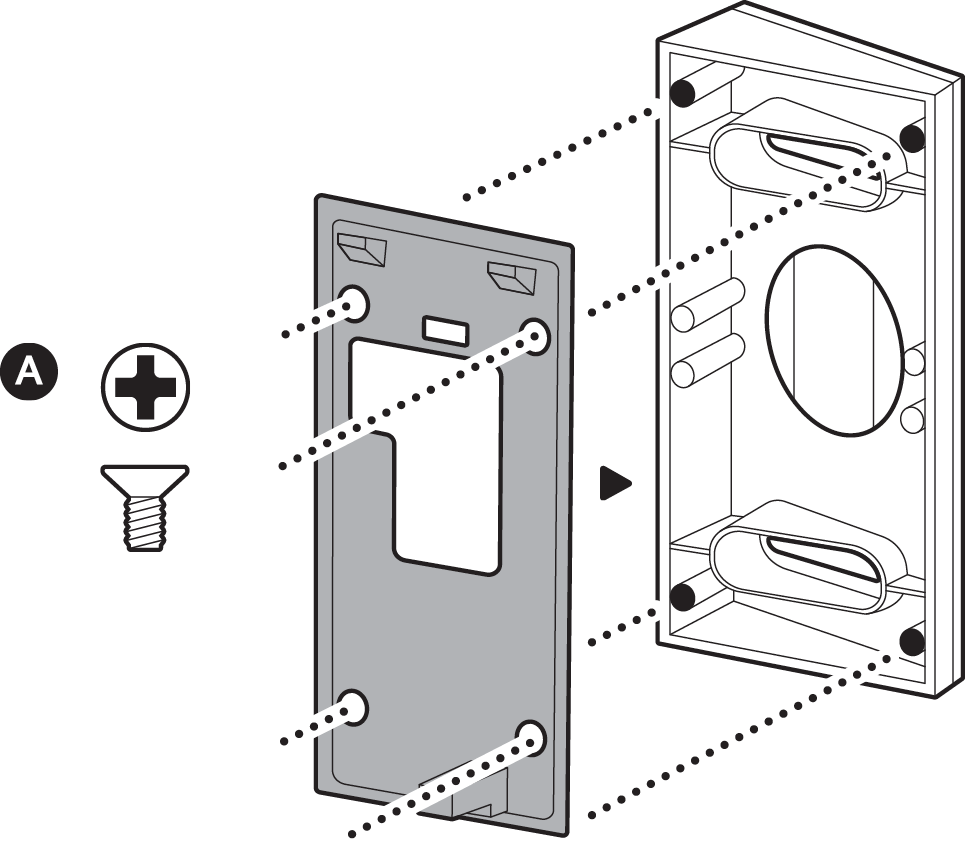
6. Attach your doorbell to the mounting bracket.
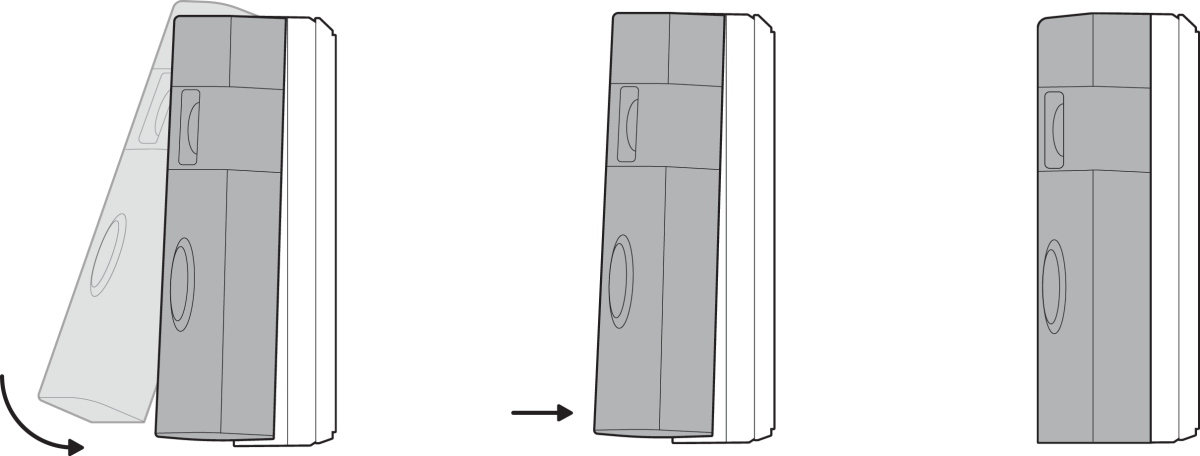
7. Refer to your doorbell setup guide to secure your doorbell.
Removing your mount
1. Remove your doorbell and Wedge or Corner Kit (if installed).
2. Flip down both pull-tabs.

3. Firmly hold the mount and gently pull down on both adhesive strips until the mount releases from the wall.
