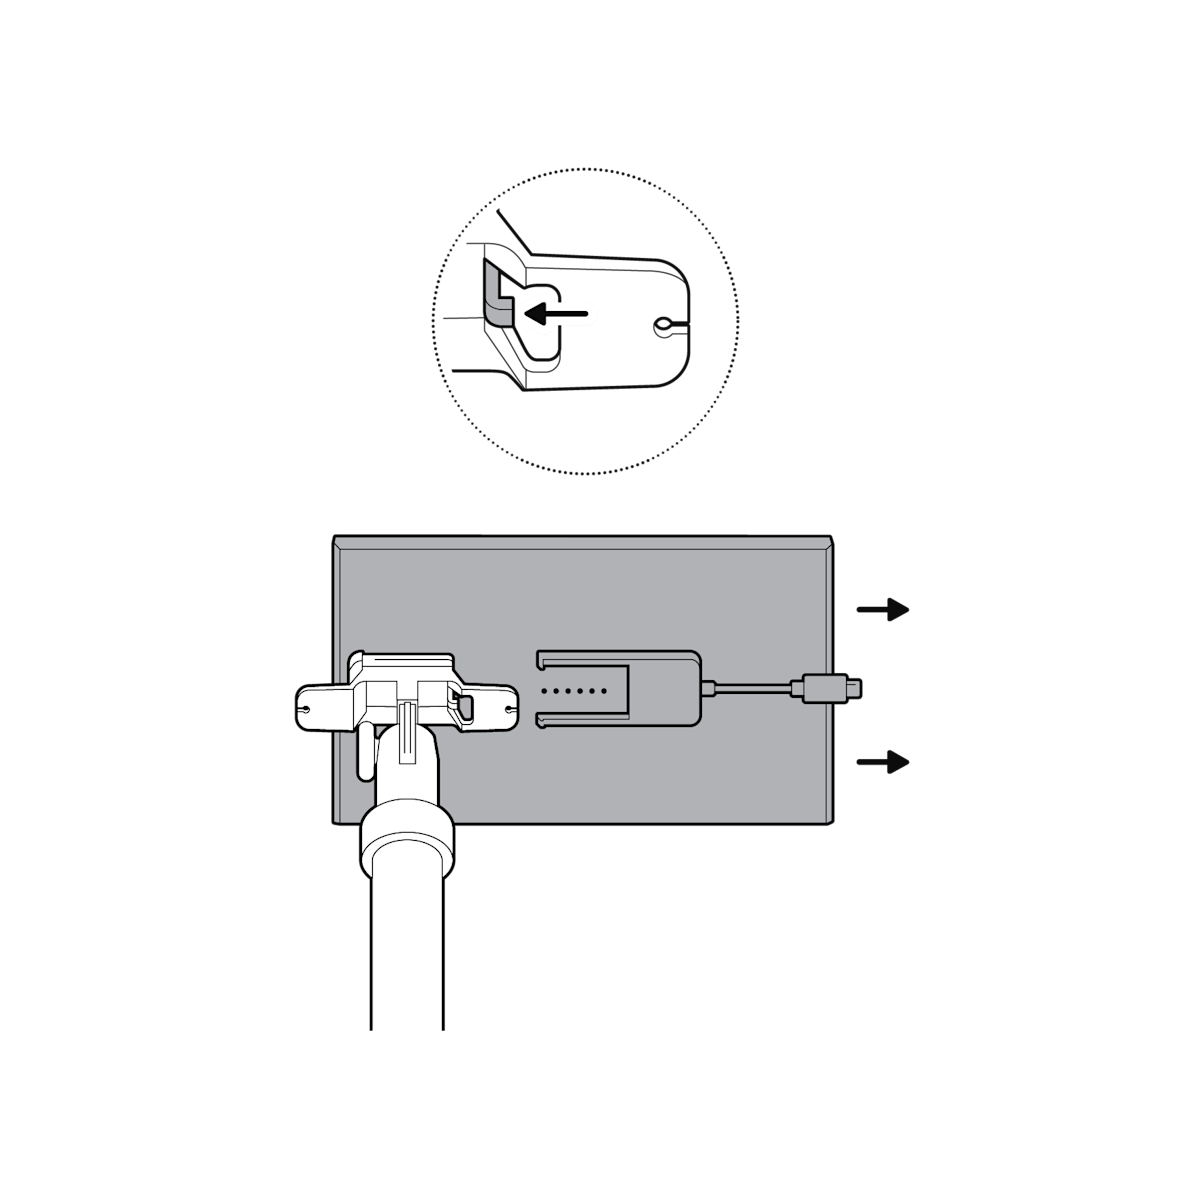
Installing Pole and Wall Mount for Cameras and Solar Panels
Learn how to install Pole and Wall Mount for Security Cameras and Solar Panels by following these steps.
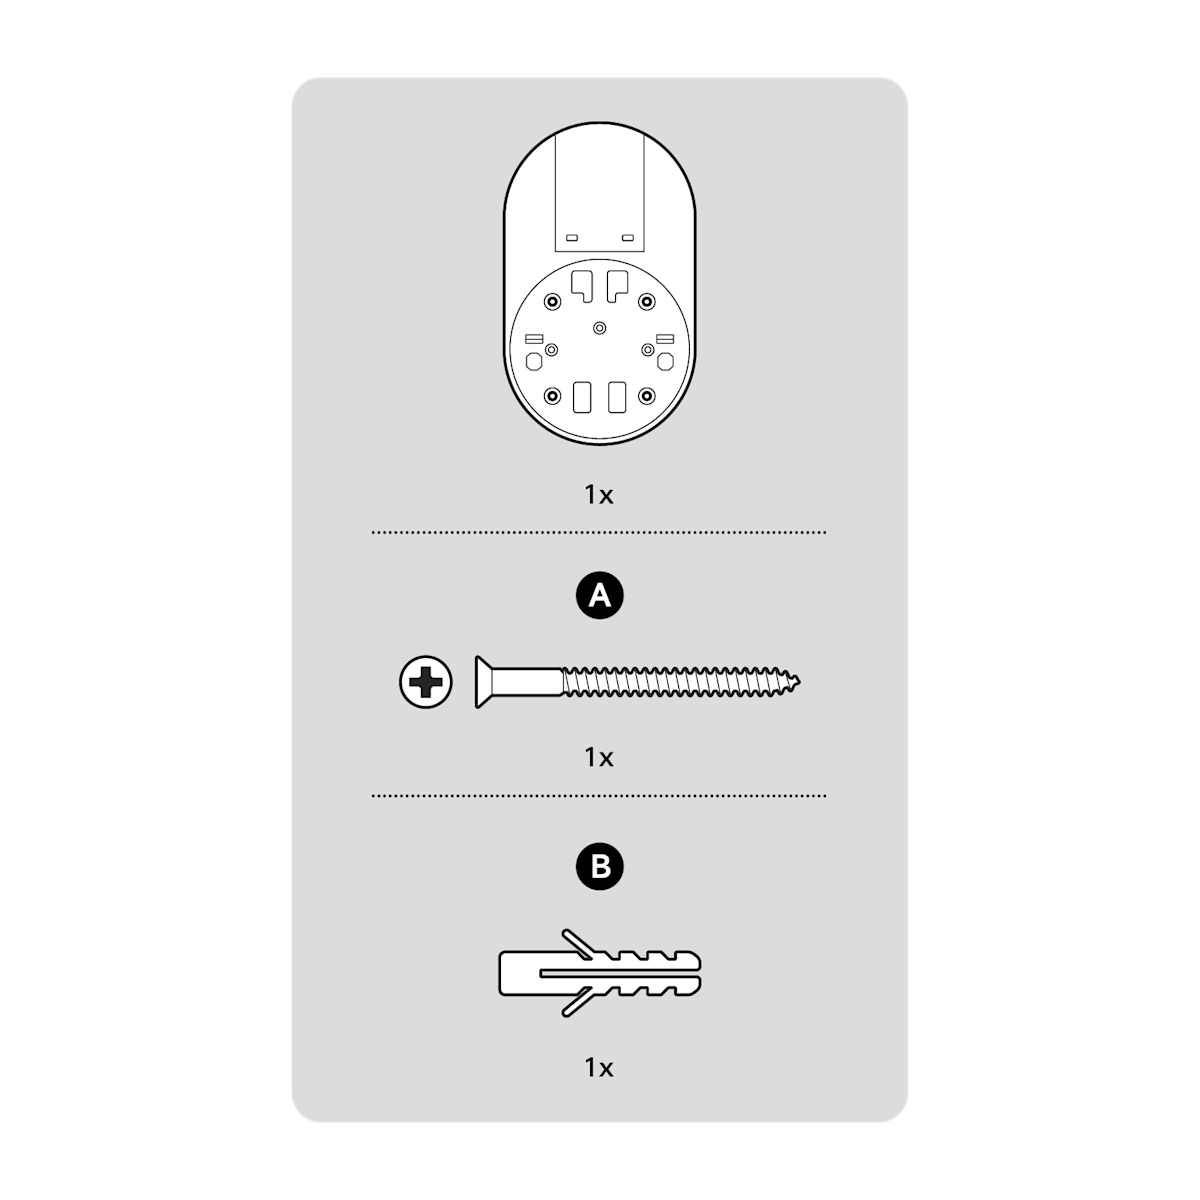
View or download the user manual for Pole and Wall Mount for Cameras and Solar Panels.Download/view the drill template for Pole and Wall Mount for Cameras and Solar PanelsHardware included

Tools needed
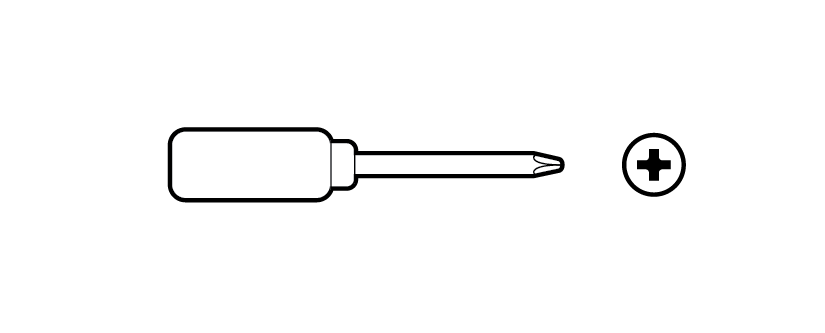
Phillips-head screwdriver

Drill with 7/32 in (5.5 mm) masonry bit (optional)
Mount your camera.
Outdoor Cam Plus | Stick Up Cam Pro
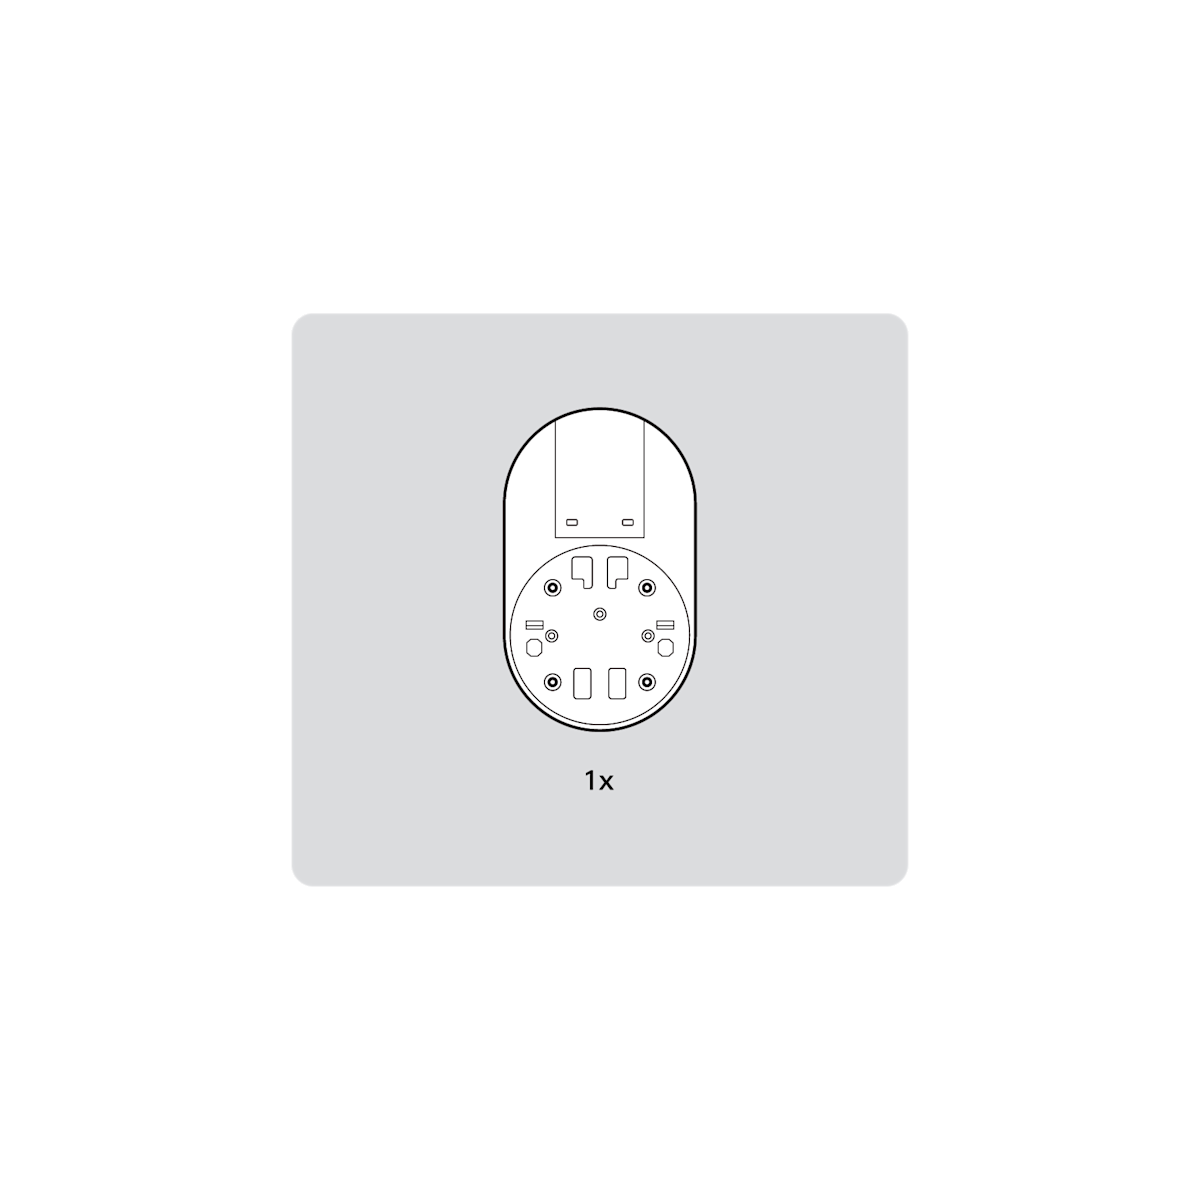
1. Fully charge the battery before installation.

2. Slide your security camera’s native mounting plate in the direction opposite to the UP arrow to remove.
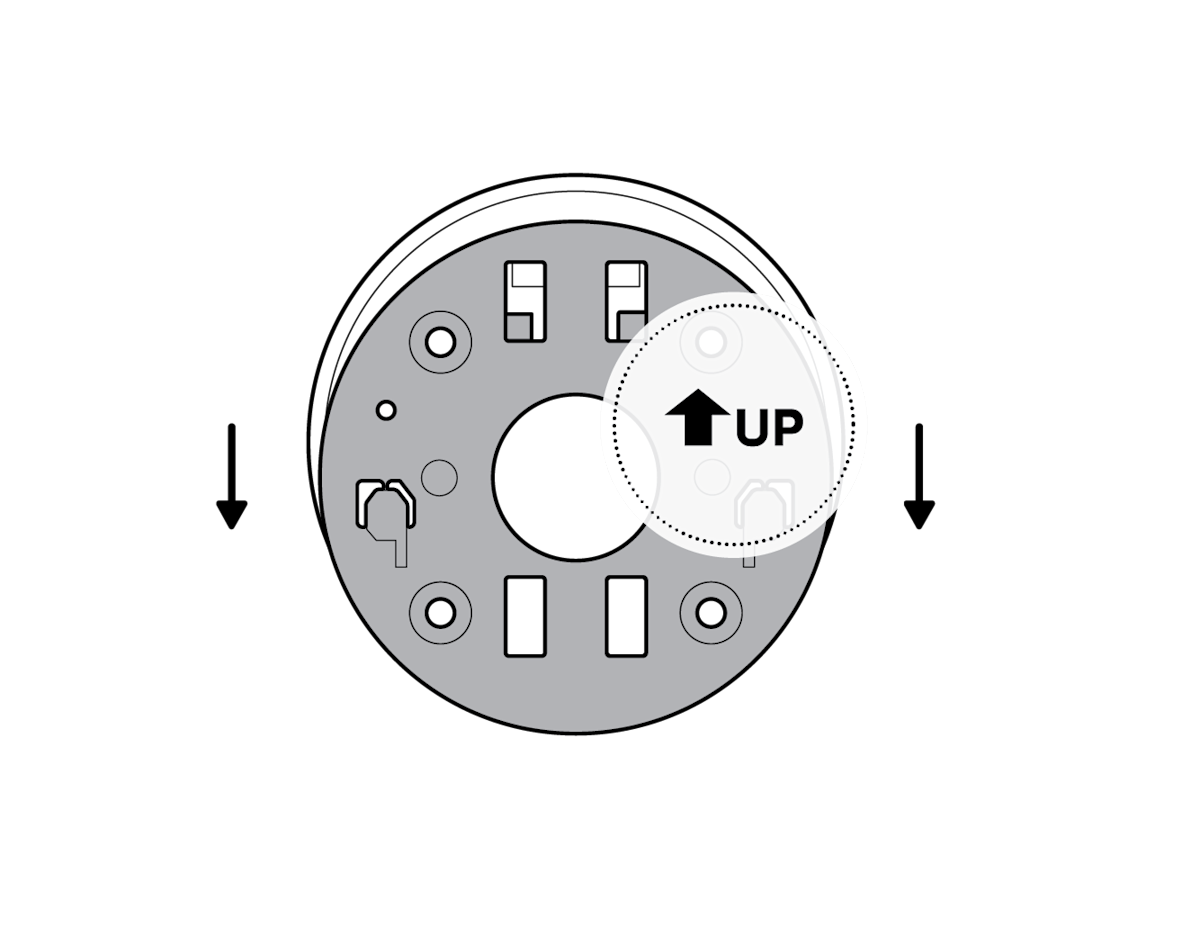
3. Unclasp the security camera mount.

4. Unscrew to detach the security camera mount from the battery cover.
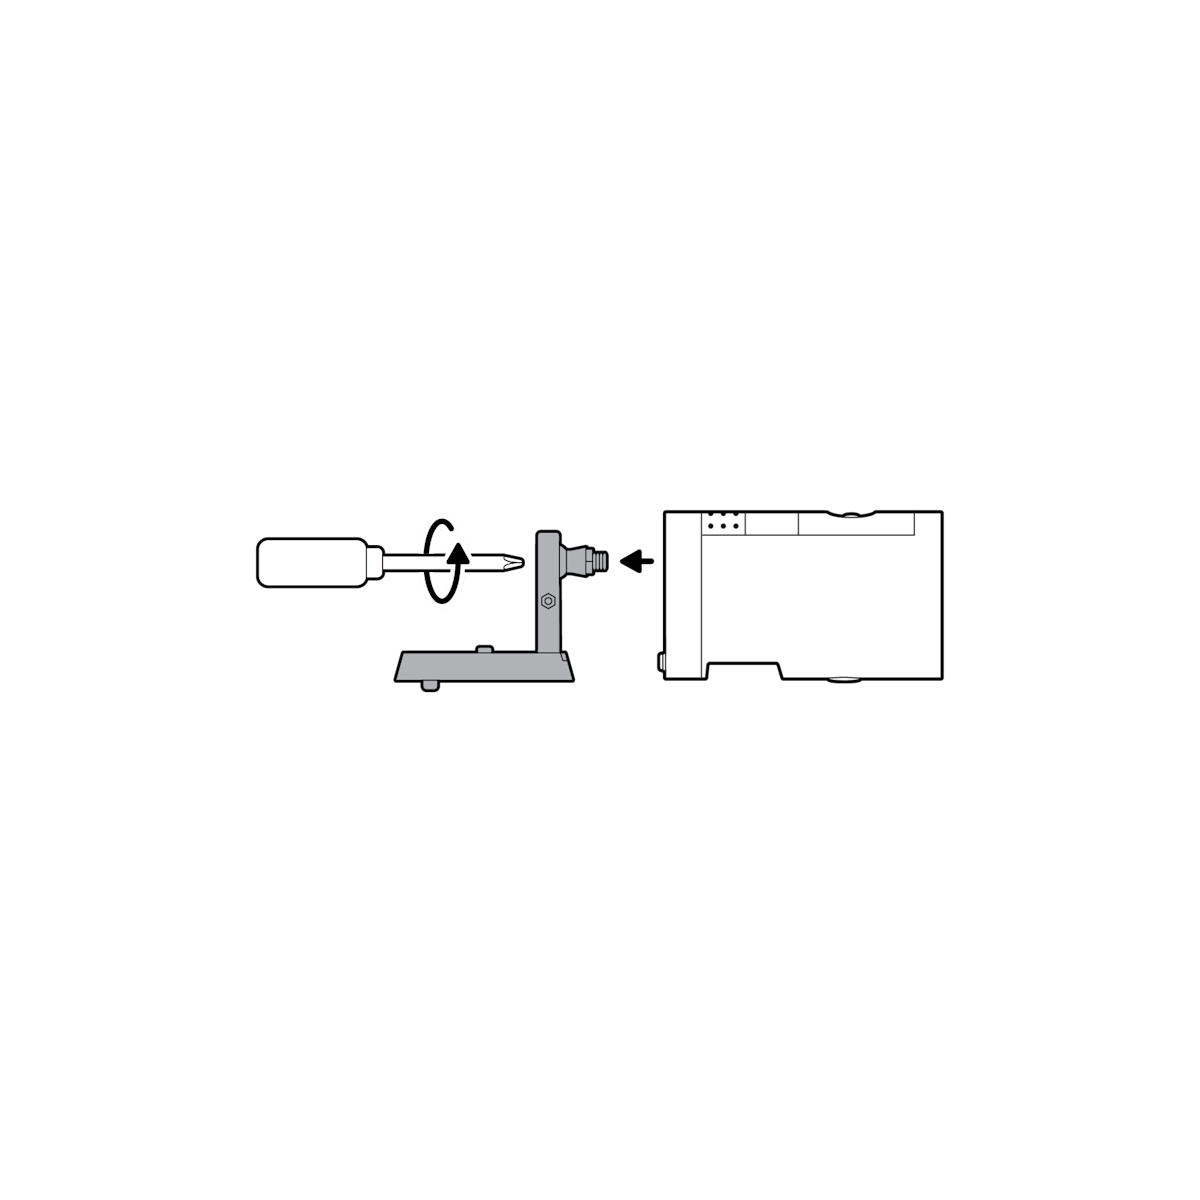
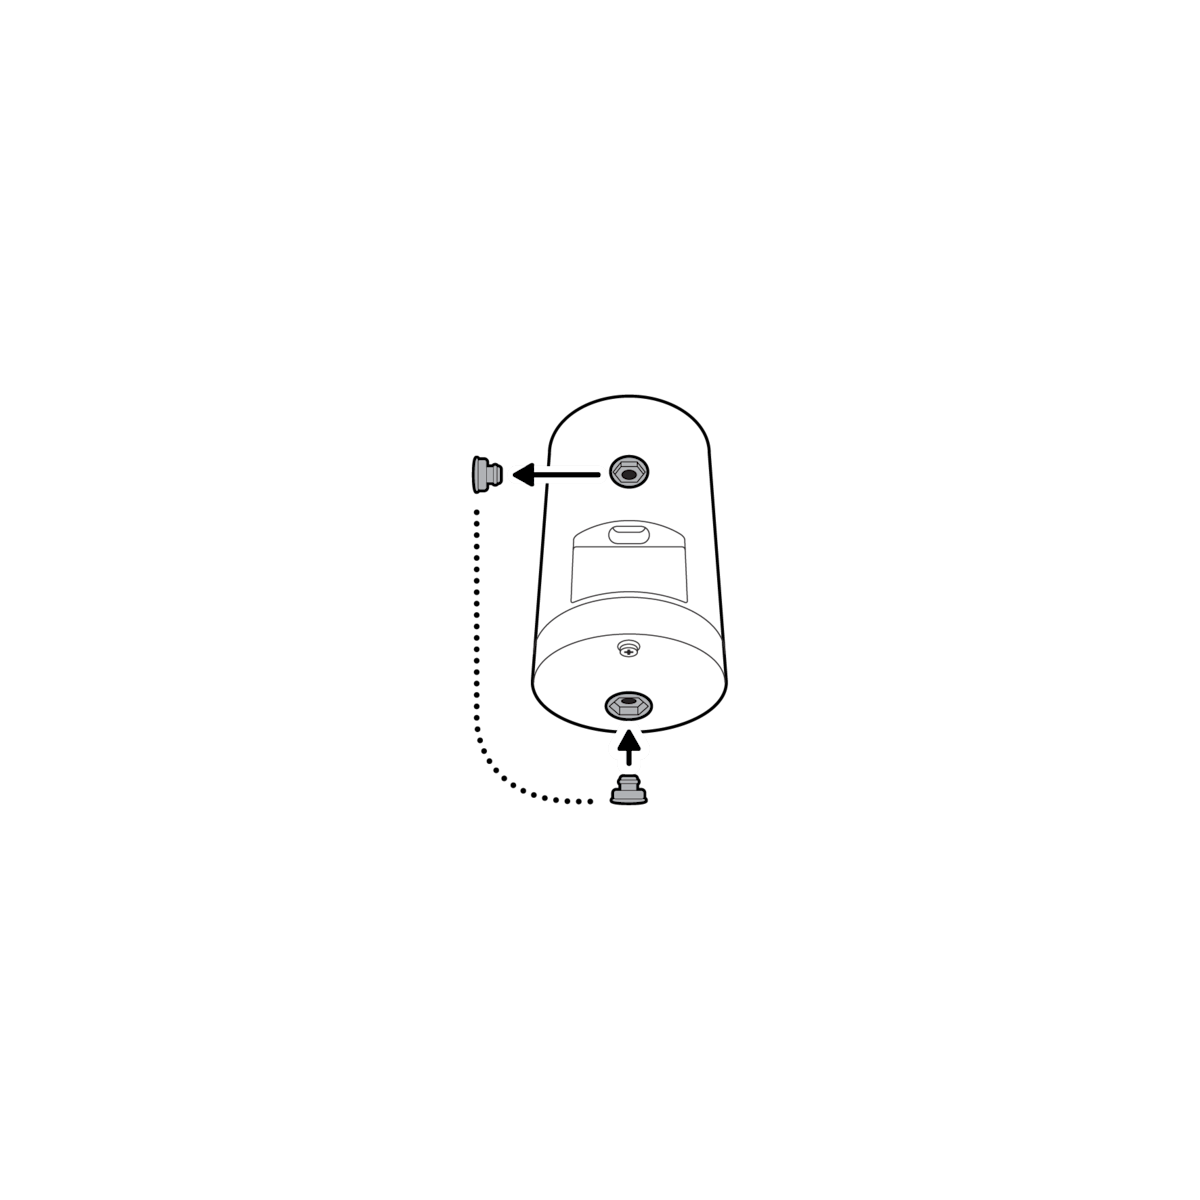
5. Remove the rubber cap on the back of your security camera and use it to plug the bottom.
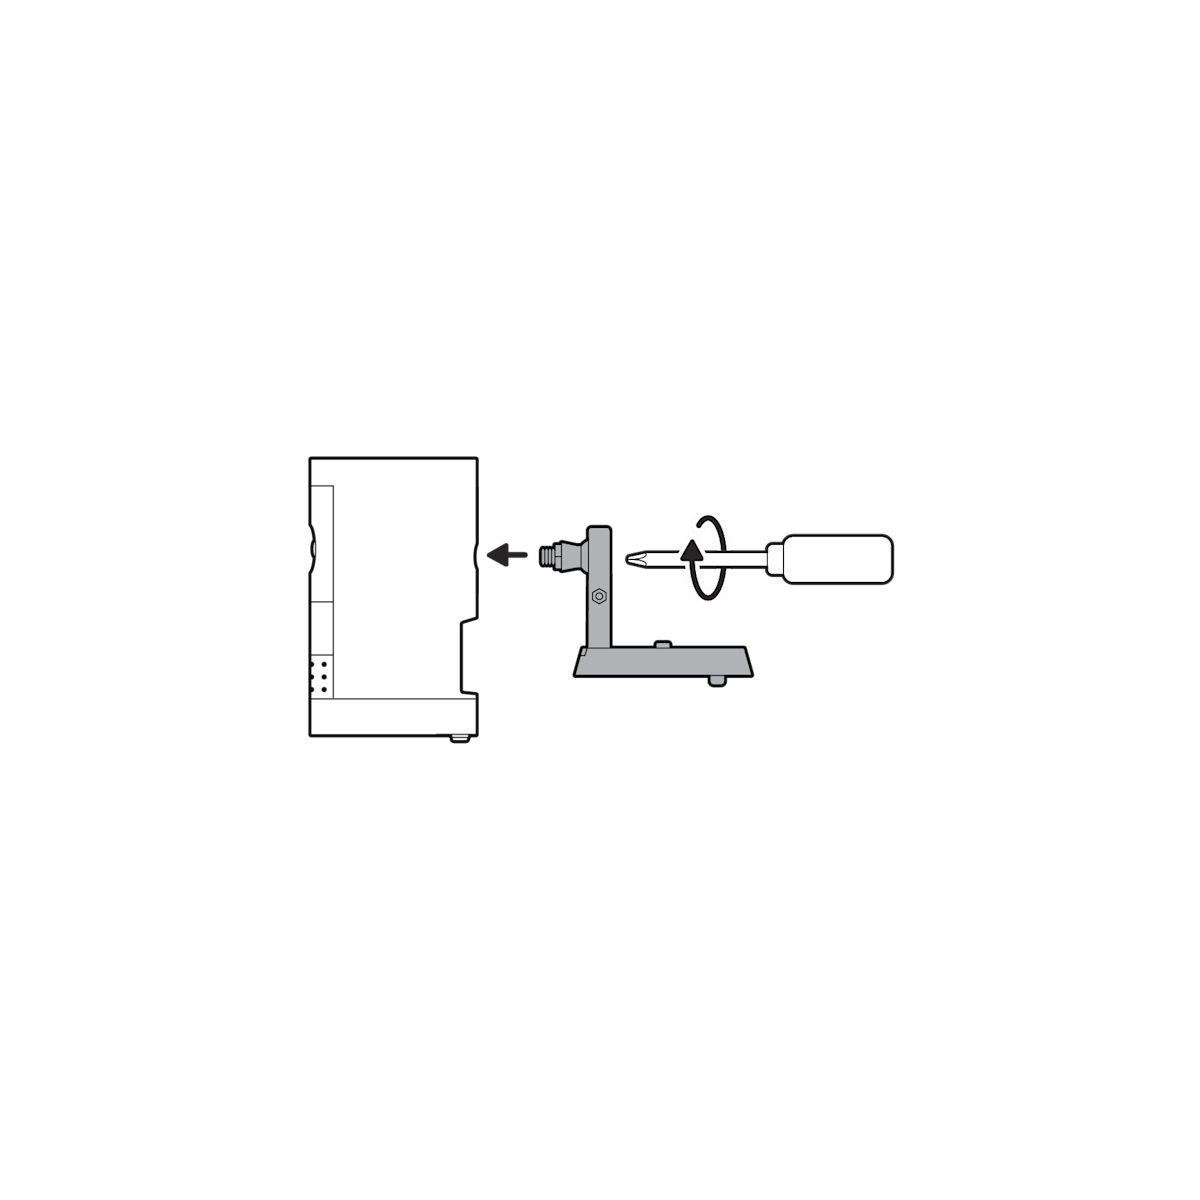
6. Attach the security camera mount to the back of your security camera with its screw.
7. Clasp the security camera mount and attach your security camera to the mounting plate by sliding until you feel a click.
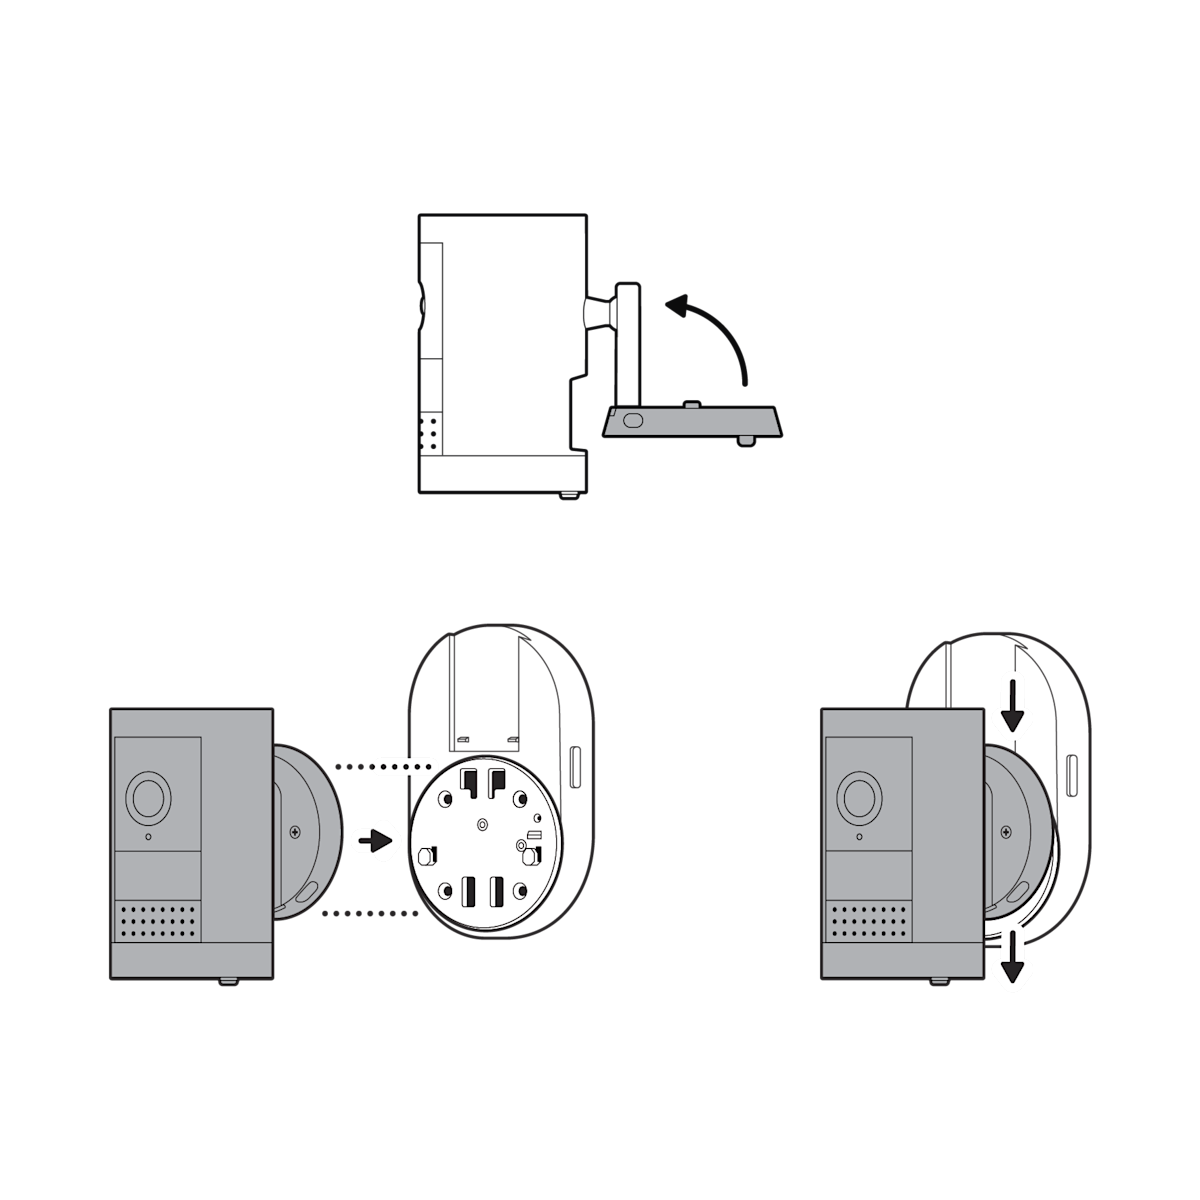
8. Unclasp the security camera mount and tighten the security screw.
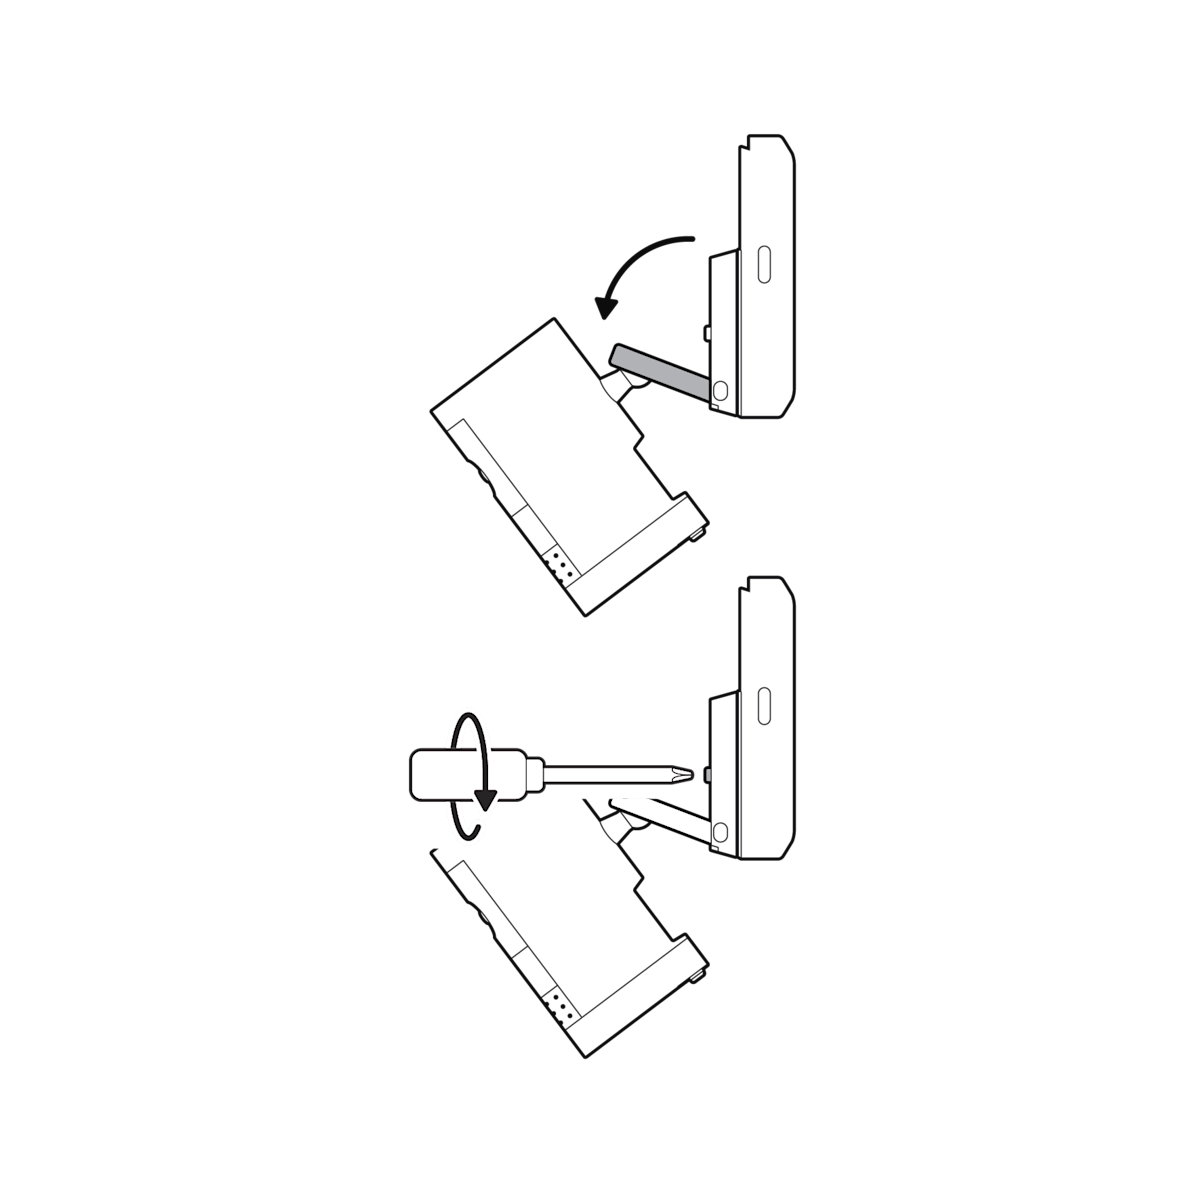
NOTE: If installing Stick Up Cam Pro, remove the decorative cover and tighten the security screw. Once finished, re-attach the decorative cover.
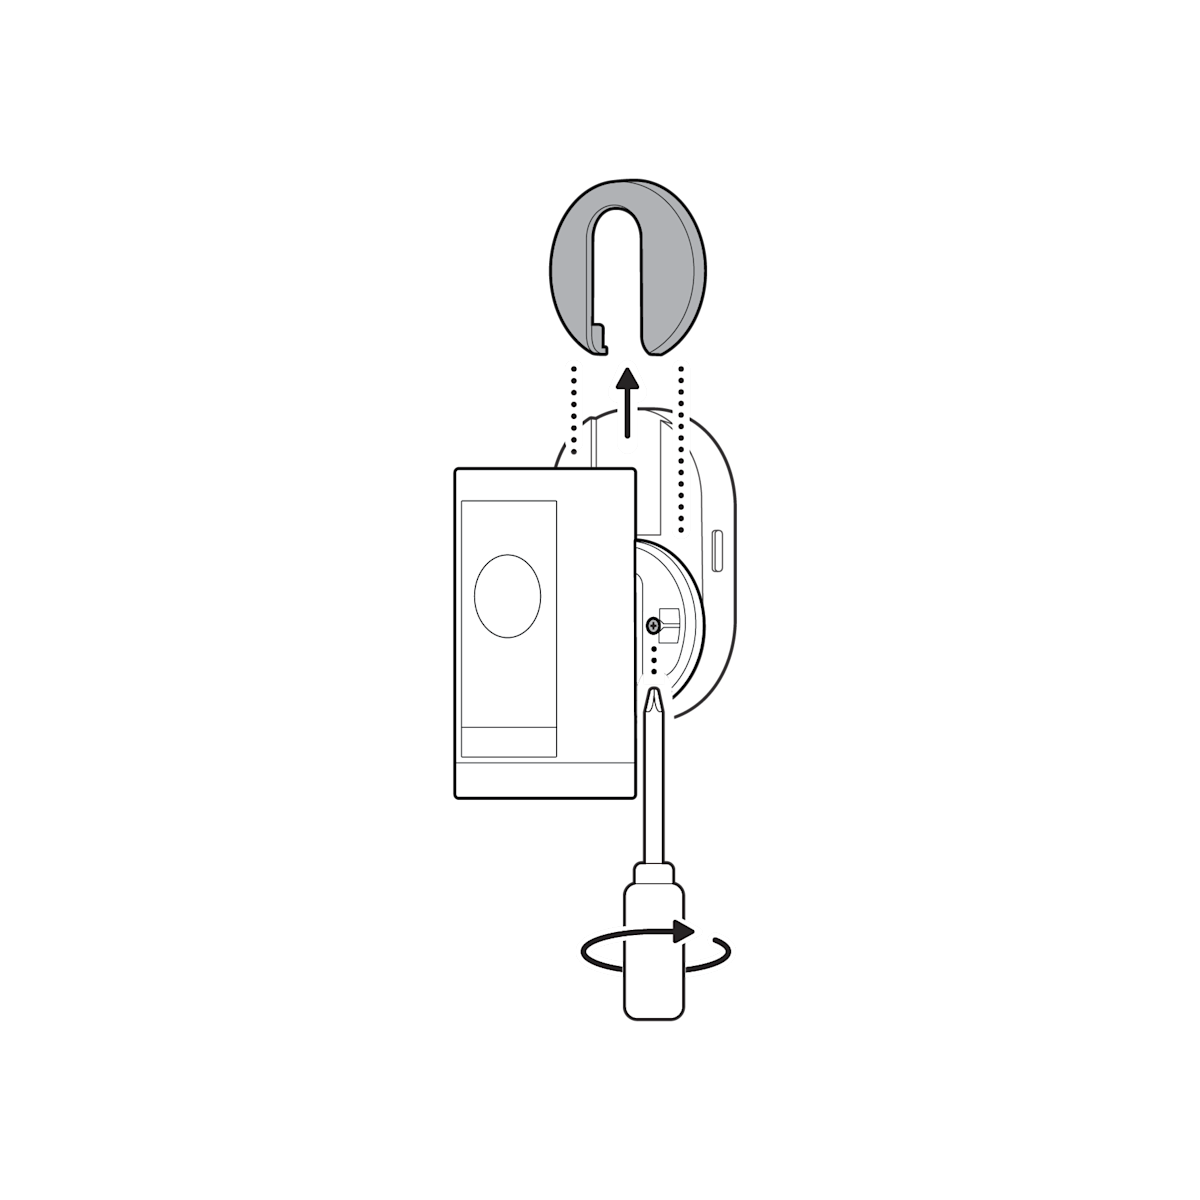
9. Refer to your security camera setup guide to adjust your angle, secure your security camera, and complete setup.
Outdoor Camera (Formerly: Stick Up Cam (3rd Gen))
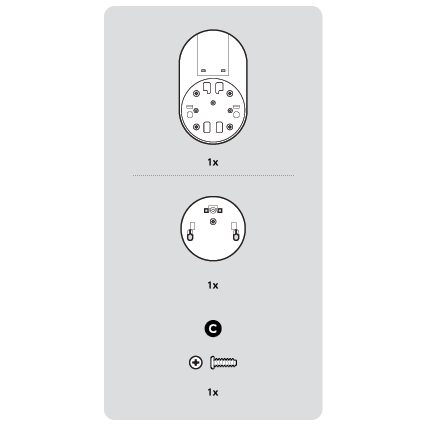
1. Fully charge the battery before installation.

2. Attach the included mounting plate adapter to the mounting bracket.
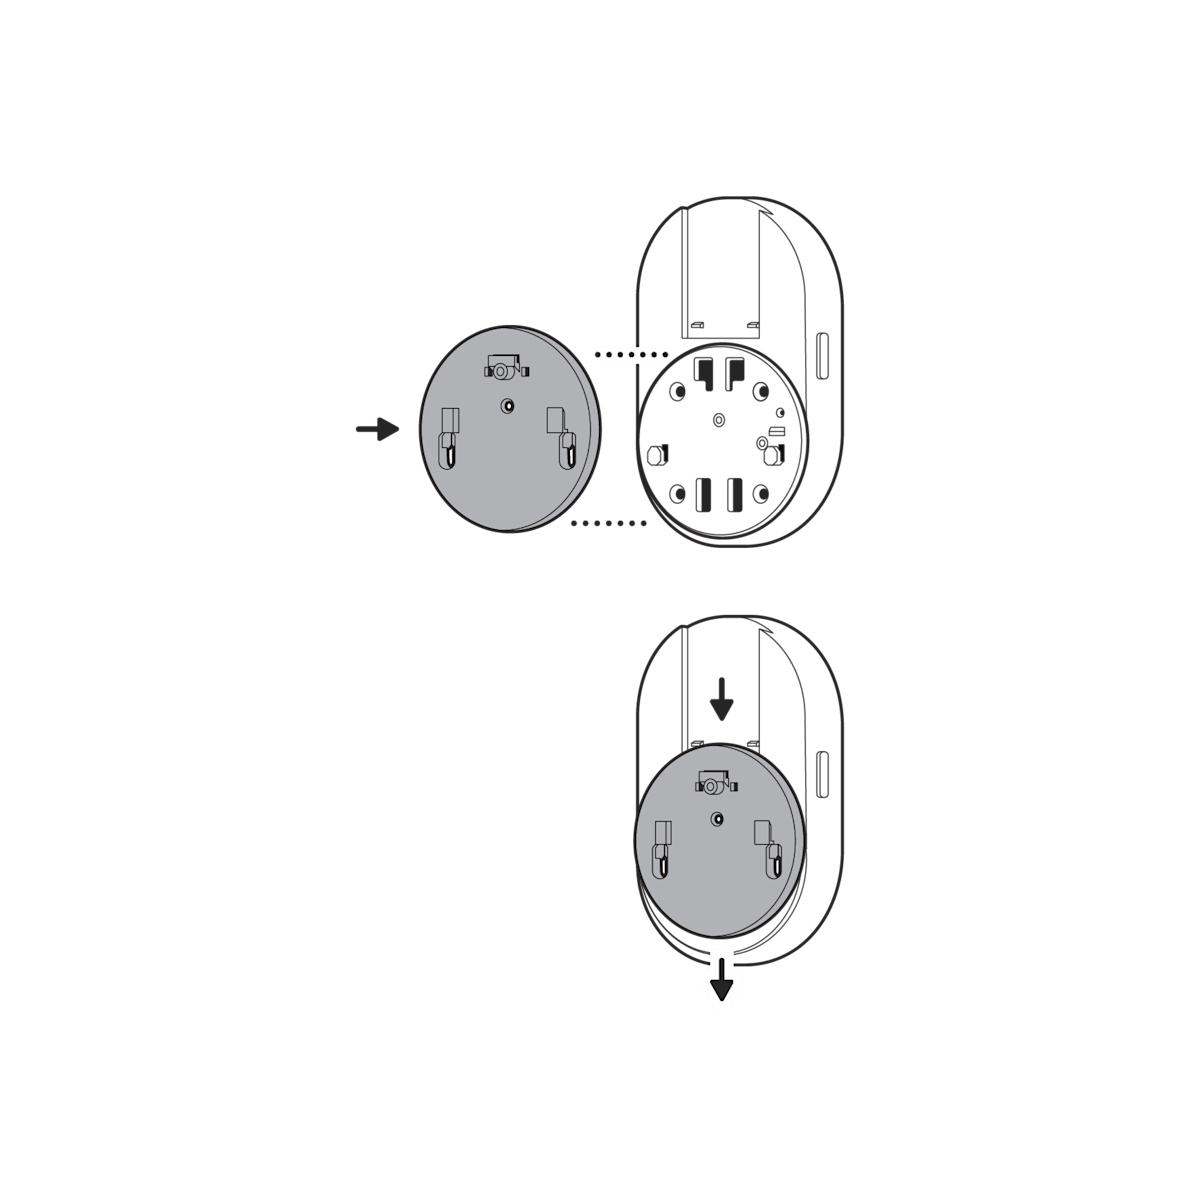
3. Use the included screw to secure the mounting plate adapter.
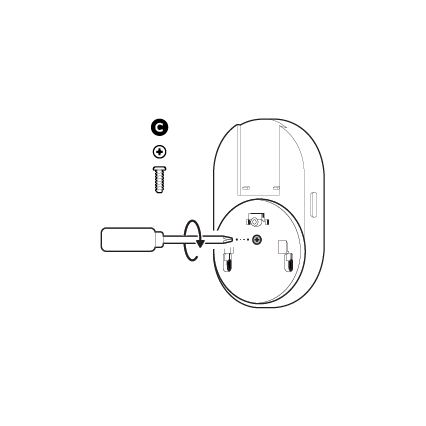
4. Unscrew to detach the security camera mount from the battery cover.
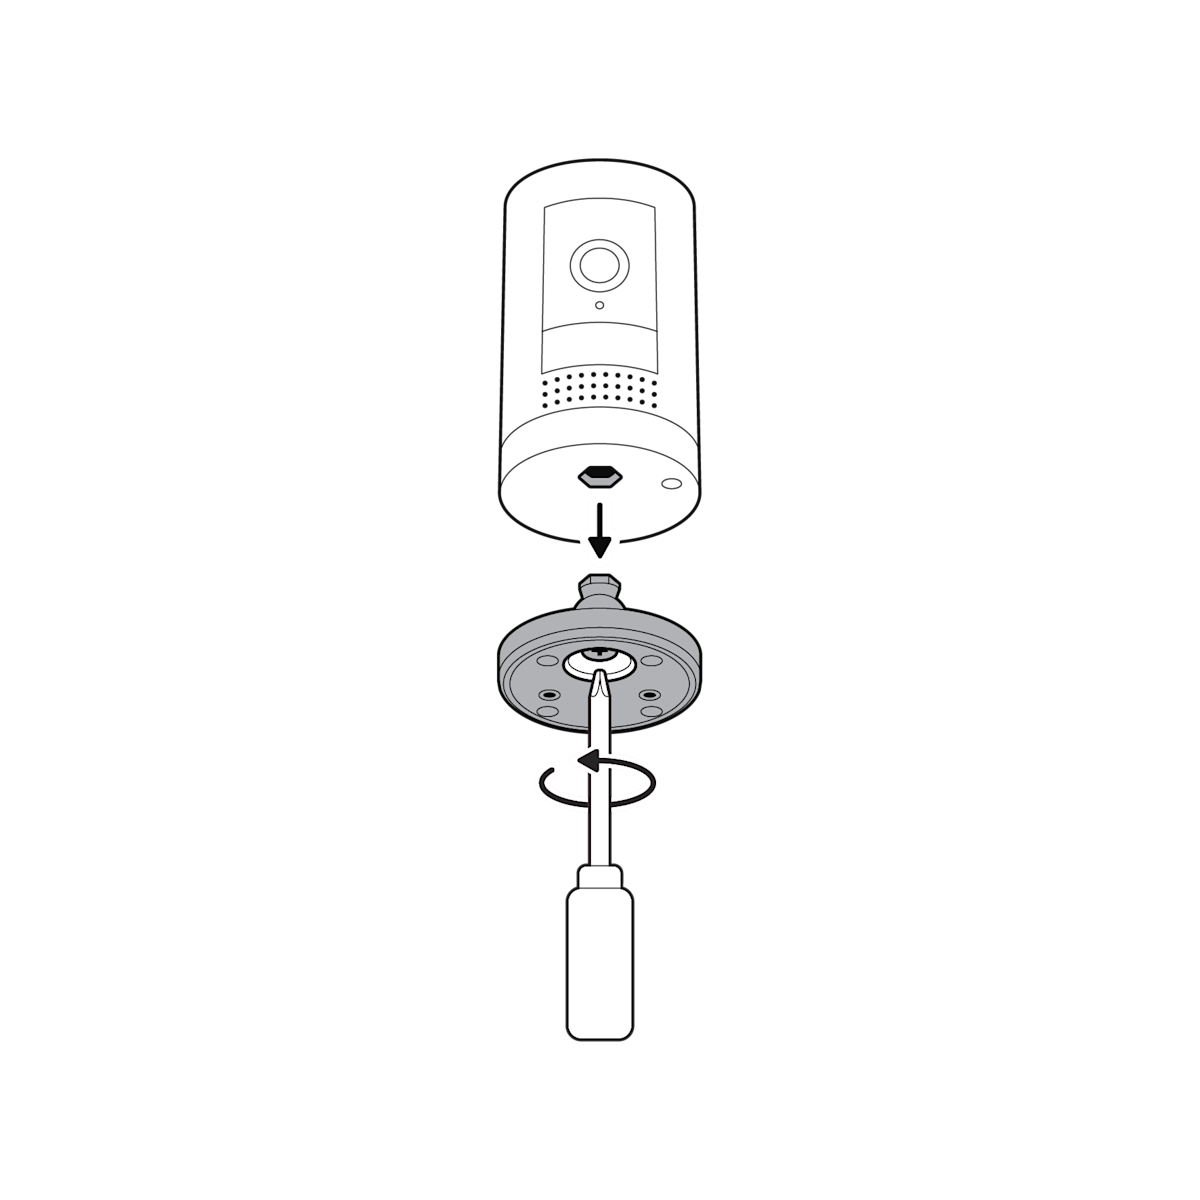
5. Remove the rubber cap on the back of your security camera and use it to plug the bottom.

6. Attach the security camera mount to the back of your security camera with its screw.

7. Slide your security camera’s native mounting plate in the direction opposite to the UP arrow to remove.
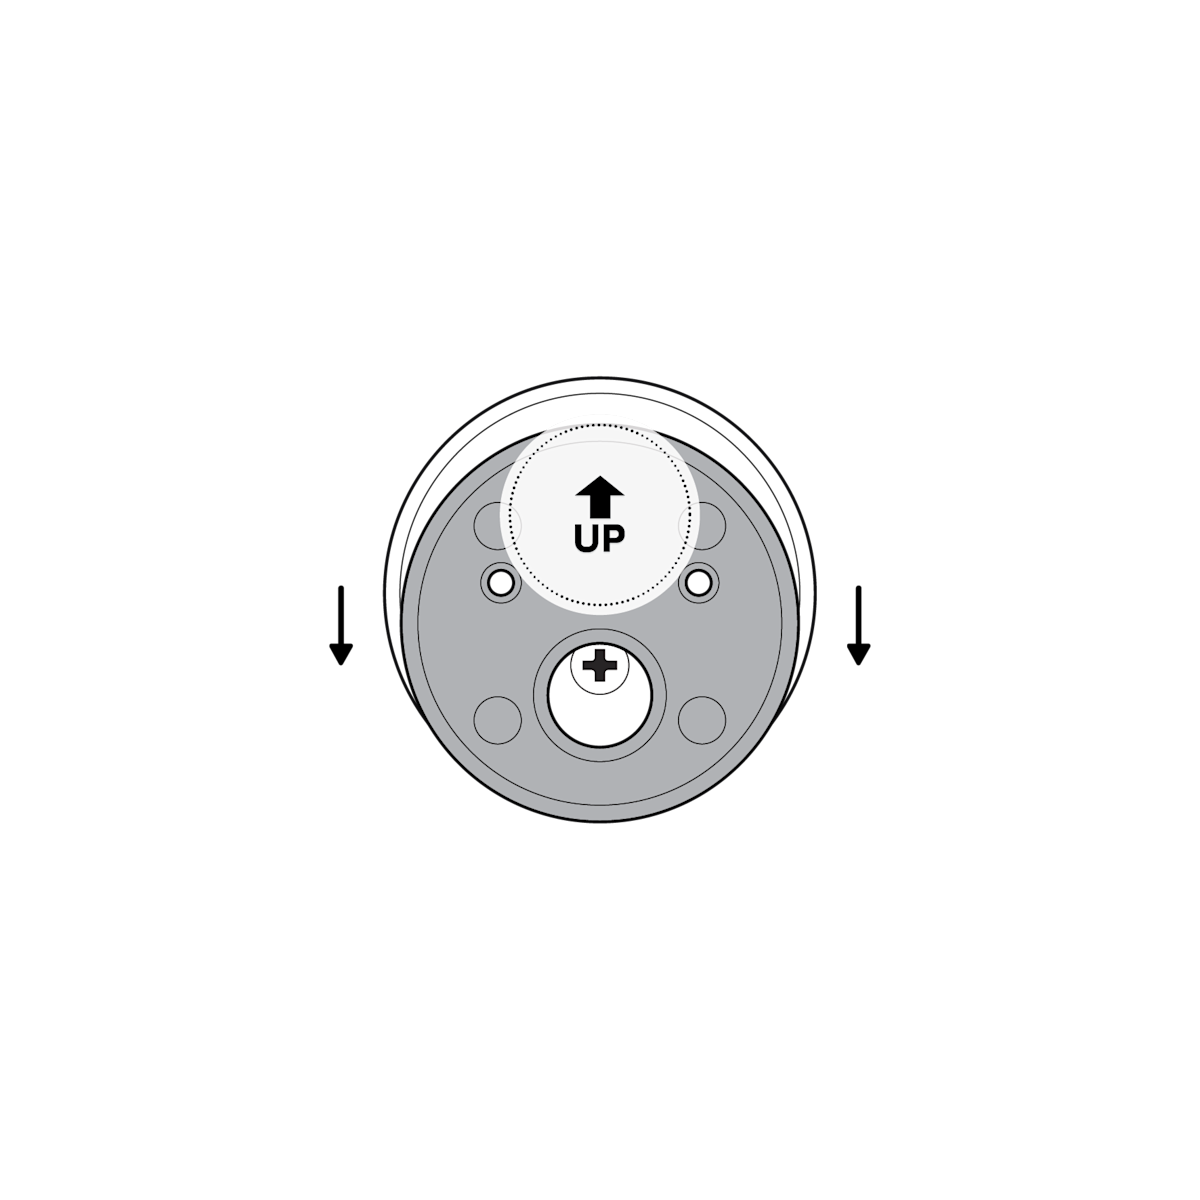
8. Mount your security camera onto the mounting bracket.
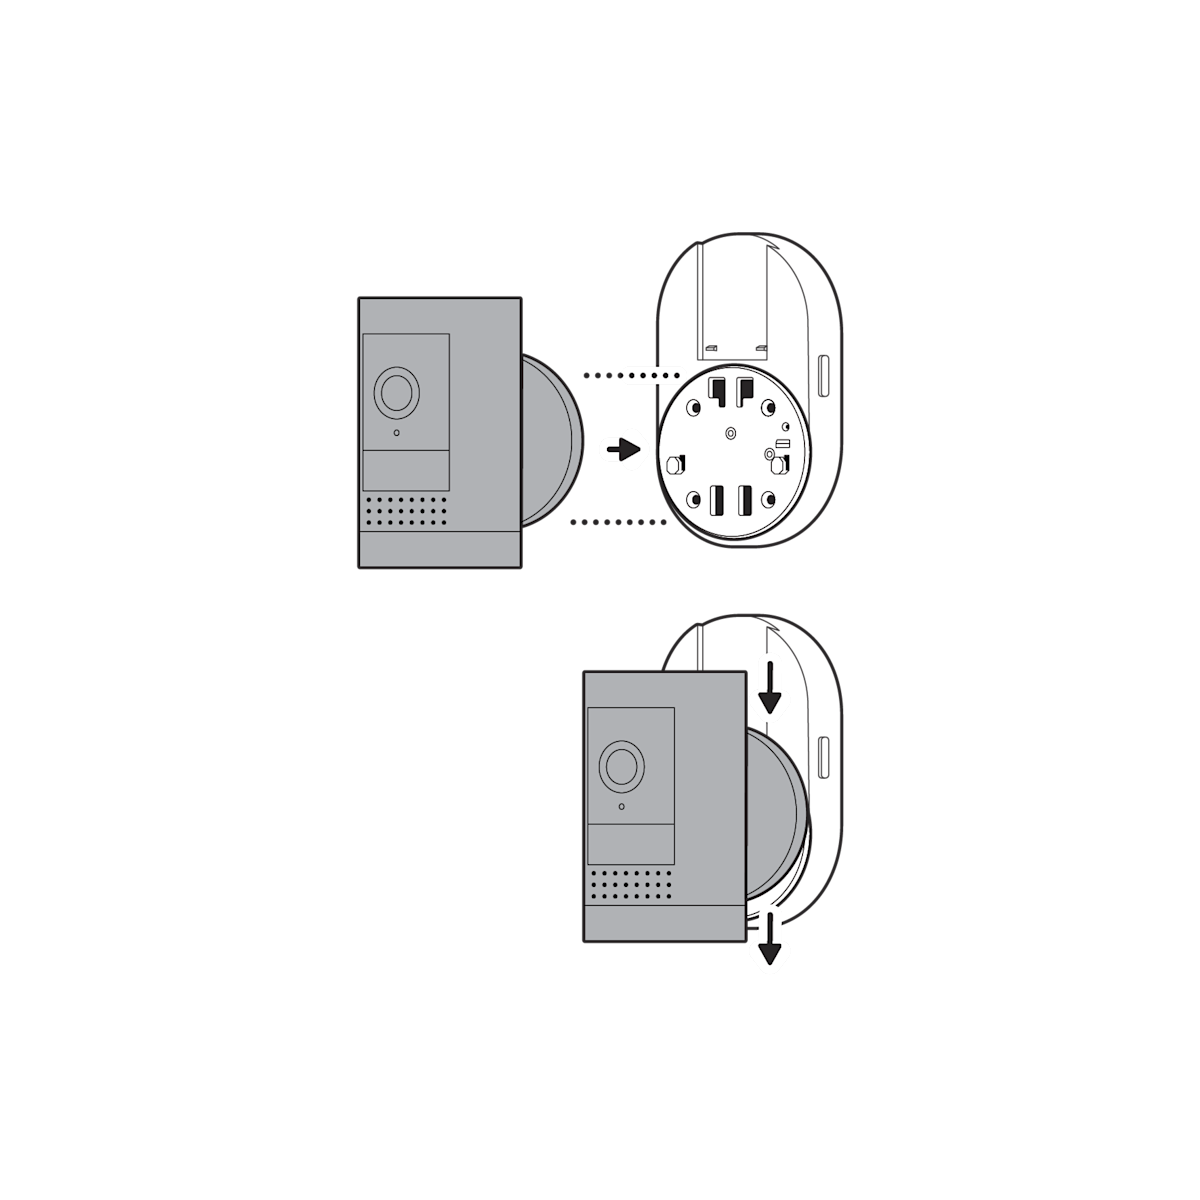
9. Rotate your security camera and remove the rubber cap on the base.
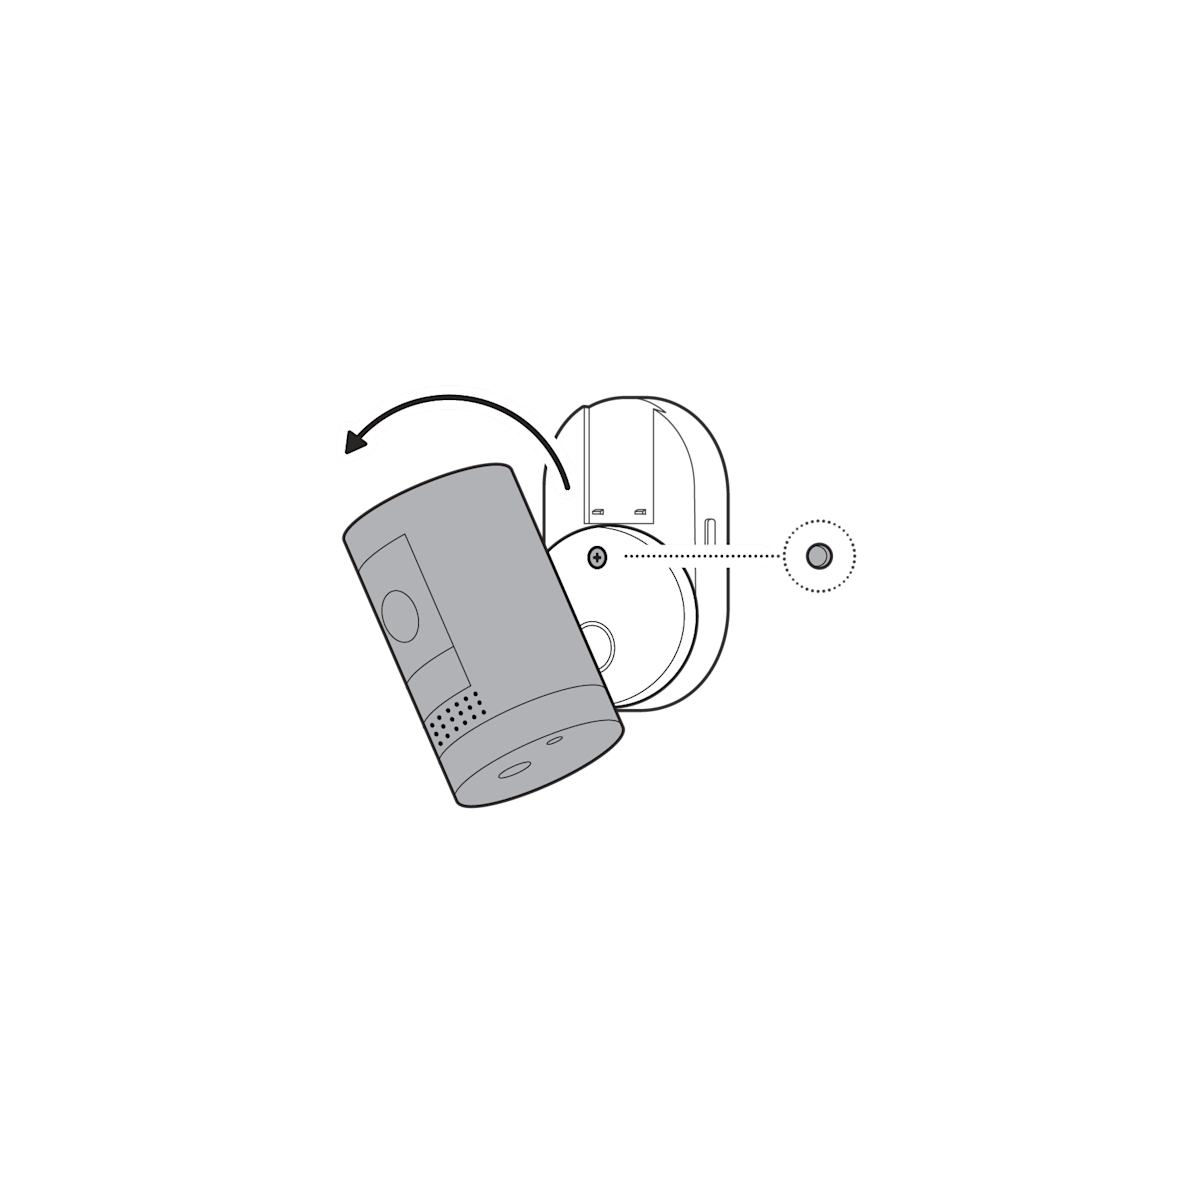
10. Tighten the security screw included with your security camera.

11. Refer to your security camera setup guide to adjust your angle, secure your security camera, and complete setup.
Spotlight Cam
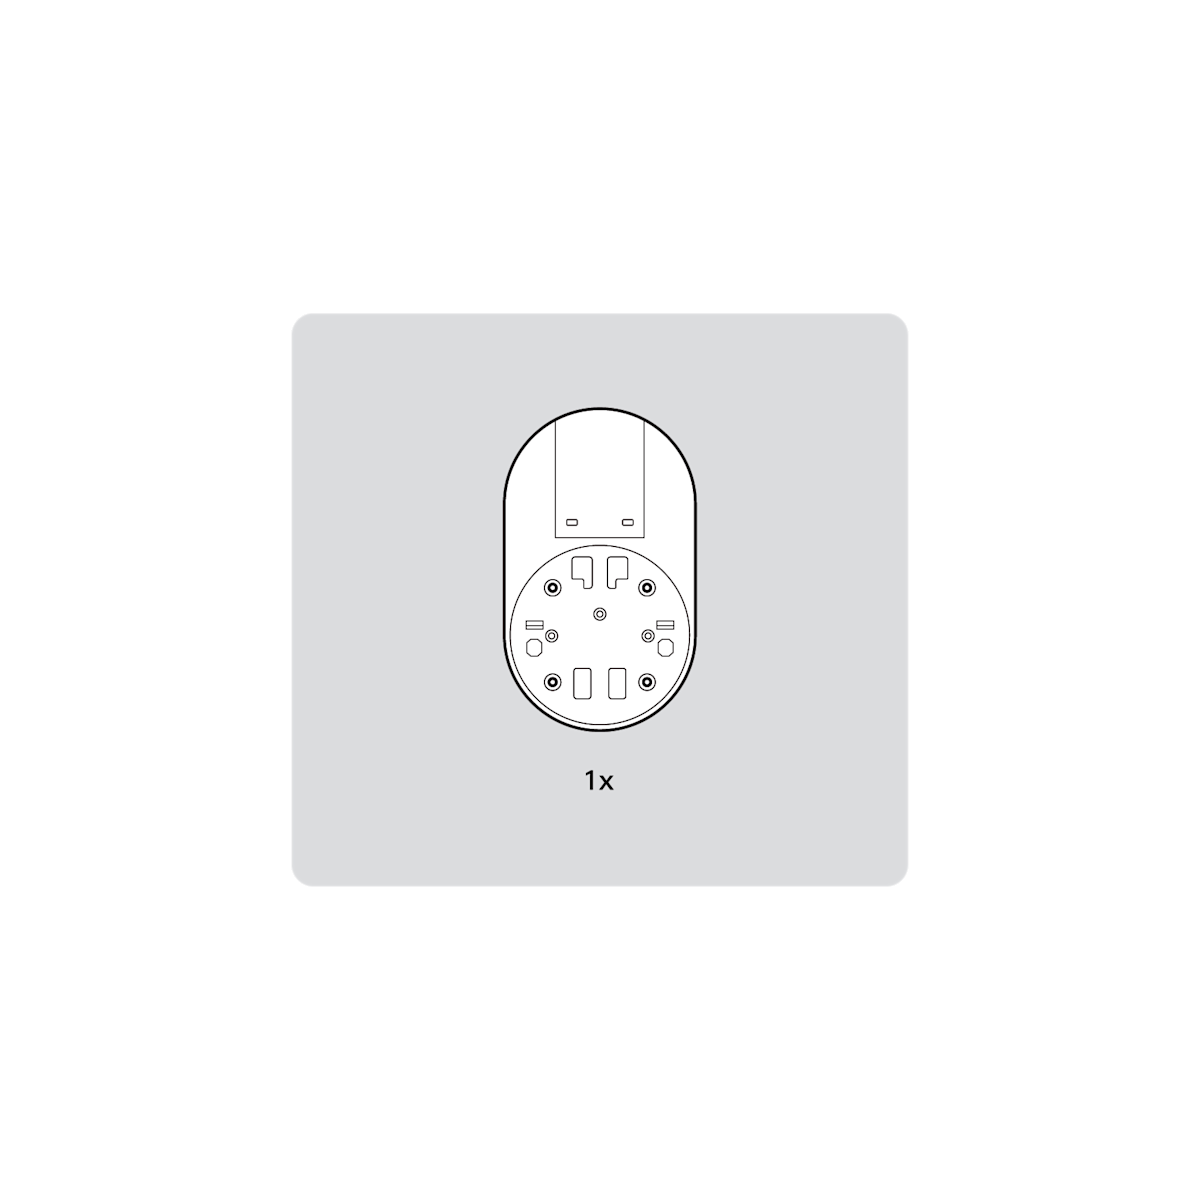
1. Fully charge the battery before installation.

2. Slide your security camera’s native mounting plate in the direction opposite to the UP arrow to remove.

3. Mount your security camera onto the mounting bracket.
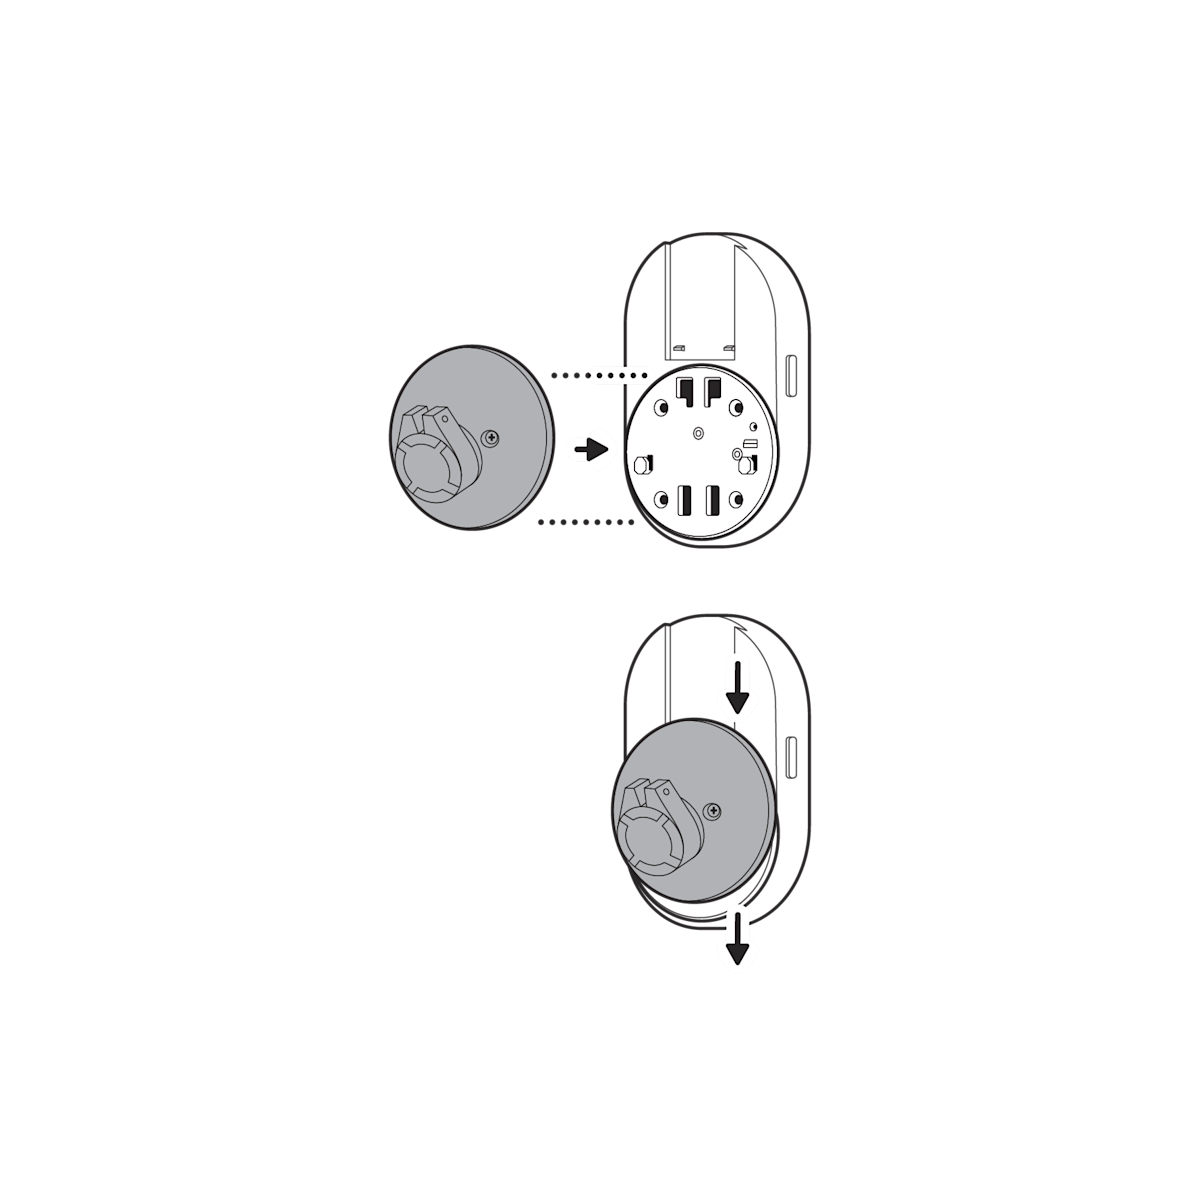
4. Tighten the security screw included with your security camera.
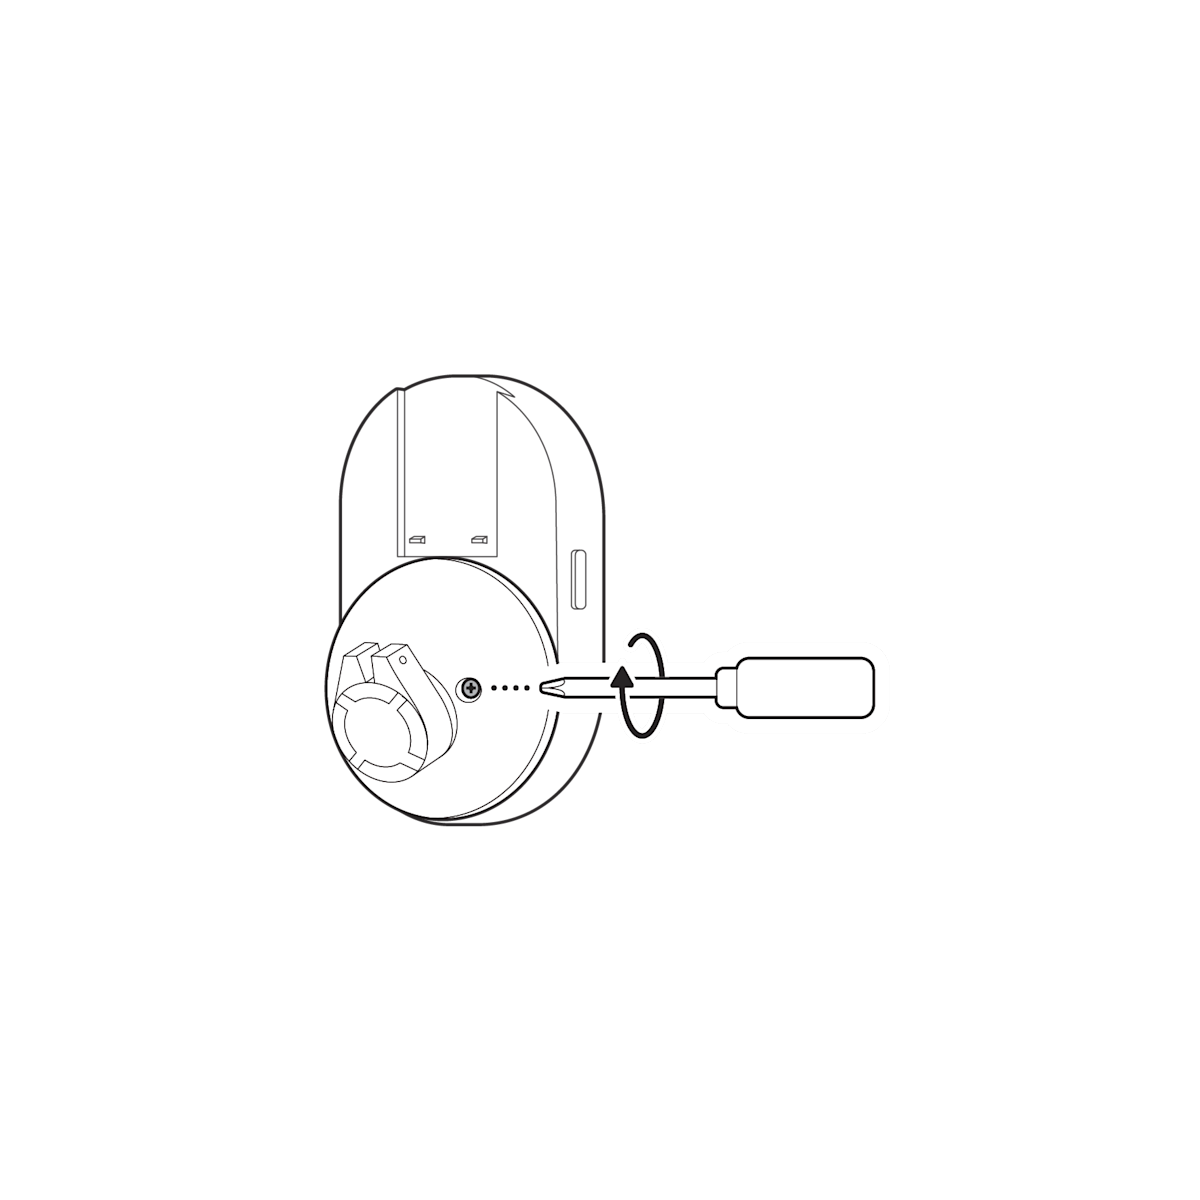
5. Loosen the metal collar with a Phillips-head screwdriver and push the ball joint into the socket to attach. Then, tighten to secure.
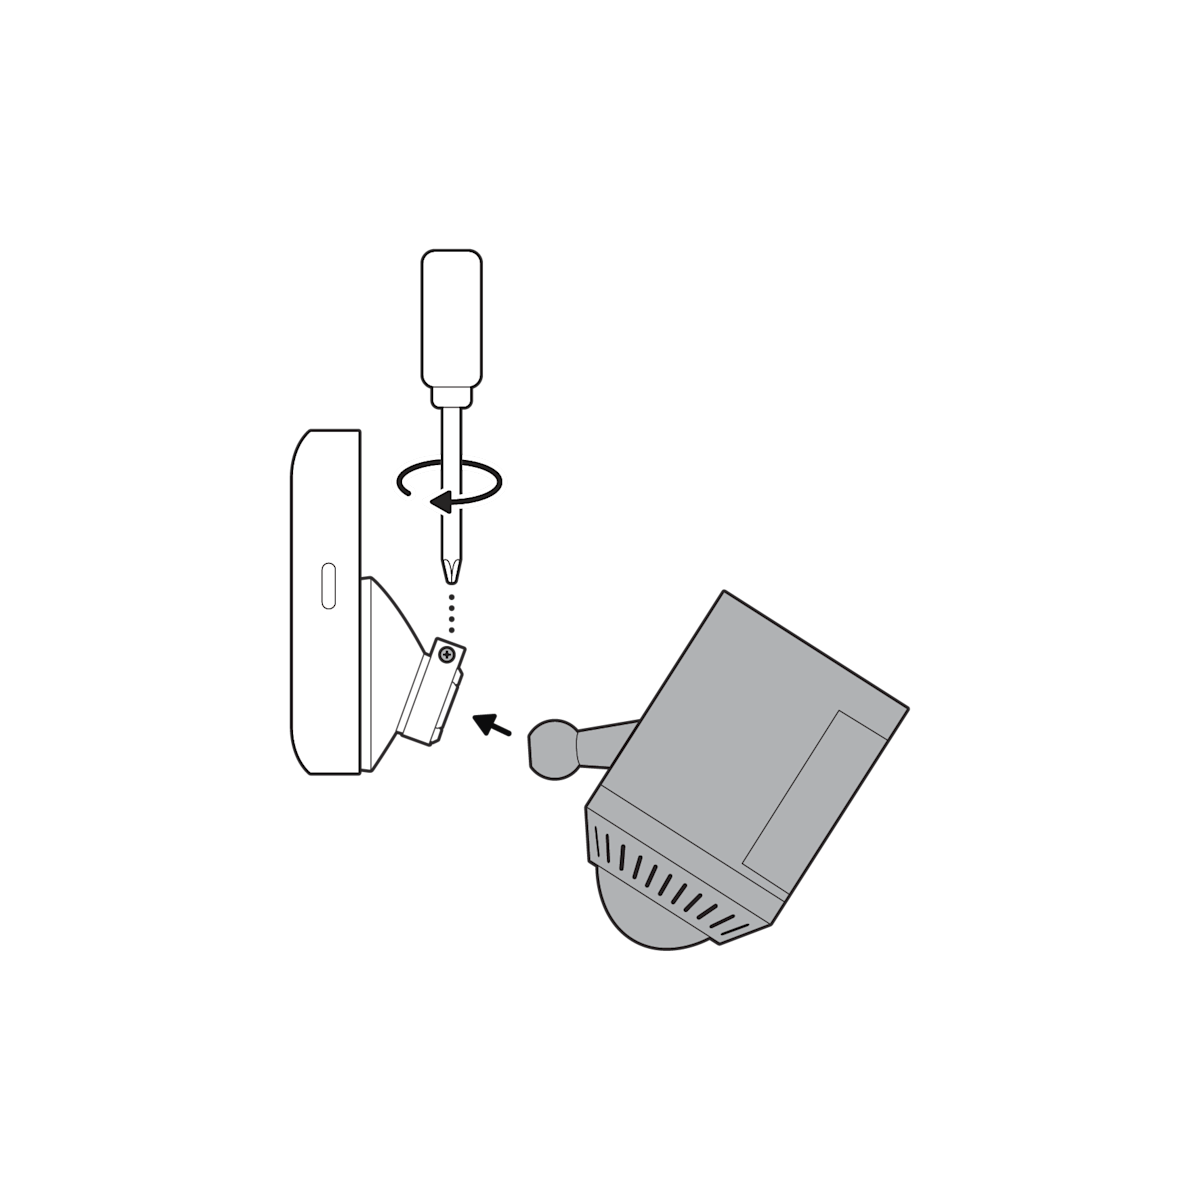
6. Refer to your security camera setup guide to adjust your angle, secure your security camera, and complete setup.
Choose a location.
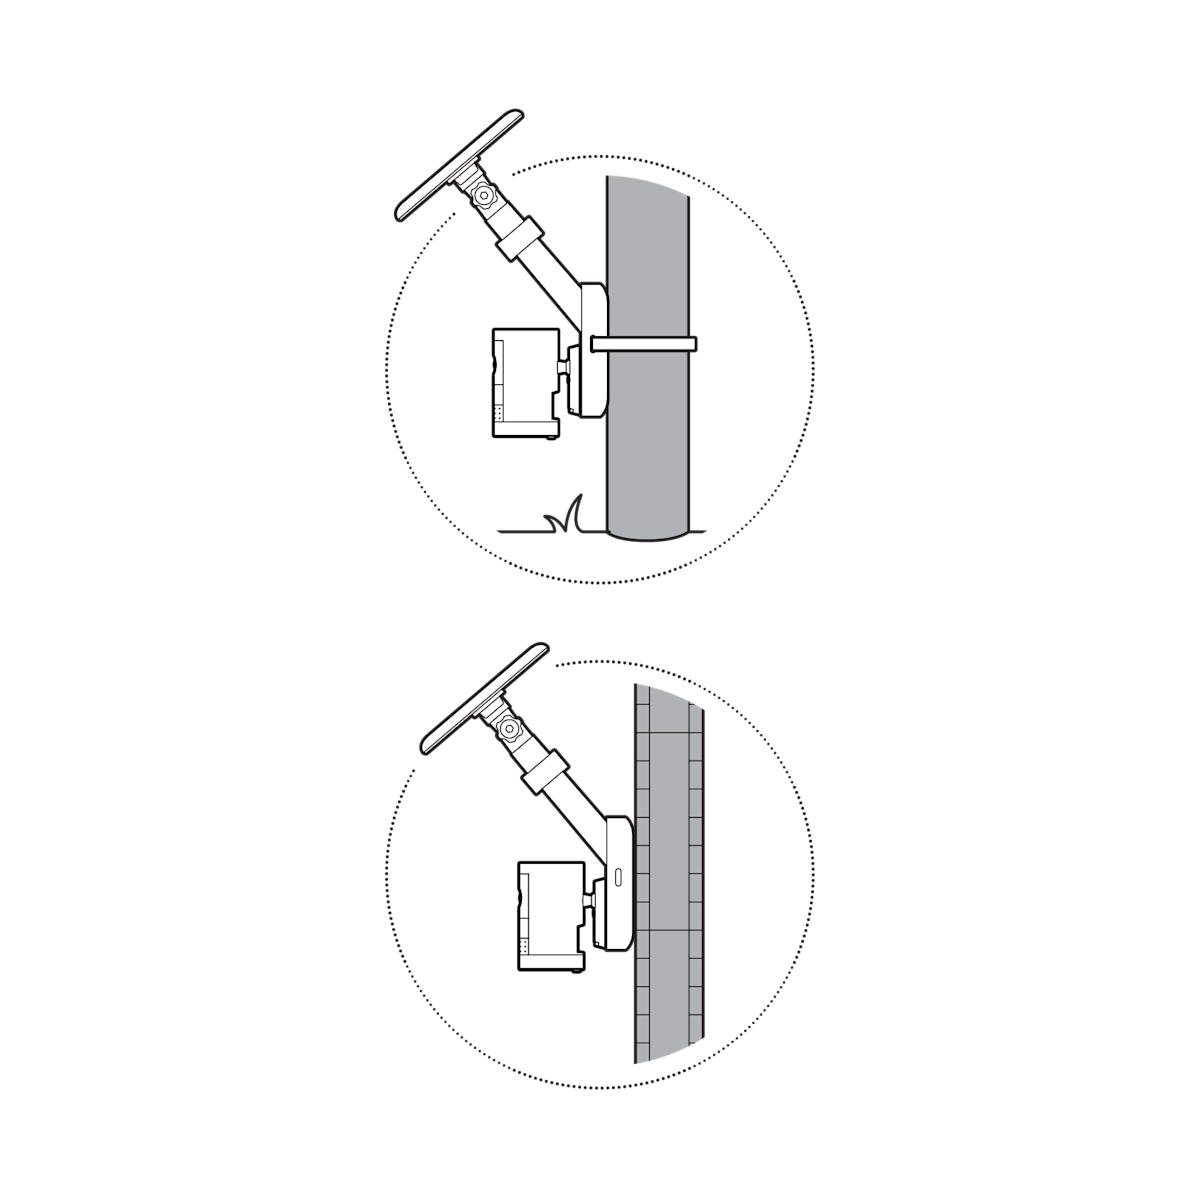
If installing a solar panel, ensure the mount is positioned under direct sunlight.
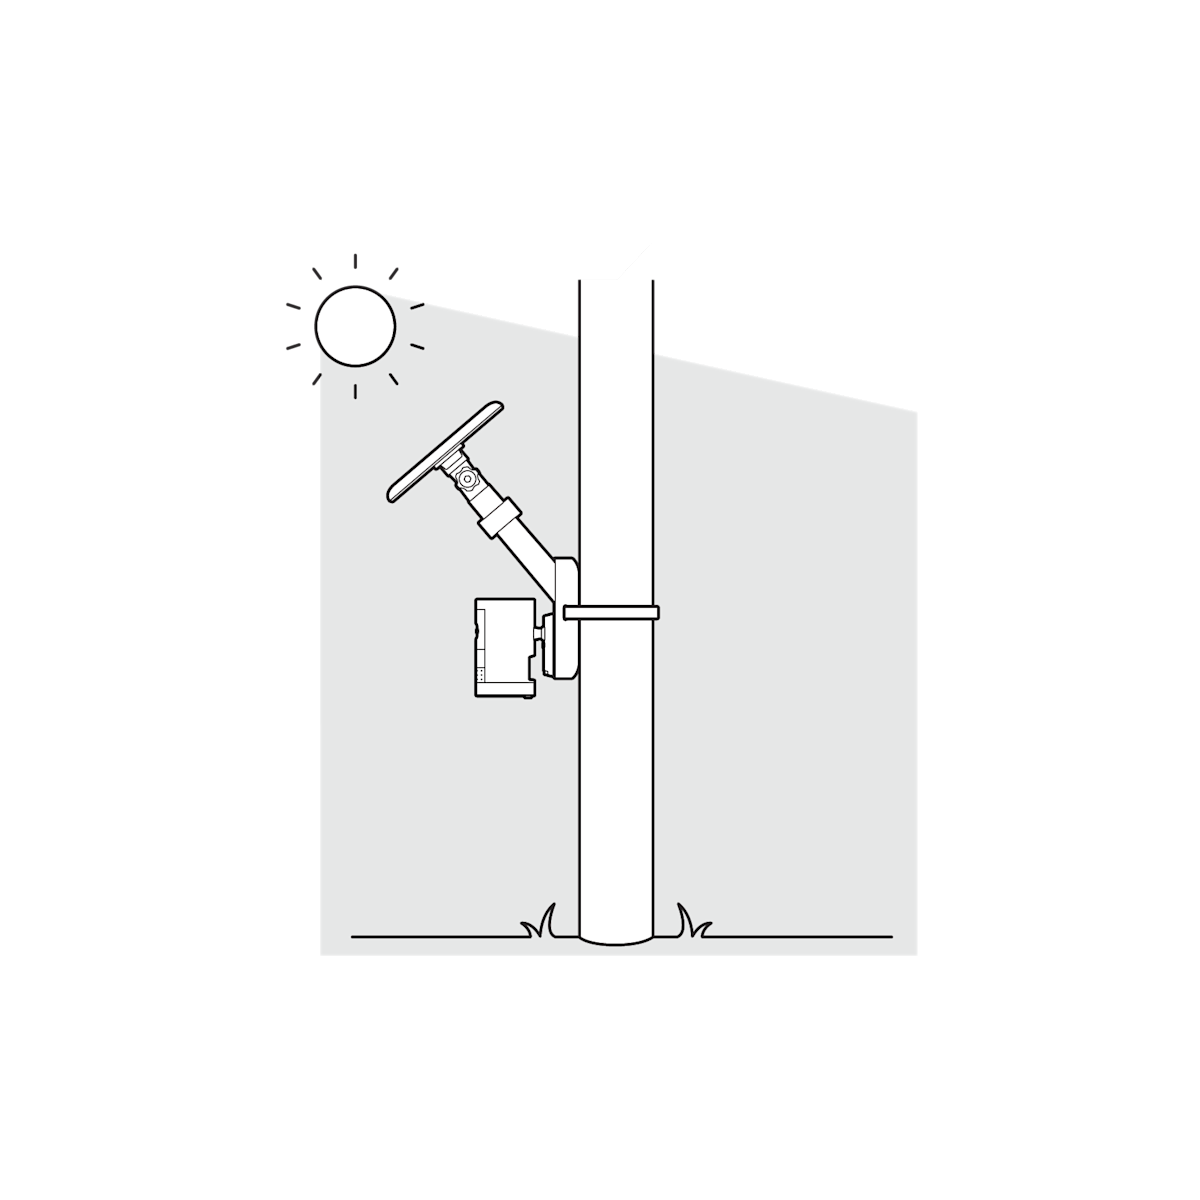
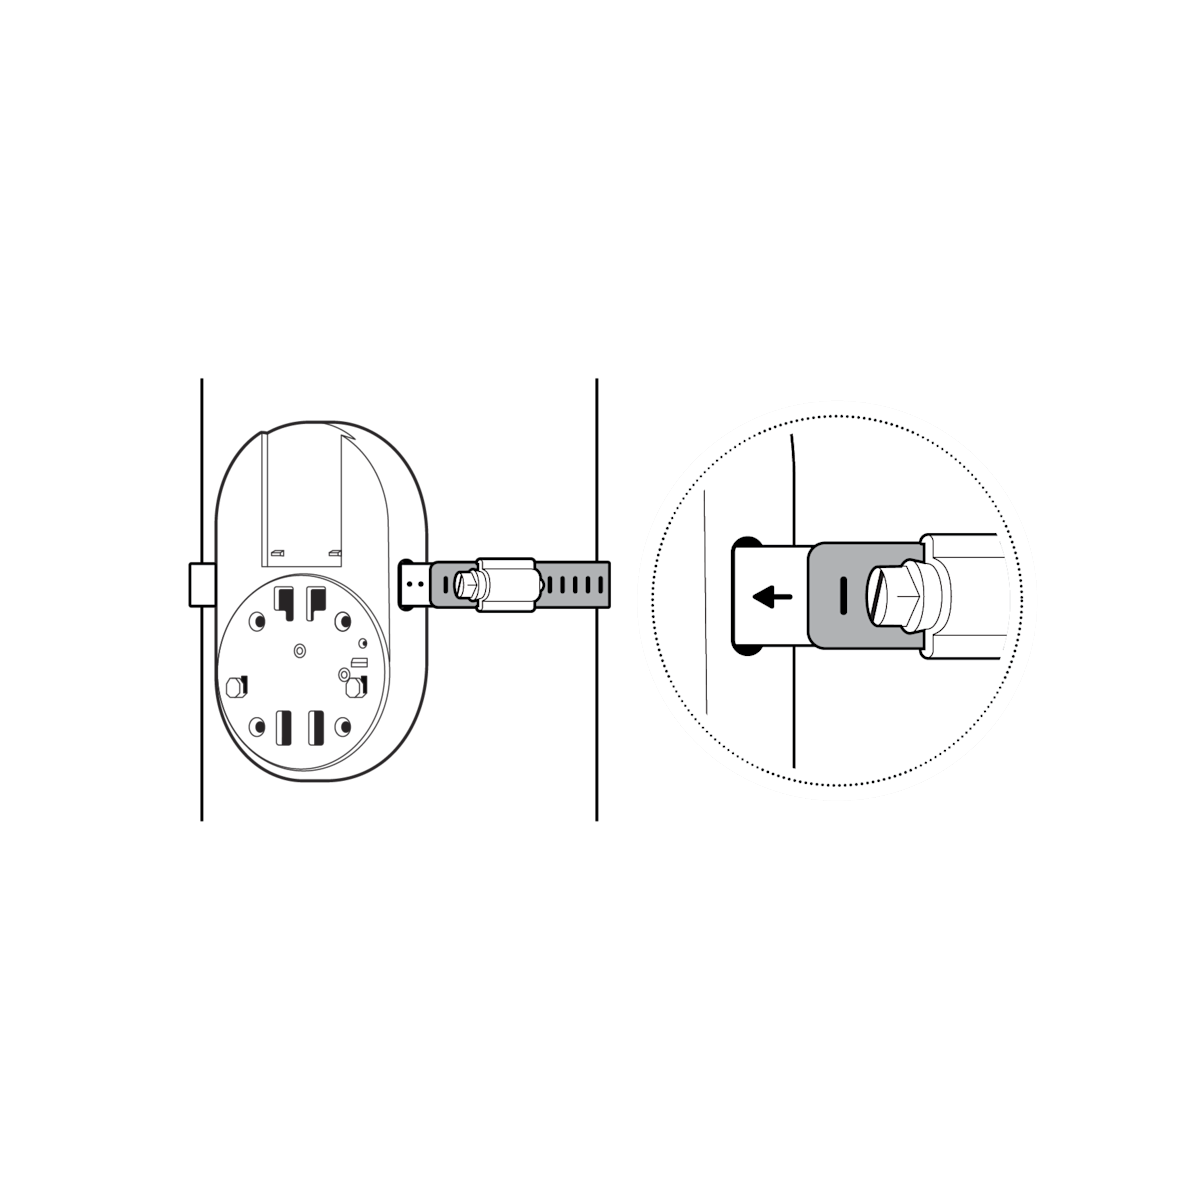
Pole installation

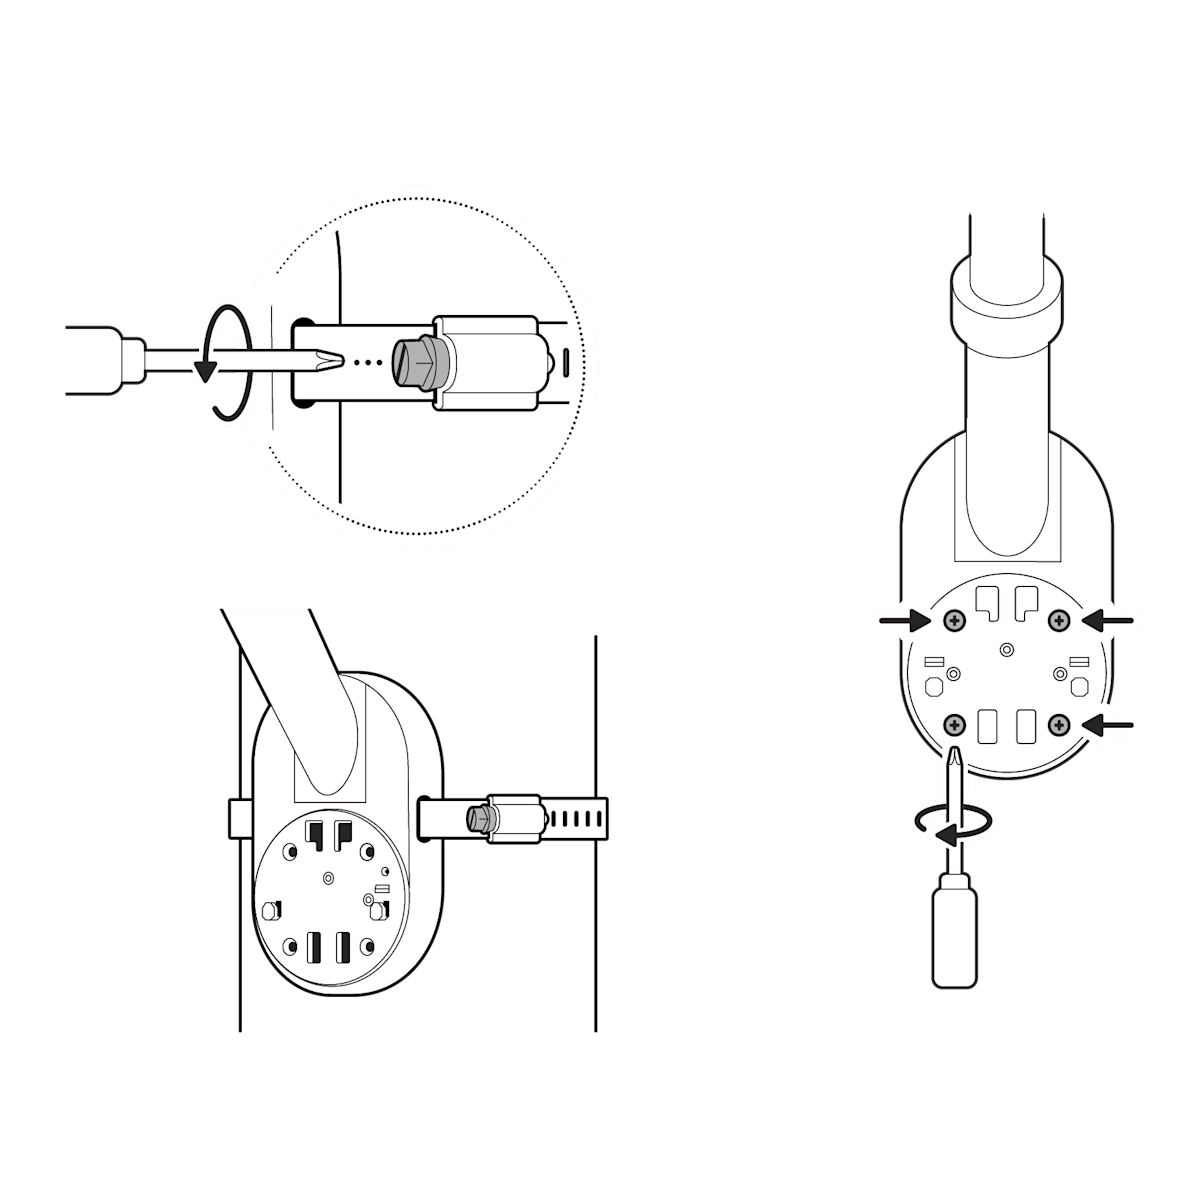
1. Choose the right hose clamp.
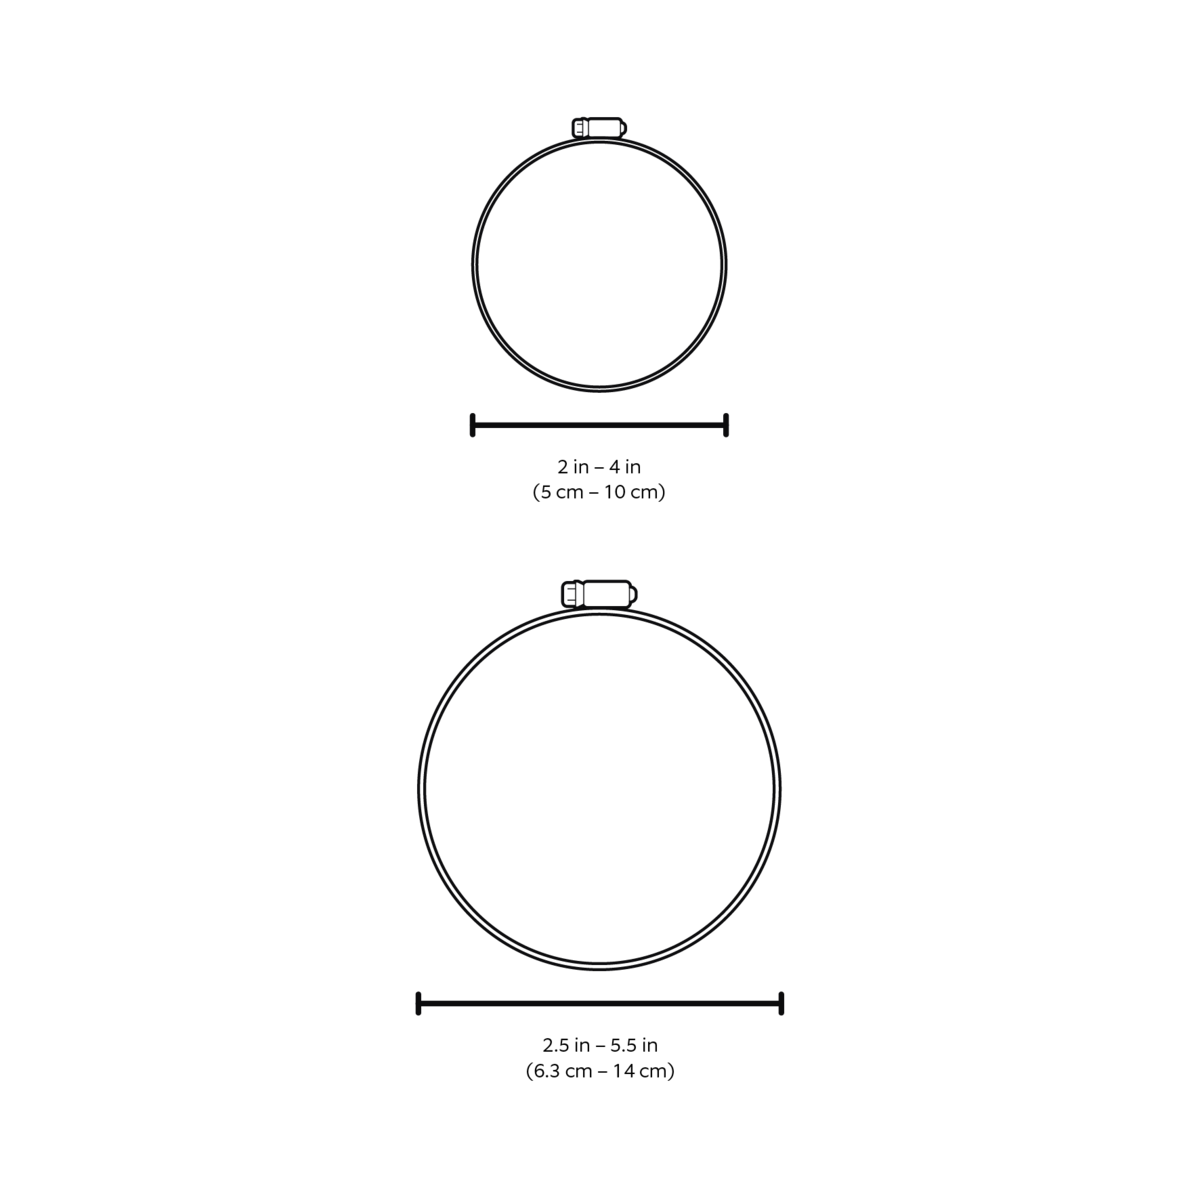
2. Remove the silicone plugs from both sides of the mount.
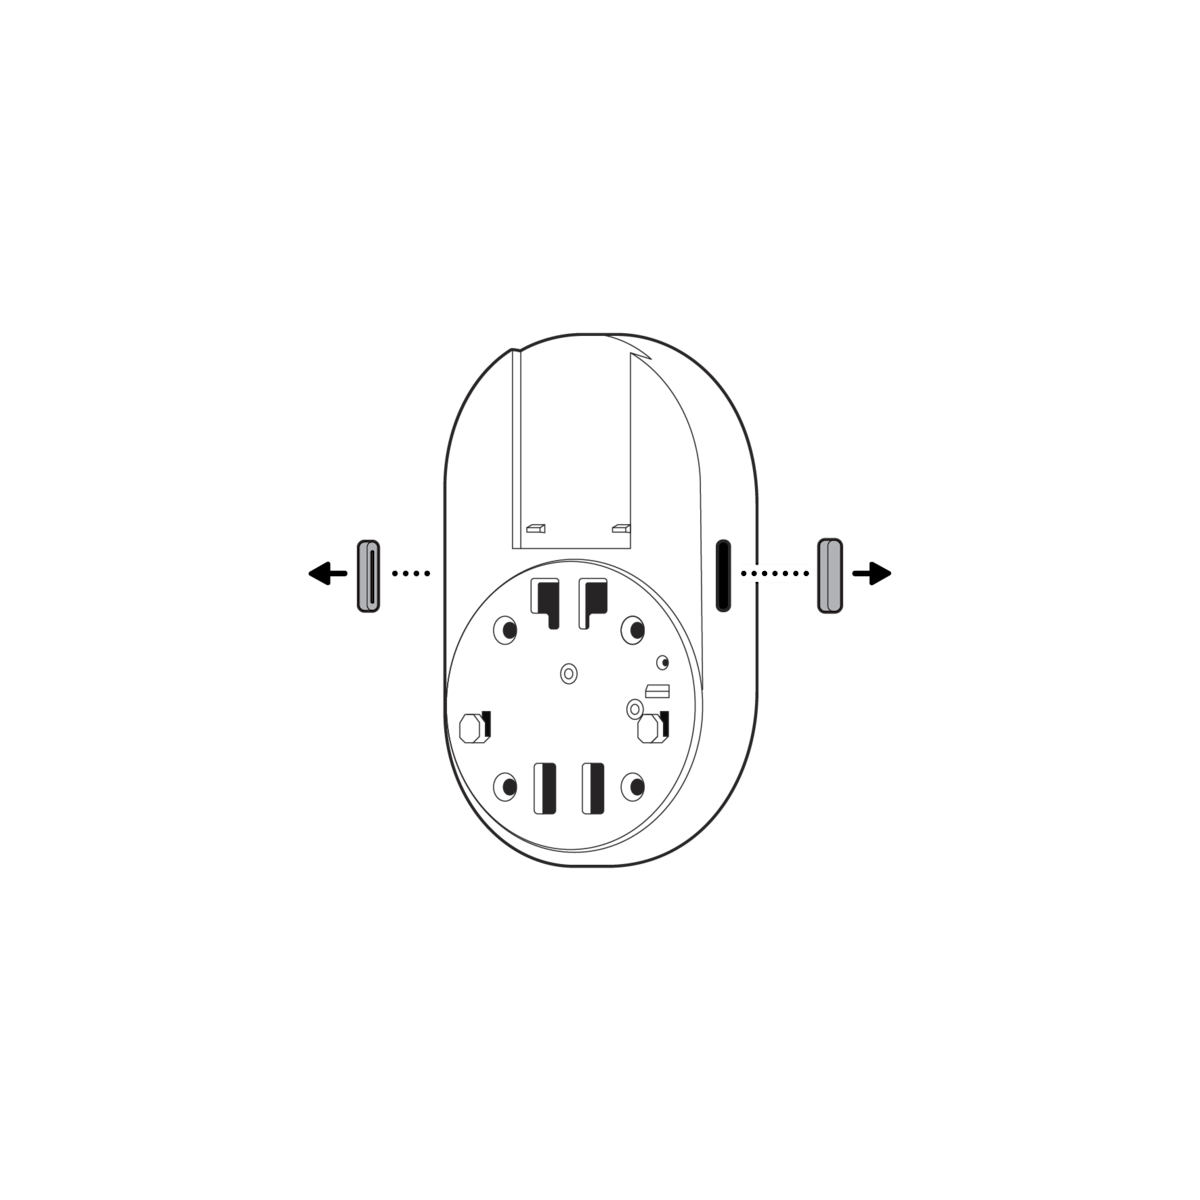
3. Loop the hose clamp through the side slots of the mount until the fastener head reaches the side of the mount.
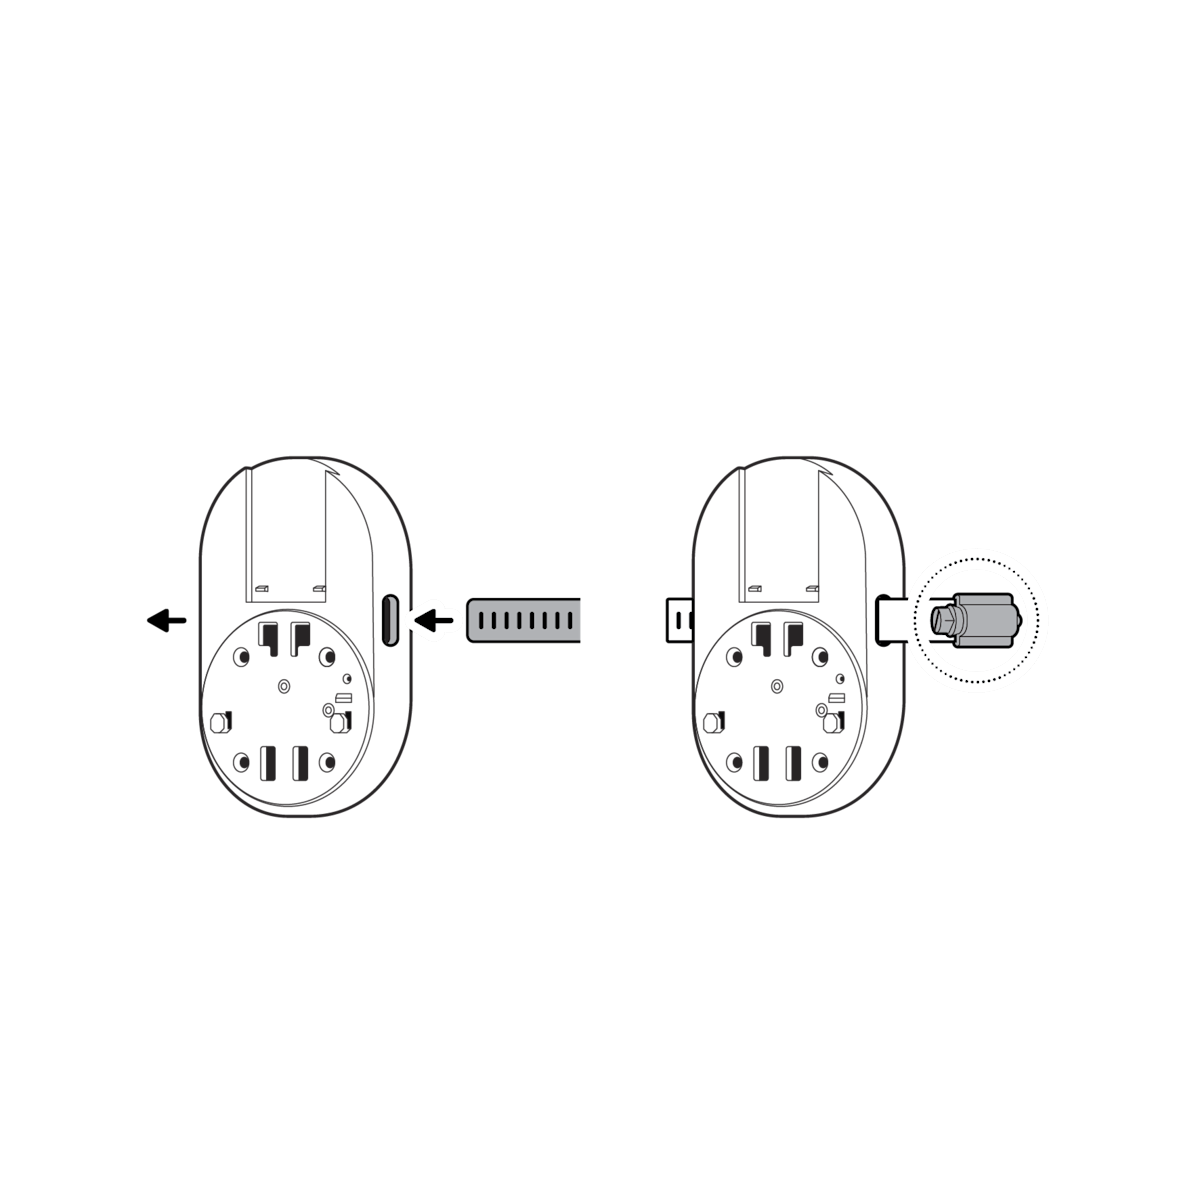
4. Close the clamp around the pole at your desired height by inserting the clamp into the fastener head.
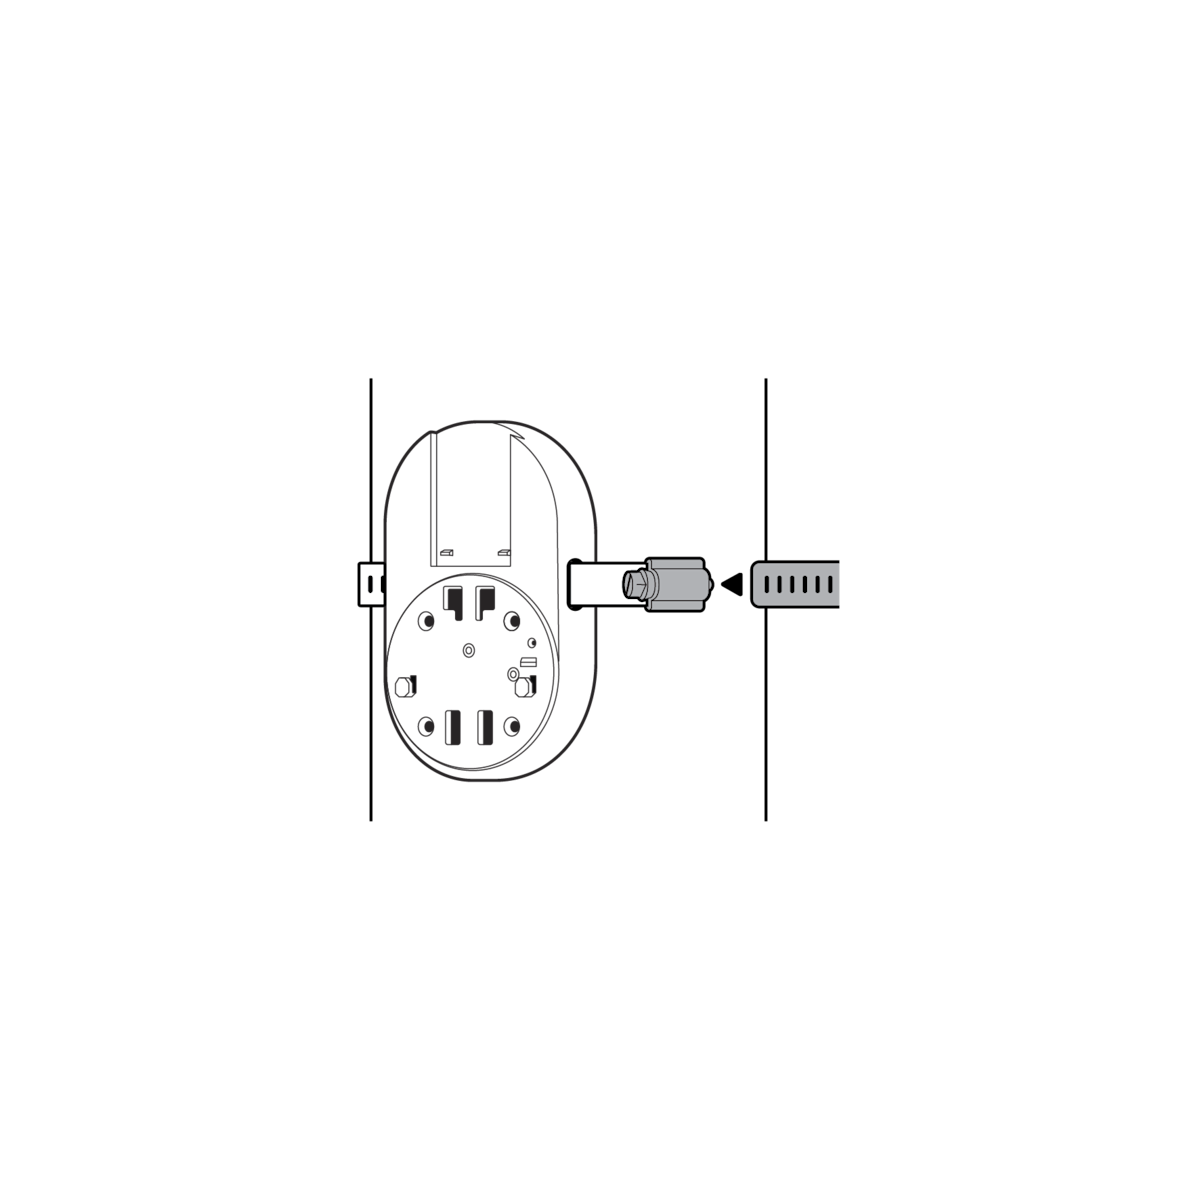
5. Turn the screw with a screwdriver to tighten the clamp.
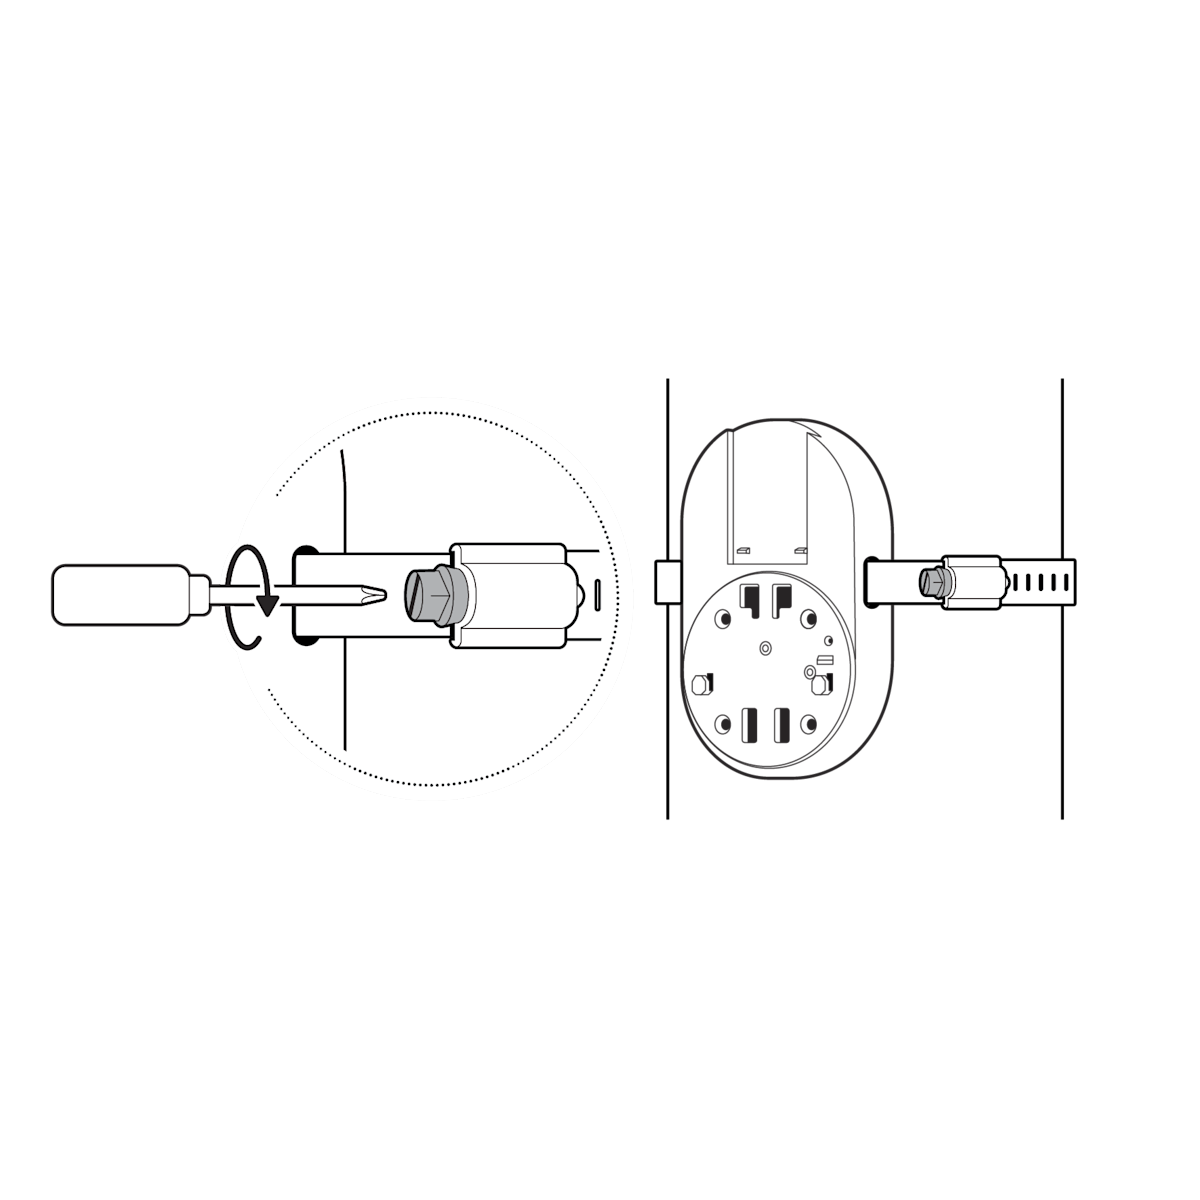
NOTE: For best results, use an electric screwdriver. Tightening too much may damage the pole or the mount.
6. Once the end of the clamp reaches the side of the mount, re-insert and tighten until fully secured.
Wall installation
Use the drilling template for your mount as a guide to mark screw holes on the wall.
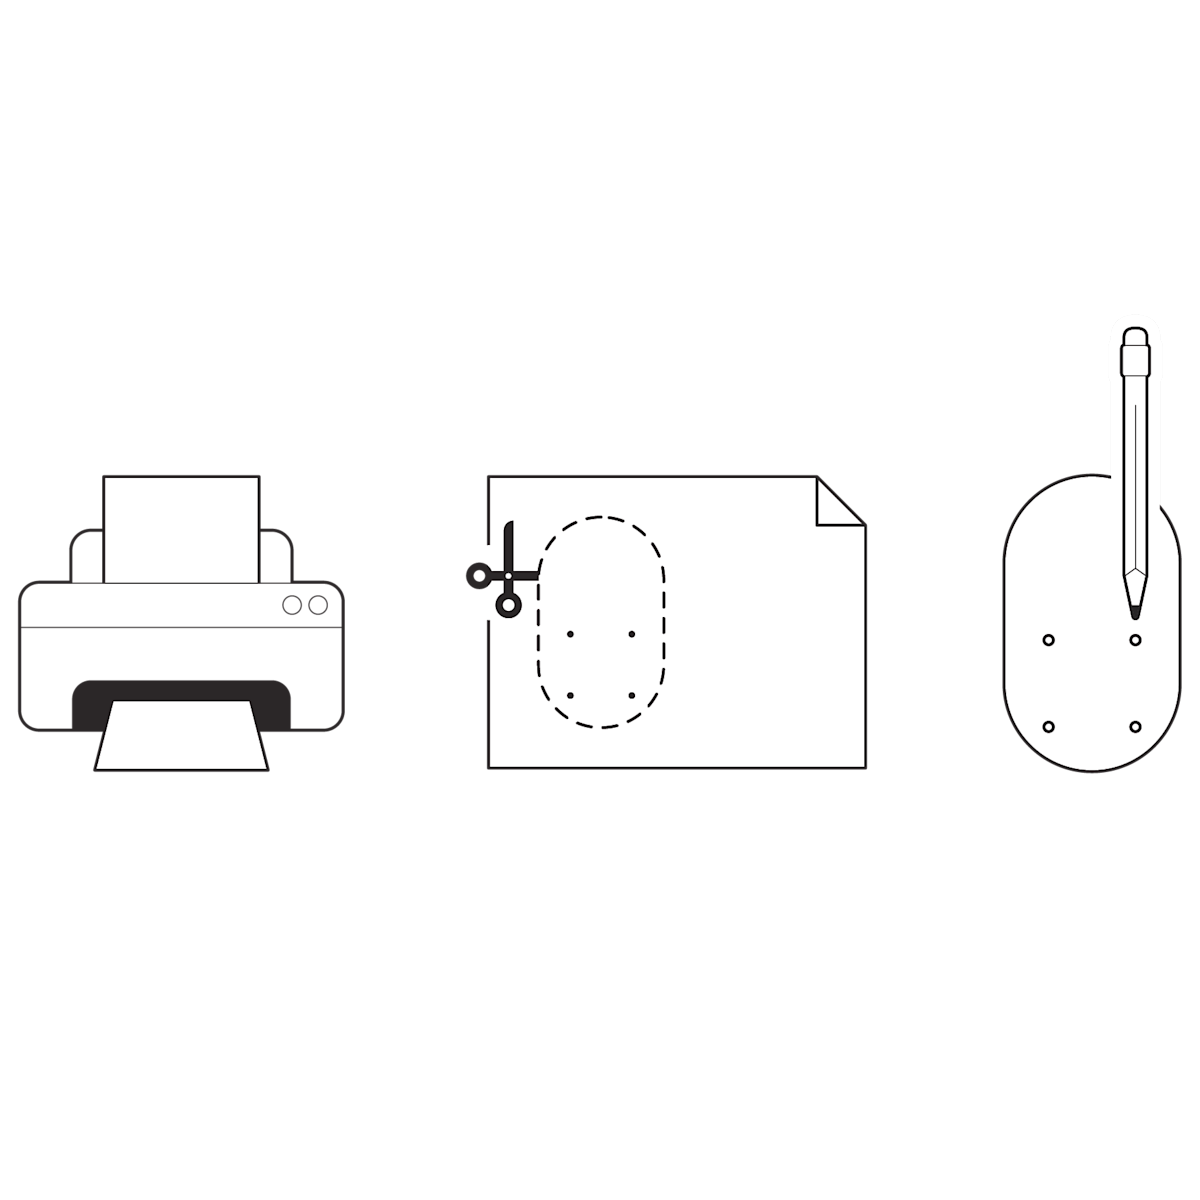
Drilling template
Print page at 100%. If credit card fits here, page size is accurate.
1. Attach the mount using the four included wall mount screws.
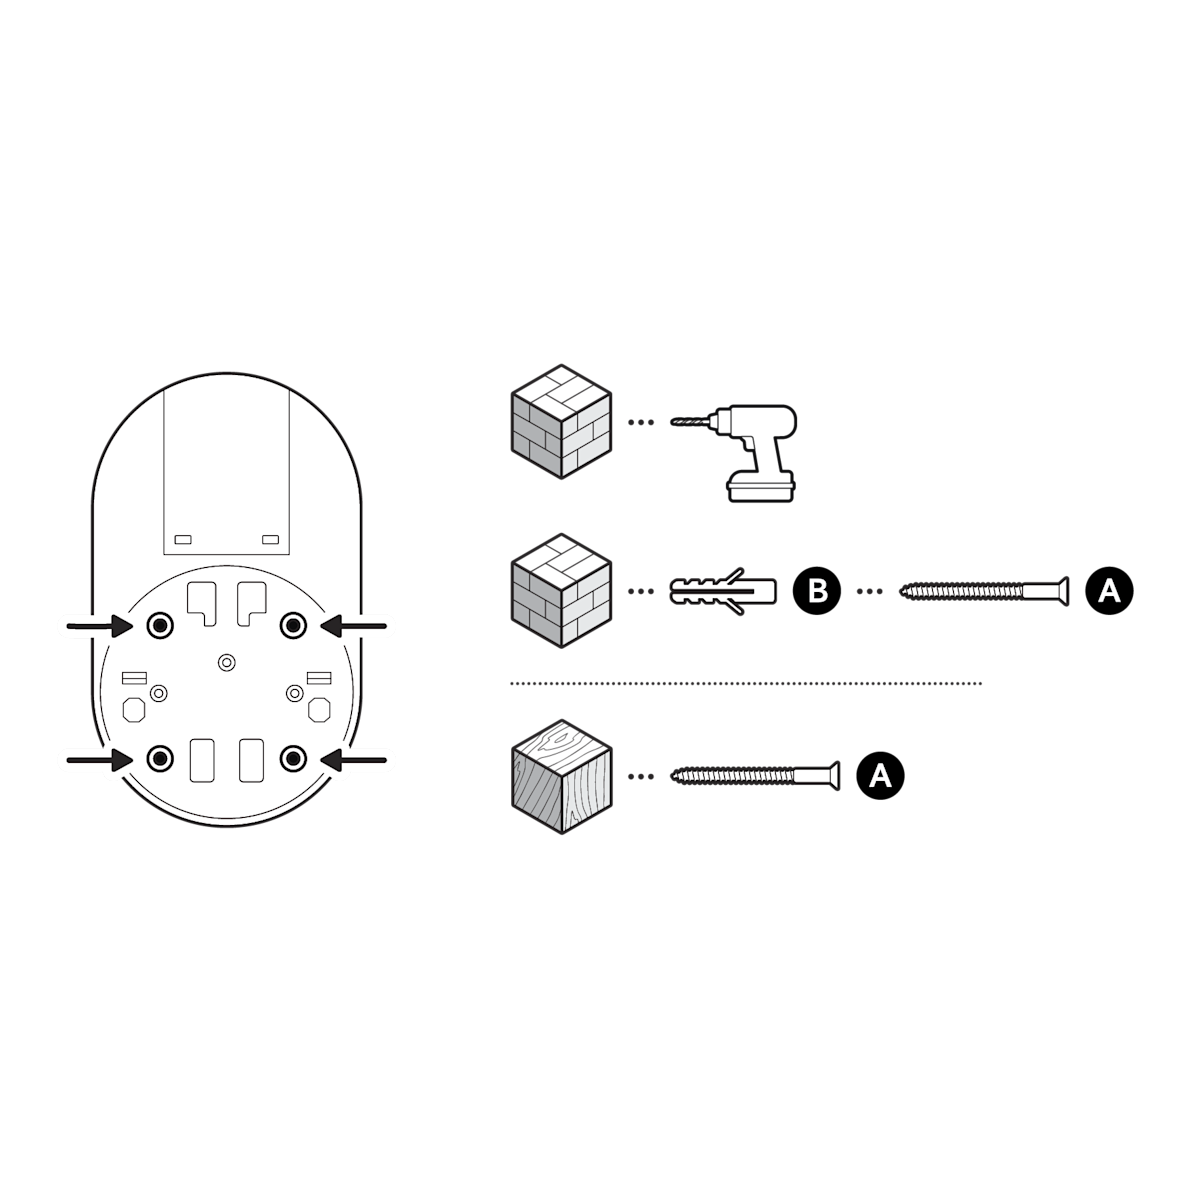
On stucco, brick, or concrete, use a 7/32 in (5.5 mm) masonry bit to drill holes for the included wall anchors.
Mount your solar panel.
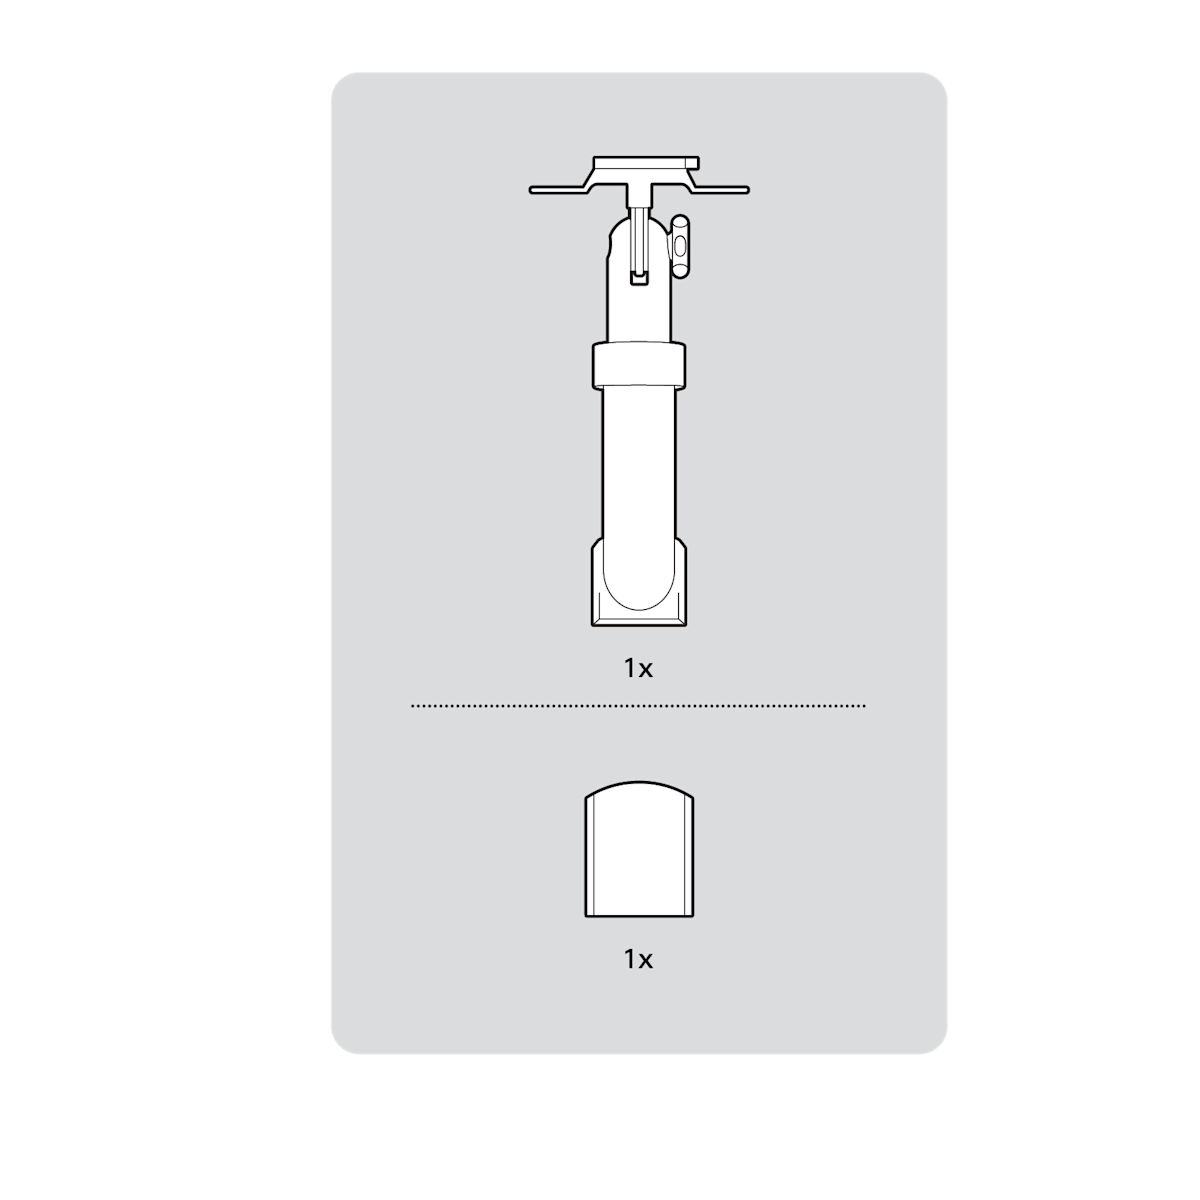
NOTE: If installing without a solar panel, insert the solar mount arm cover until you hear a click.
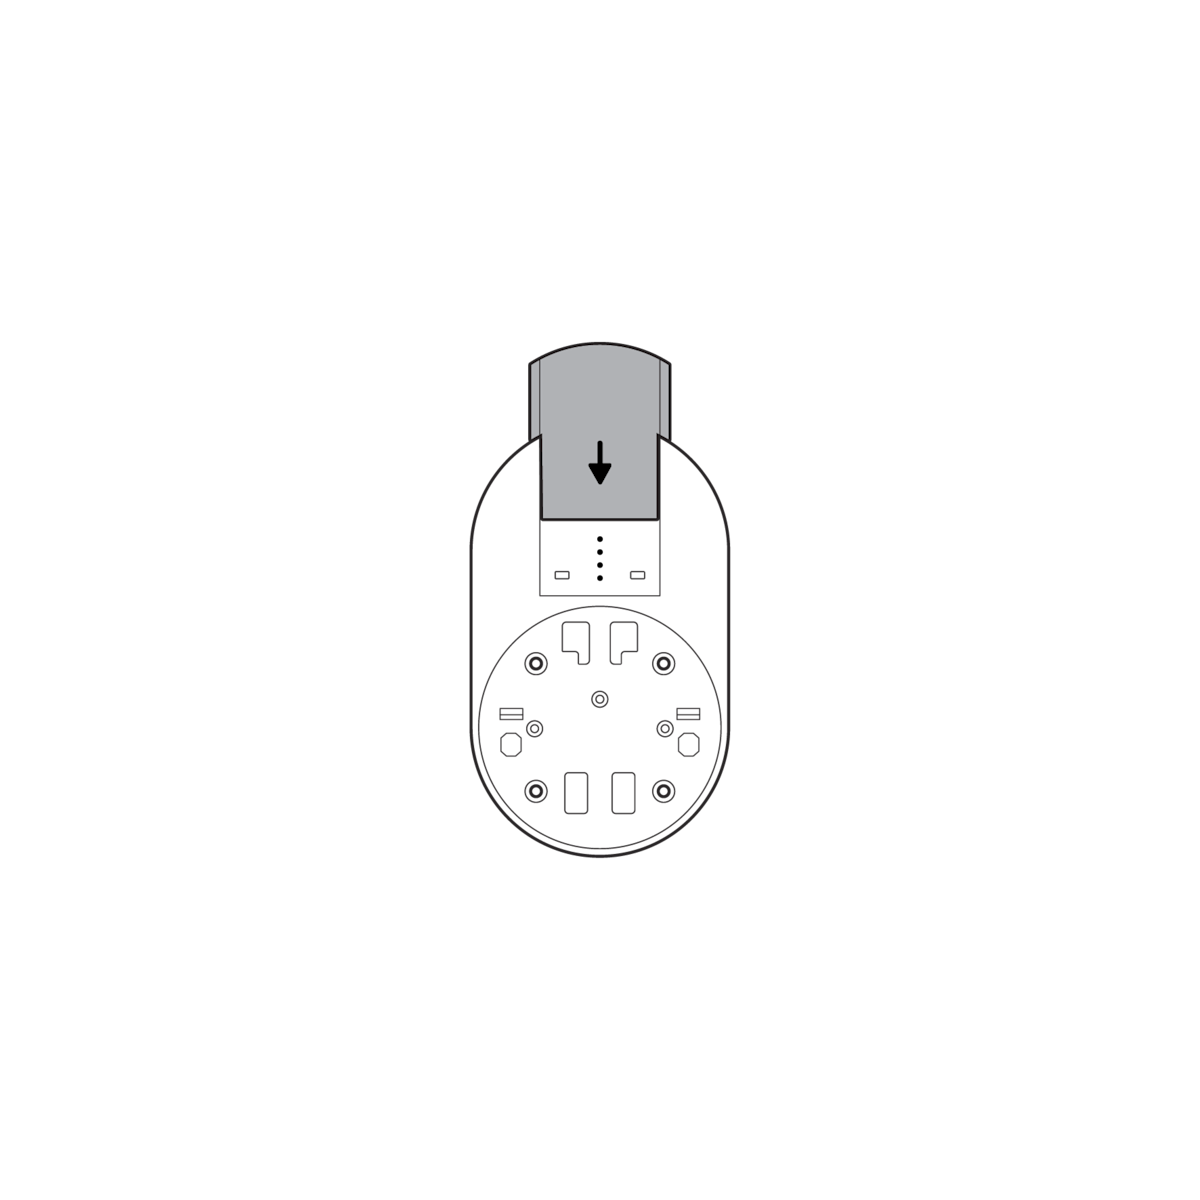
1. Slide the solar panel onto the solar mount arm bracket until you hear a click to attach.

2. Wrap the cable underneath your solar panel, leaving enough length to connect your security camera.
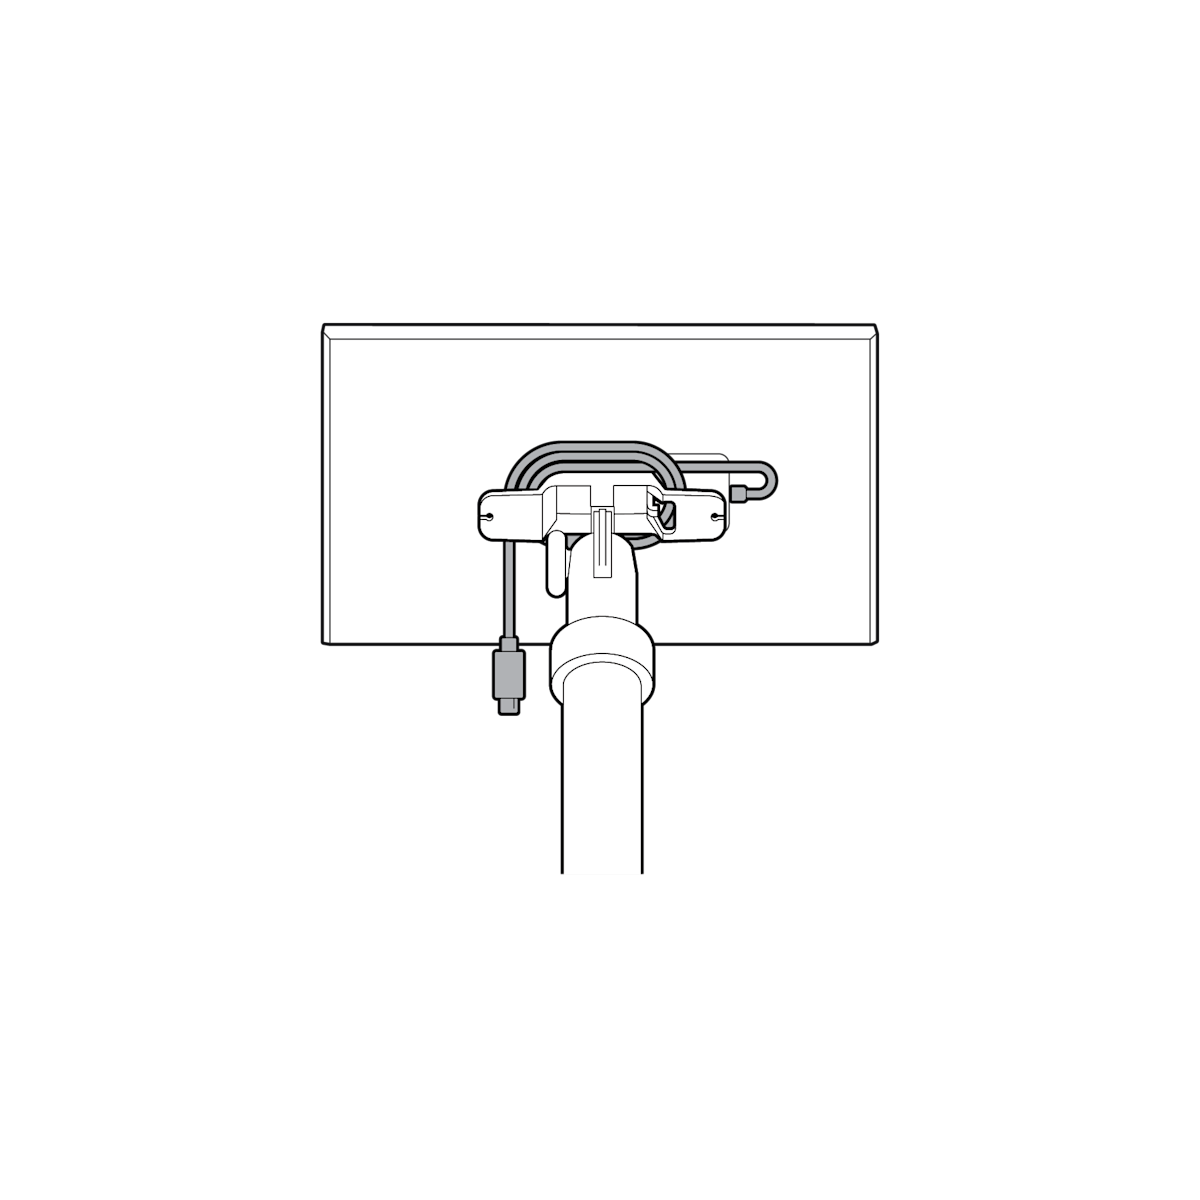
3. Slide the solar mount arm onto the mount until you hear a click to attach.
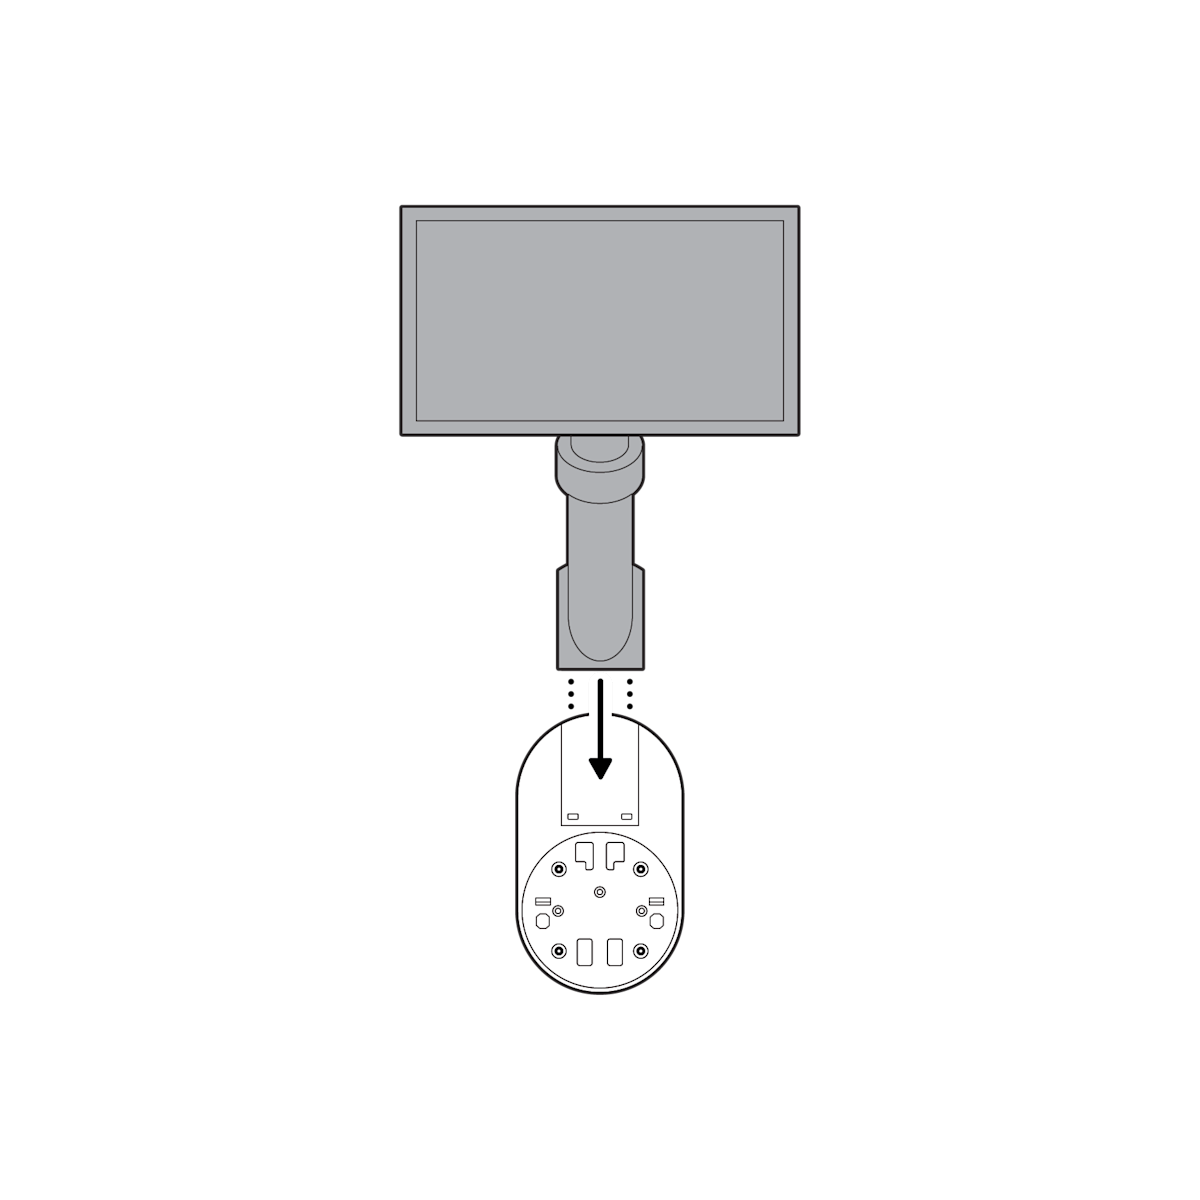
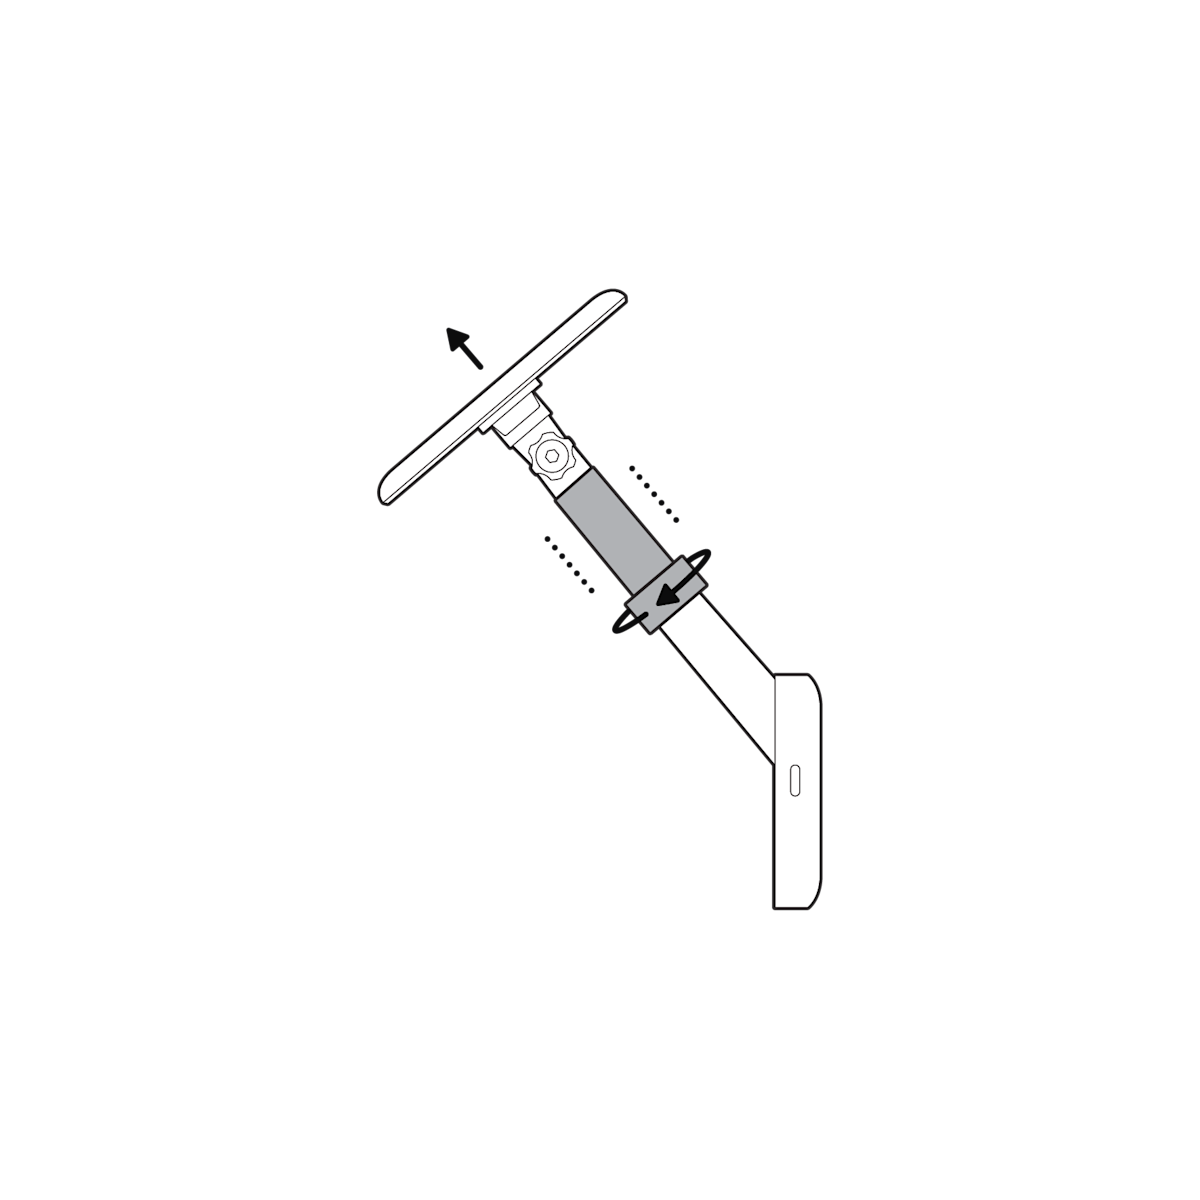
Adjust your solar panel.
Loosen the knob to adjust your solar panel angle, then tighten to secure.

Loosen the ring to extend the mount arm, then tighten to secure.
Plug the power cable into your security camera, ensuring it is fully connected.
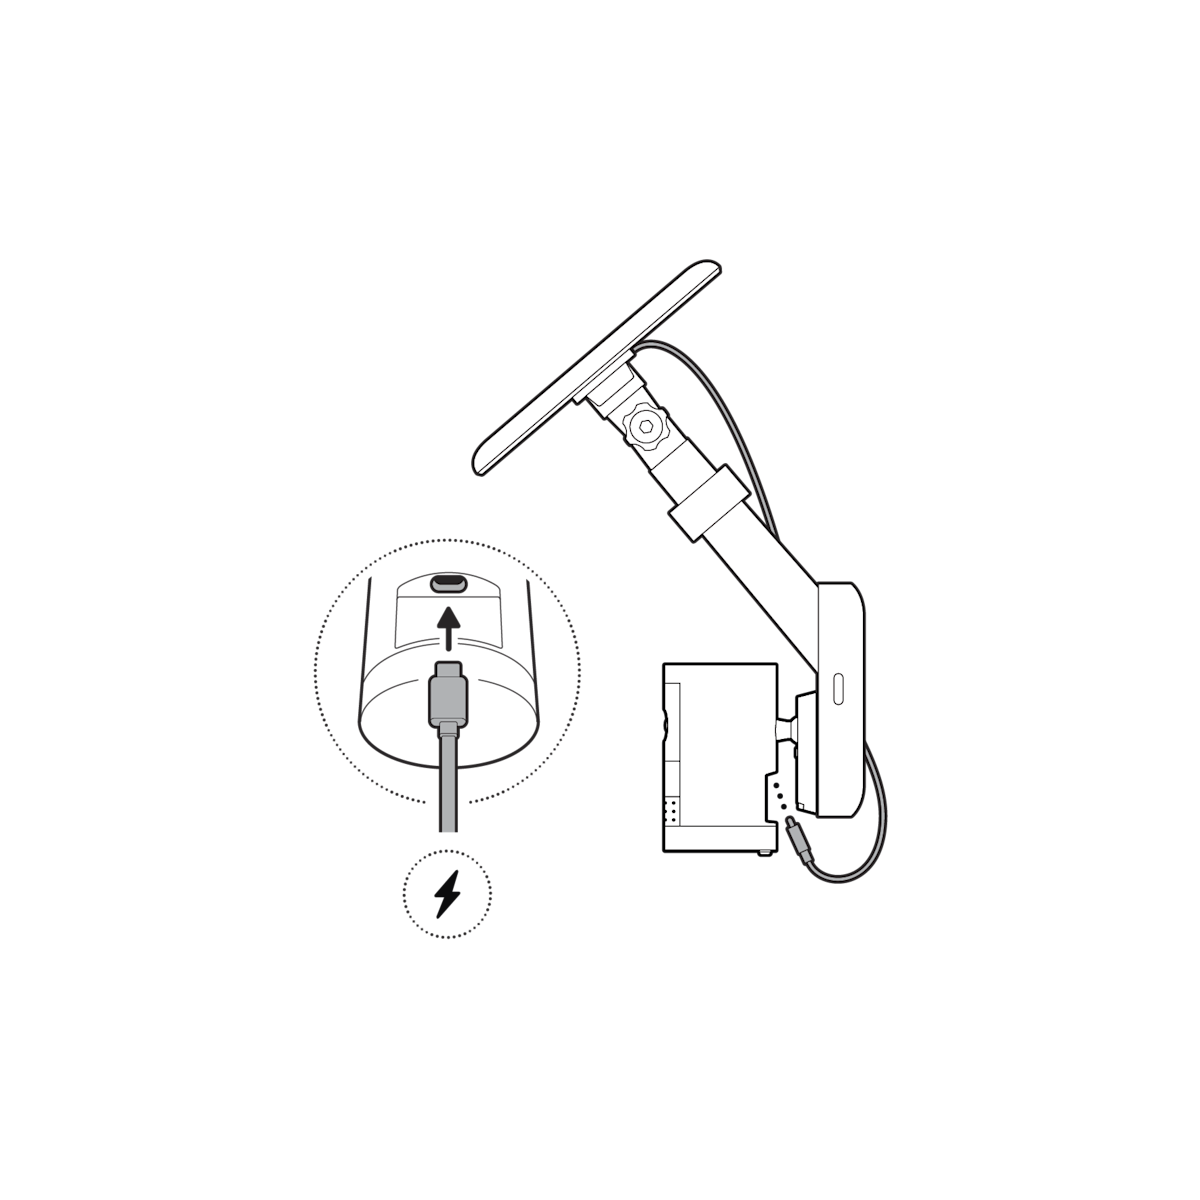
Refer to your solar panel setup guide to select a cable adapter and complete setup.
Removing your solar panel.
1. Untighten and remove the mount from the pole or wall.
2. Press the button behind the mount to release the solar mount arm.
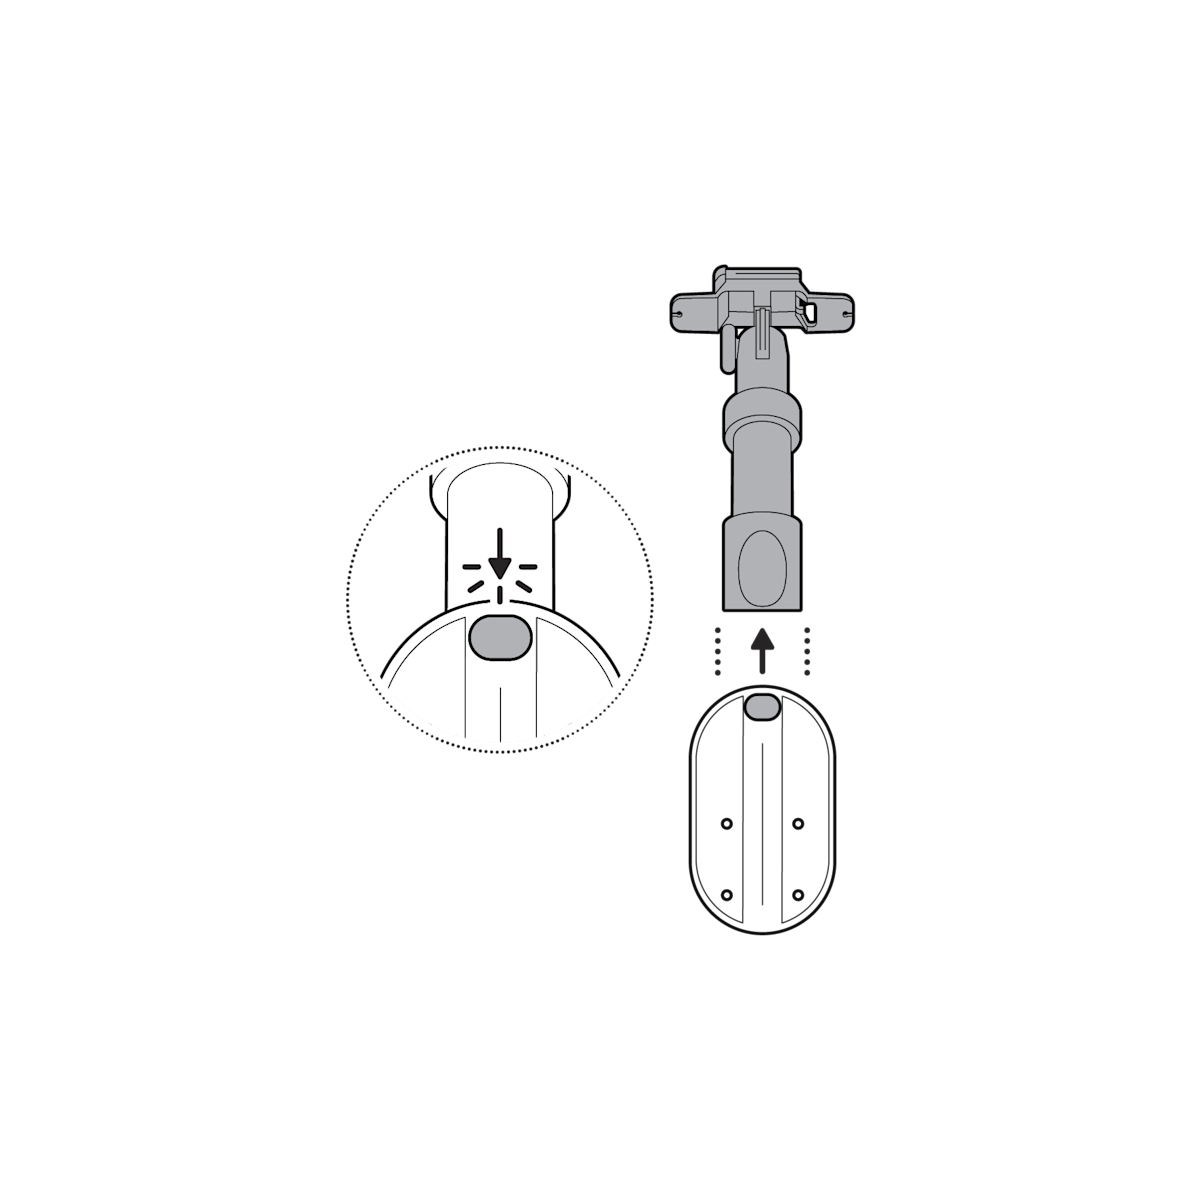
3. Pull the tab underneath the solar mount arm bracket to release your solar panel.
