Hardwired Kit for Cameras Installation Guide
Hardware included:

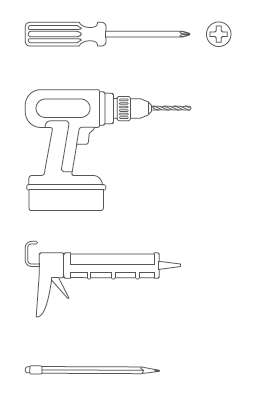
Tools needed:
Use PH2 screw driver to prevent stripping screw.
Junction box
Before you begin installing your Hardwired Kit, make sure that you’re following safety code standards.
WARNING: Risk of electrical shock. Installation by a qualified electrician may be required in your area. Refer to your local laws and building regulations before performing electrical work; permits and/or professional installation may be required by law.
Turn off power at the consumer unit before installing.
- Verify that the supply voltage is correct. Connect product to a 100~240 VAC 50/60 Hz power source.
- The earth wire must be connected to the product. DO NOT INSTALL if a working earth connection is not available.
- Do not connect this product to a dimmer switch or timer.
CAUTION: Risk of fire. Do not install near combustible or flammable surfaces. The Hardwired Kit must be installed on a wall or eave.
1. Turn off power at the consumer unit.

Note: If your power system is classified as OVC III, please check the building "Distribution Panel", Ex switch panel has an installed Surge Protectors. Ensure that the surge protector is an IEC 61051-2 certified Surge Protector to reduce Mains Transient Voltage to Overvoltage Category II (2500 V pk or lower) before connecting to all AC Inputs. If the there is no Surge Protector, do not install Hardwired Kit without one.
2. Feed wire through grommet.

Note: Use a minimum 18AWG or higher round 3-core cable with outer diameter of 6-7 millimetres and core diameter of 0.75-1 millimetres.
3. Tighten wire fastener screws.
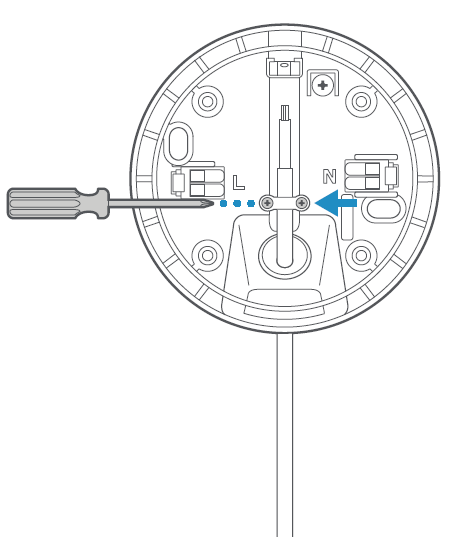
WARNING: The pressing plate should be over the cable insulation, and not over the individual wires.
4. Use level and mark screw holes.
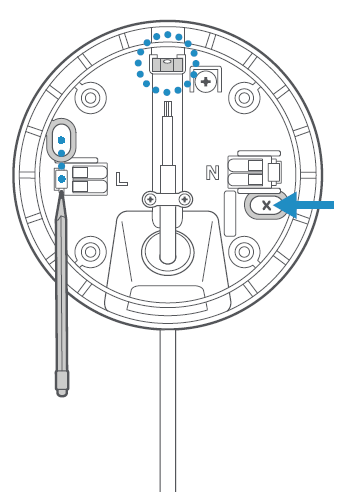
5. Install junction box.
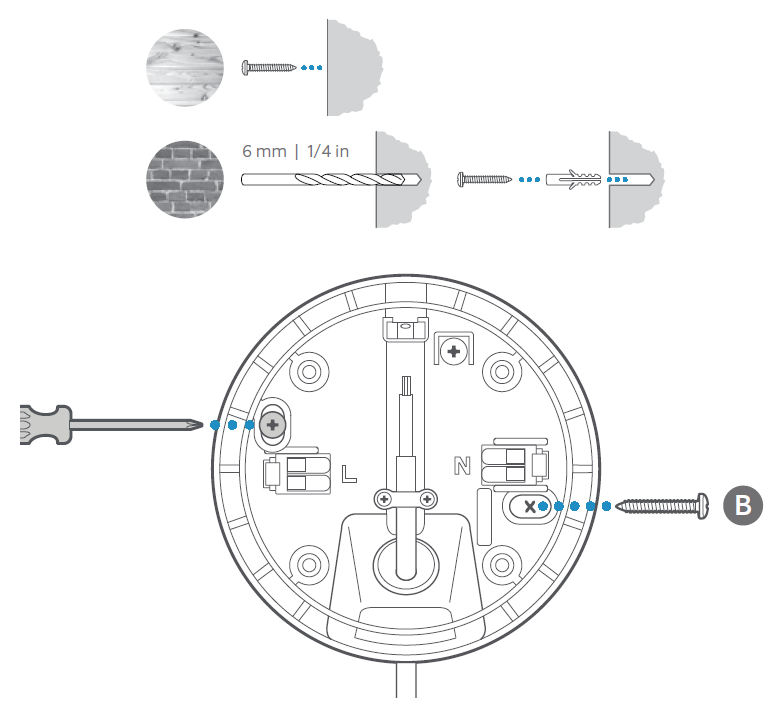
6. Cover screws with rubber caps.
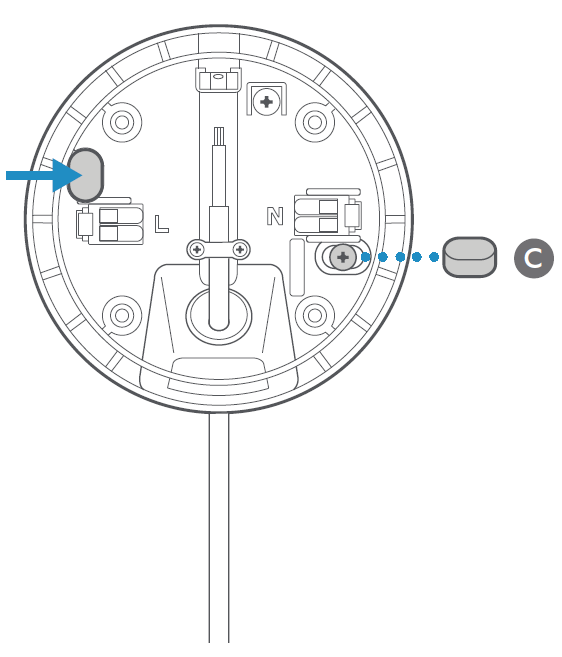
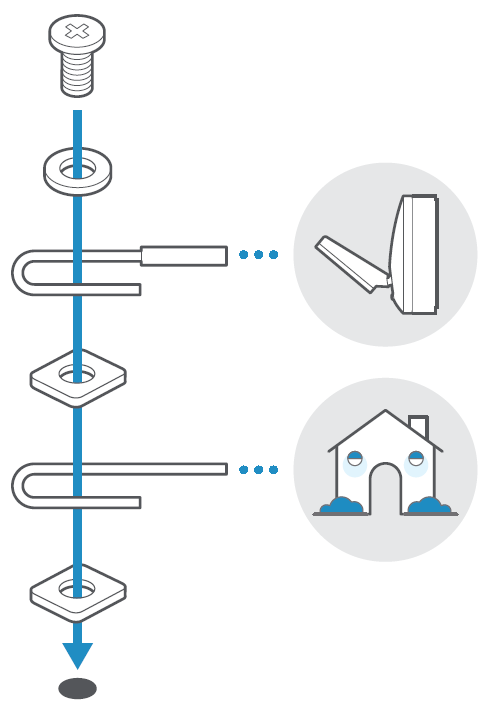
Optional: Use the built-in hooks to hold the S-hook.
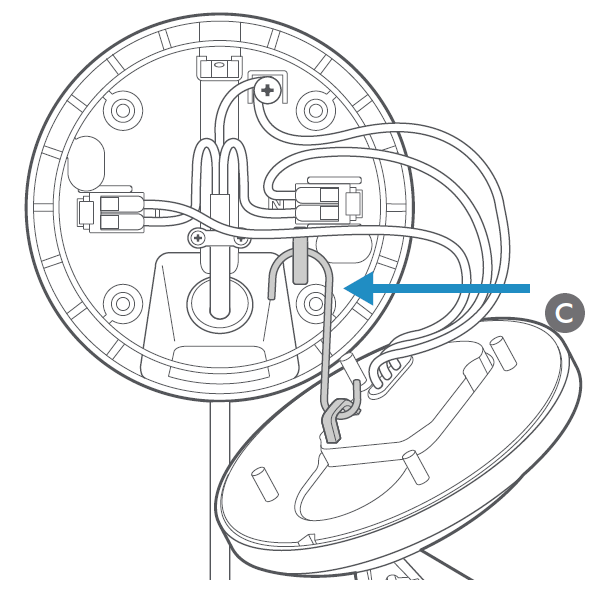
7. Connect wires.
Fasten earth screw with a minimum torque of 0.4N/m.
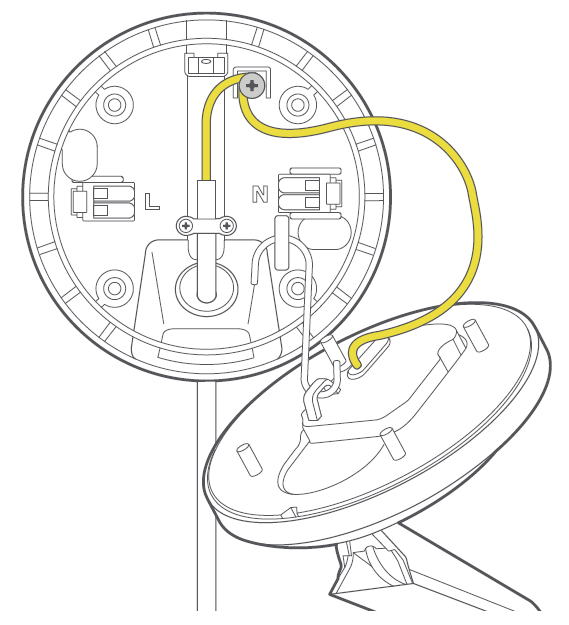
Connect the brown (L) and blue (N) wires.
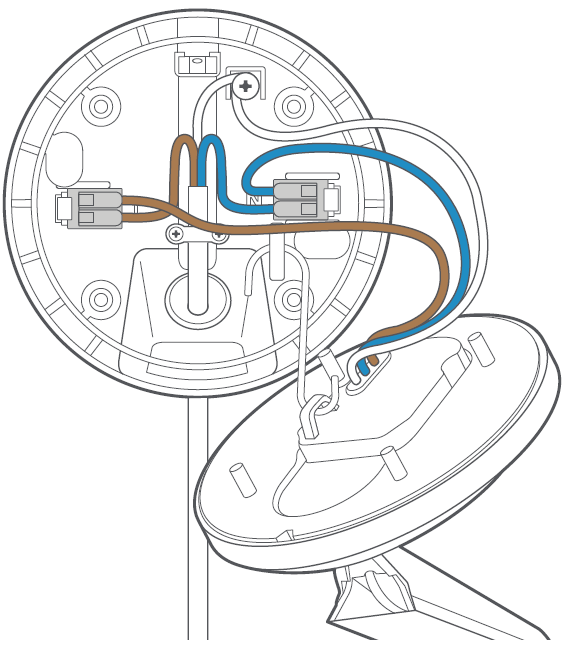
Note: If you ever need to remove the wires:
Remove the brown (L) and blue (N) wires. Then, remove the yellow wired mount bonding conductor wire and the home protective earthing conductor wire.
WARNING: Please follow standard electrical code in your country. Depending on the age of the home, the wires may not match the colours shown. Consult an electrician if you are unsure.
8. Tuck wires and install wired mount.
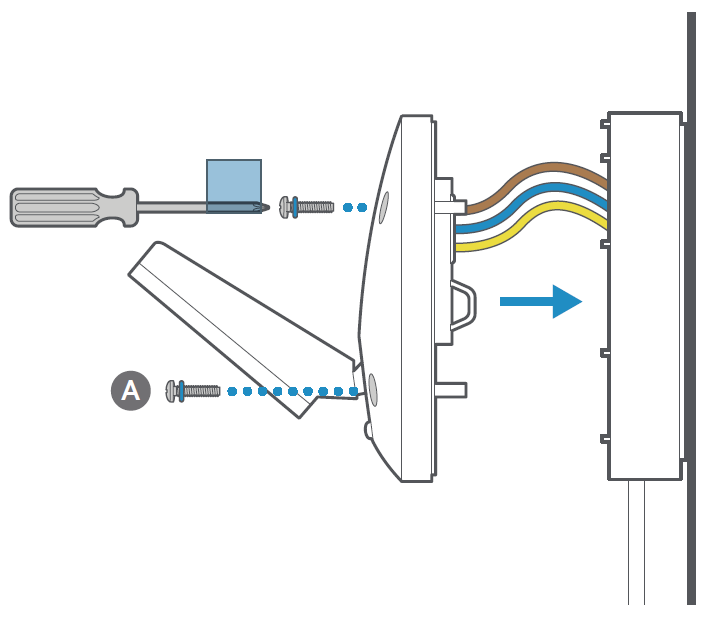
9. Tighten screws until fully sealed.
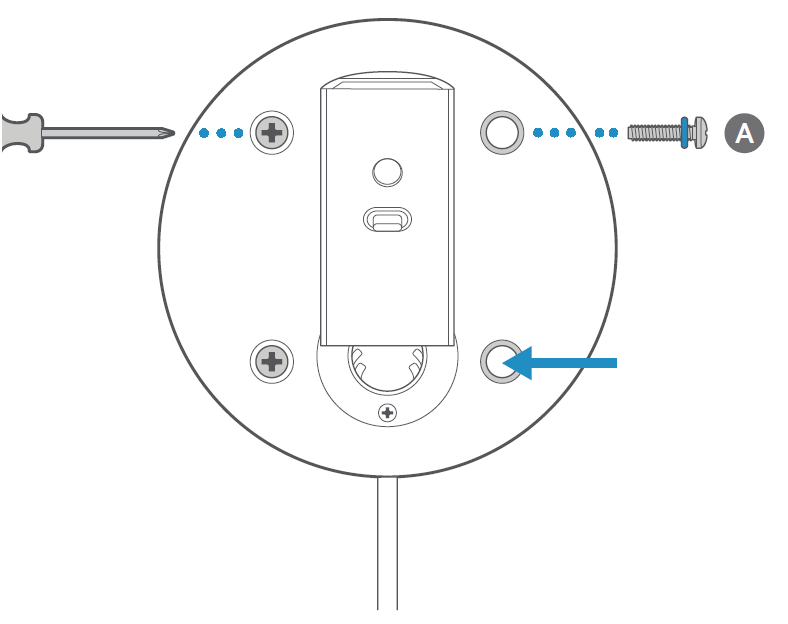
Then, tighten the screws into the wired mount until the foam backing fully seals the junction box to prevent water from entering. (1.37-1.47N/m of torque force)
10. Apply a weatherproof silicone caulk or sealant around the outside where the wired mount and wall meet to prevent water from entering the junction box.
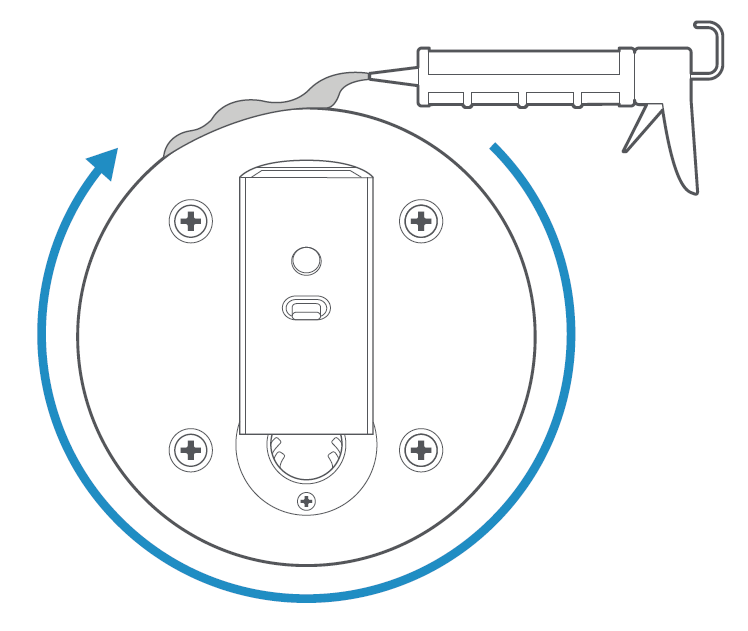
11. Apply cosmetic screw plugs.

For Spotlight Cam Pro or Plus
Choose a location.
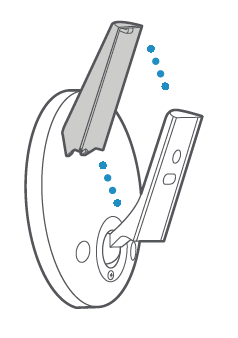
1. Remove weather cover.
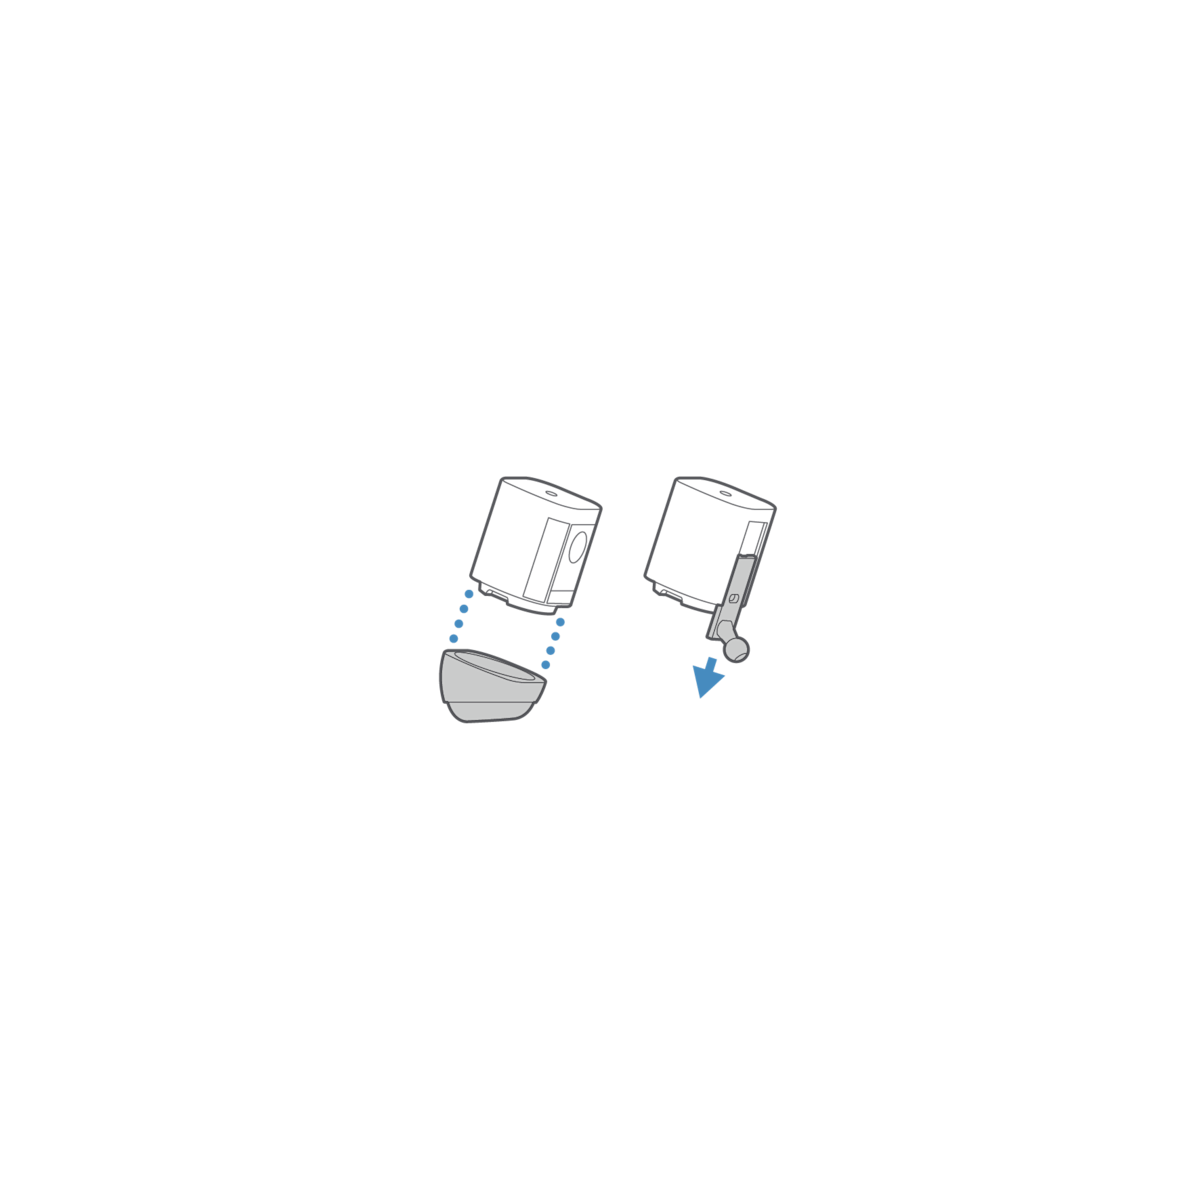
2. Remove the battery cover and camera backplate.
Twist the cover counter-clockwise and slide out the backplate.
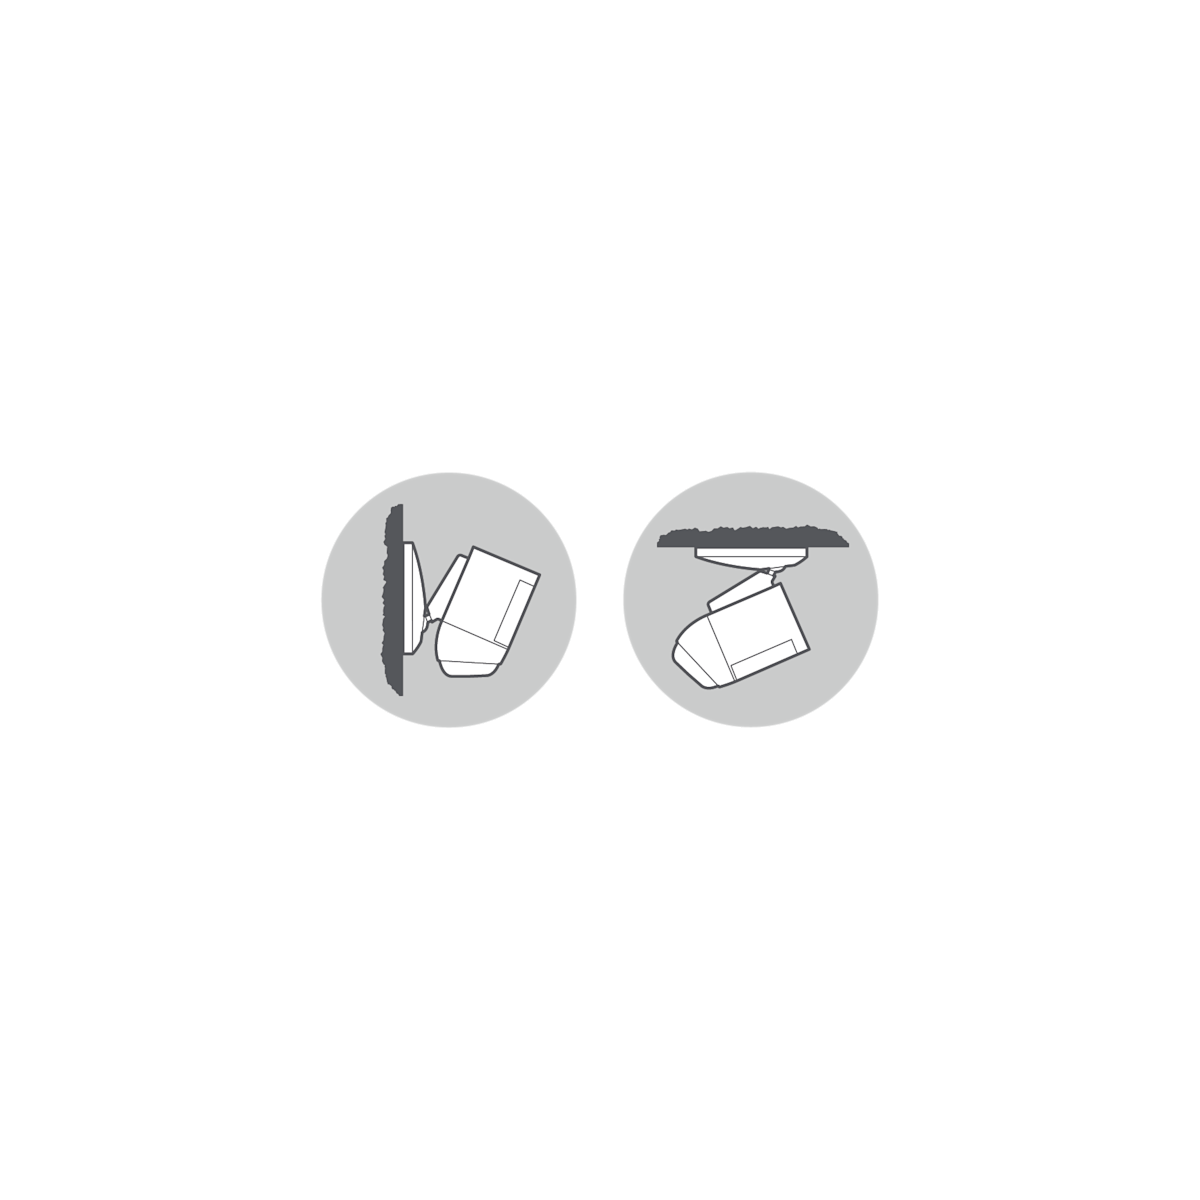
3a. For wall installation
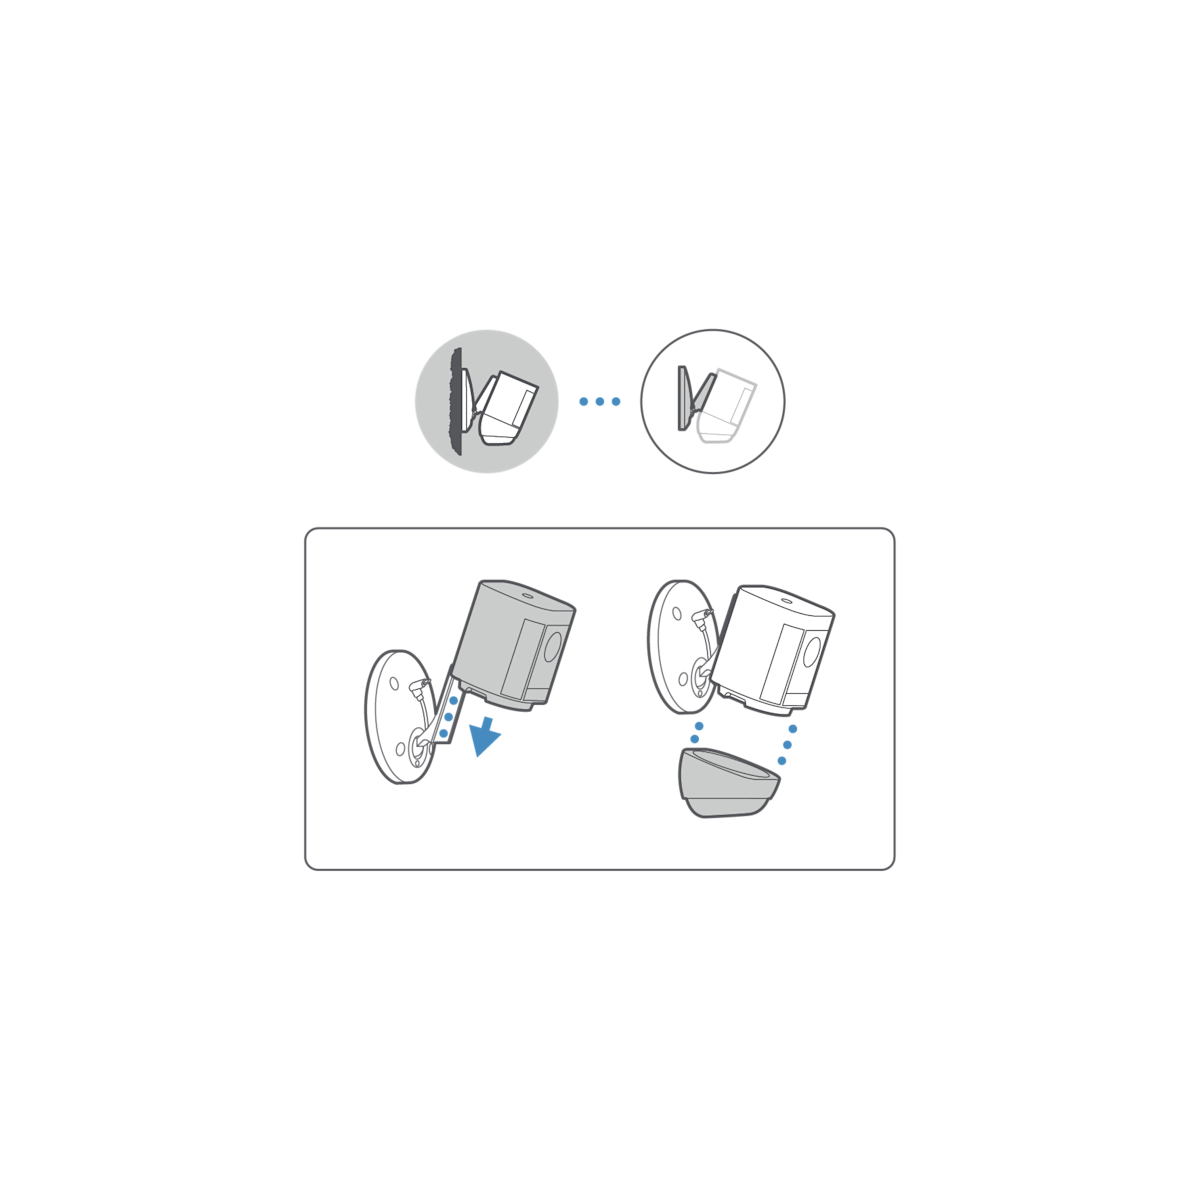
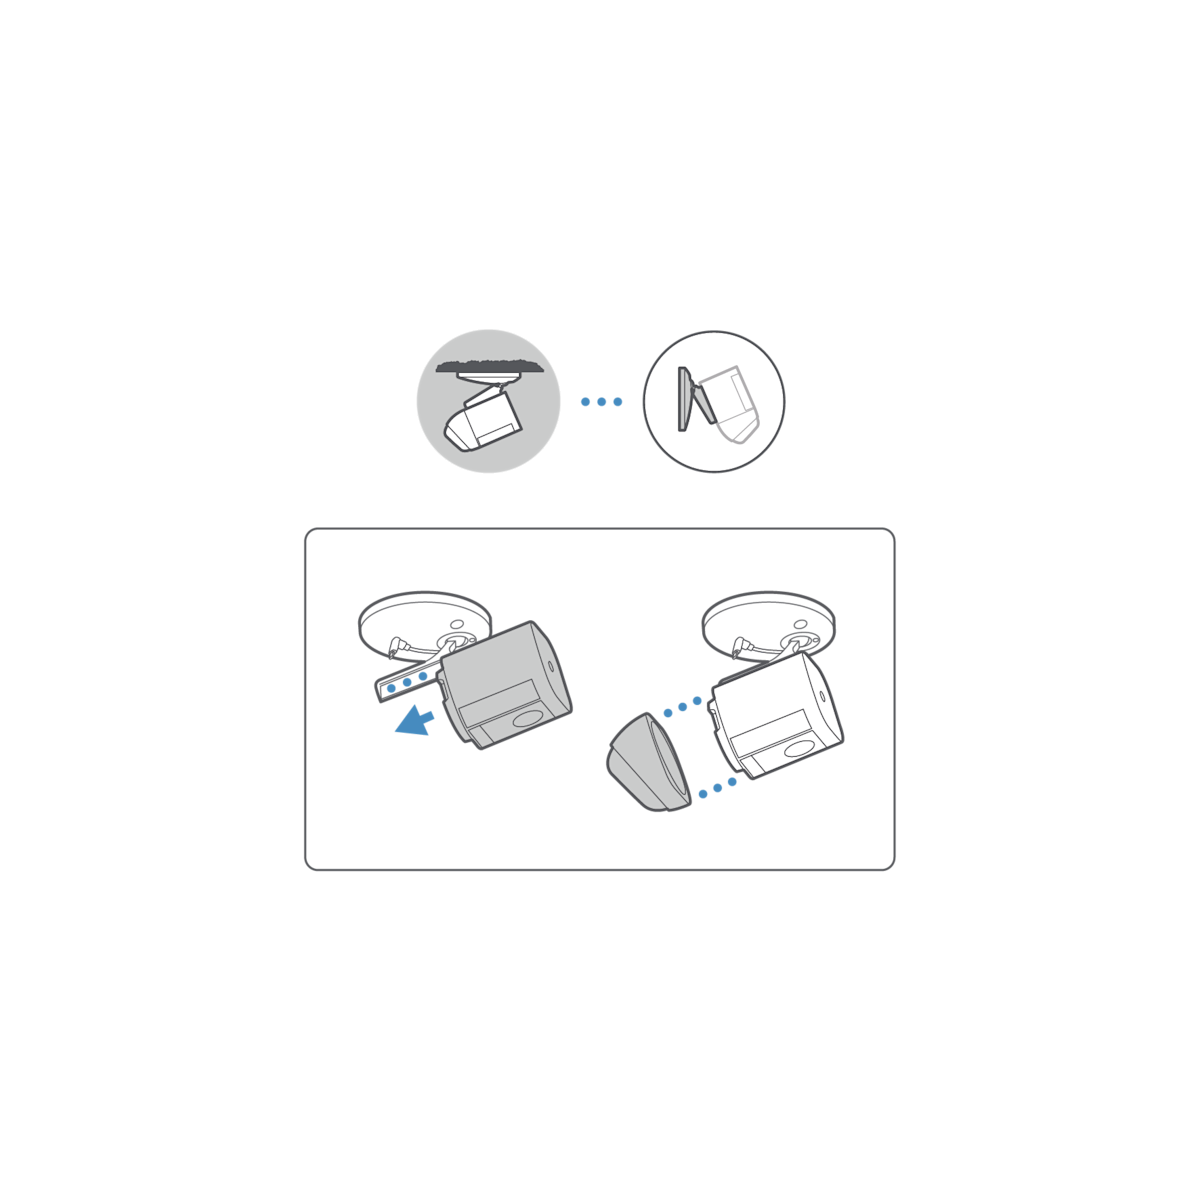
3b. For ceiling installation
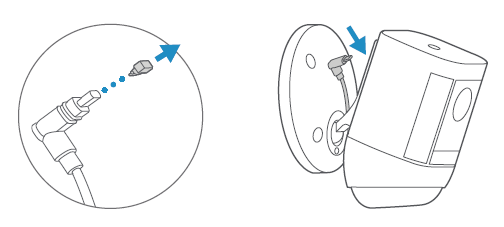
4. Connect USB-C cable.
Plug the USB-C cable in to your camera's USB-C port.
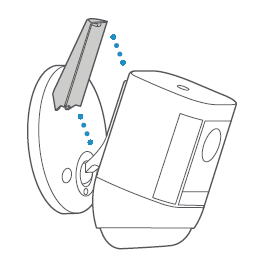
5. Attach weather cover.
Snap into place to cover exposed cables.
5. Adjust the camera angle.
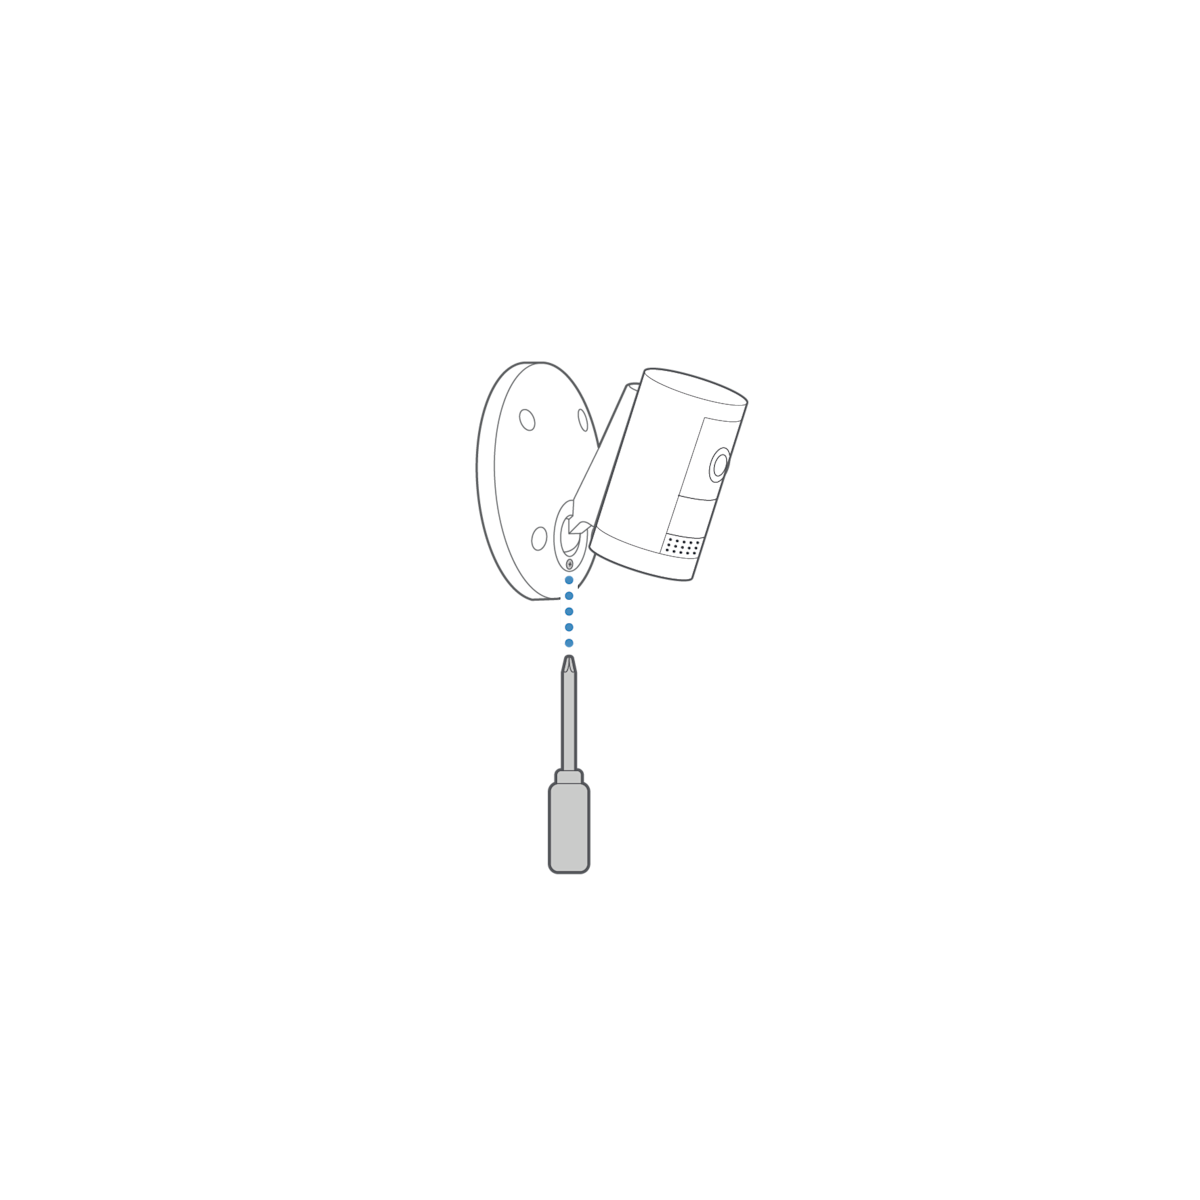
Tighten the ball joint screw to secure the camera in place.
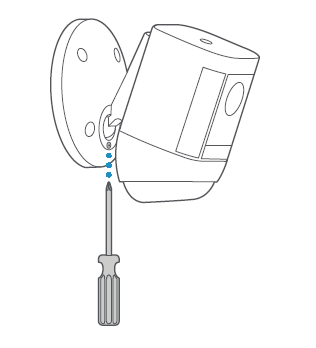
For Outdoor Cam Plus and Stick Up Cam Pro
1. Unclasp the camera mount.
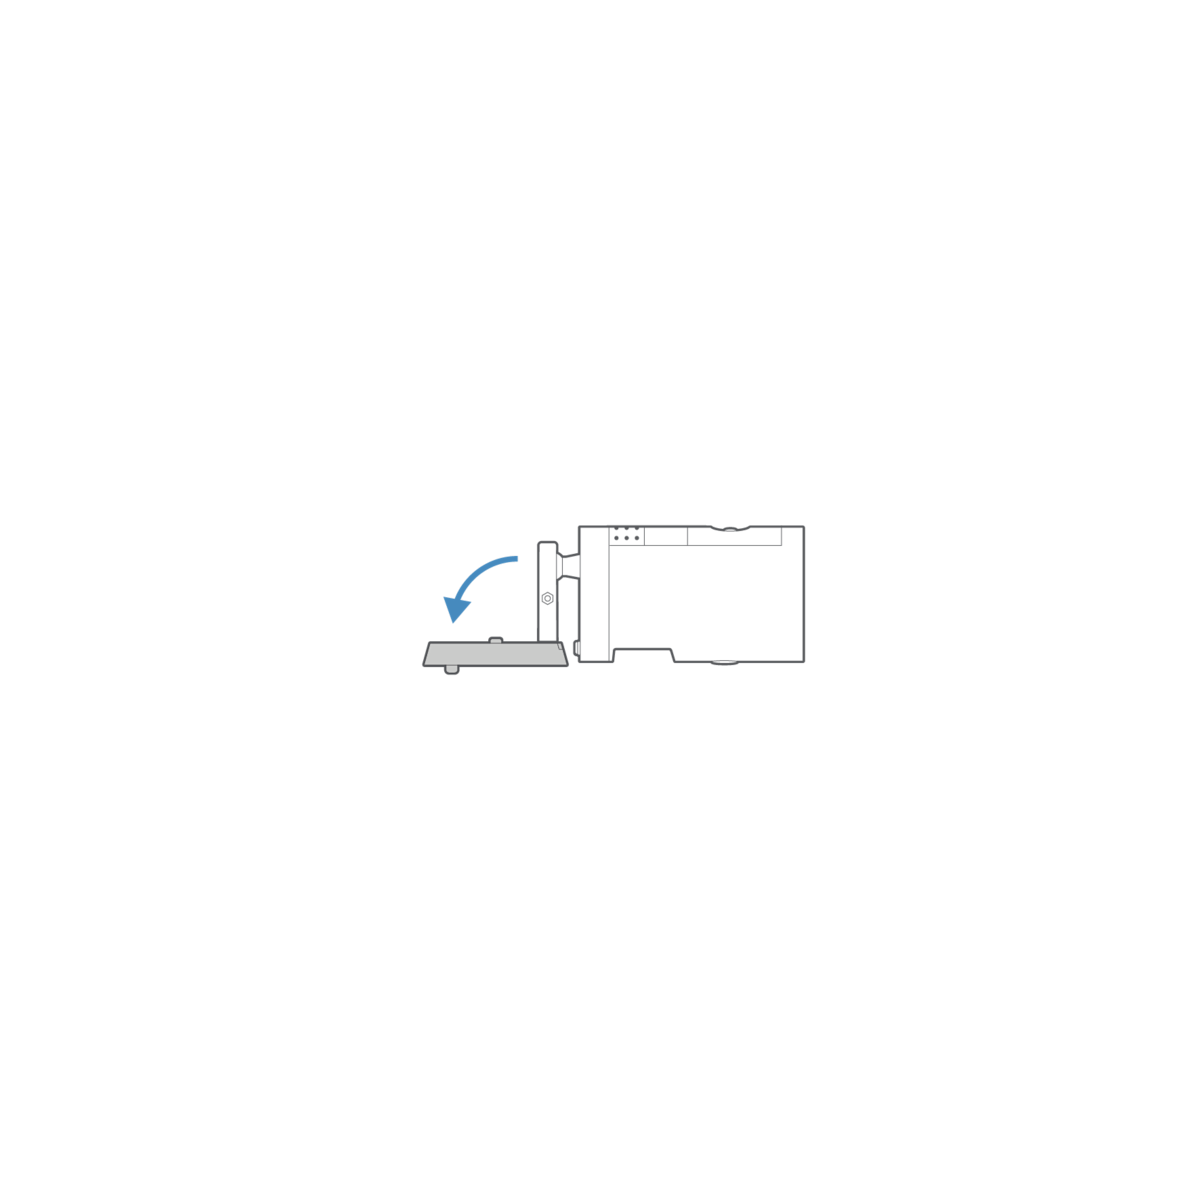
2. Unscrew to detach the camera mount from the battery cover.
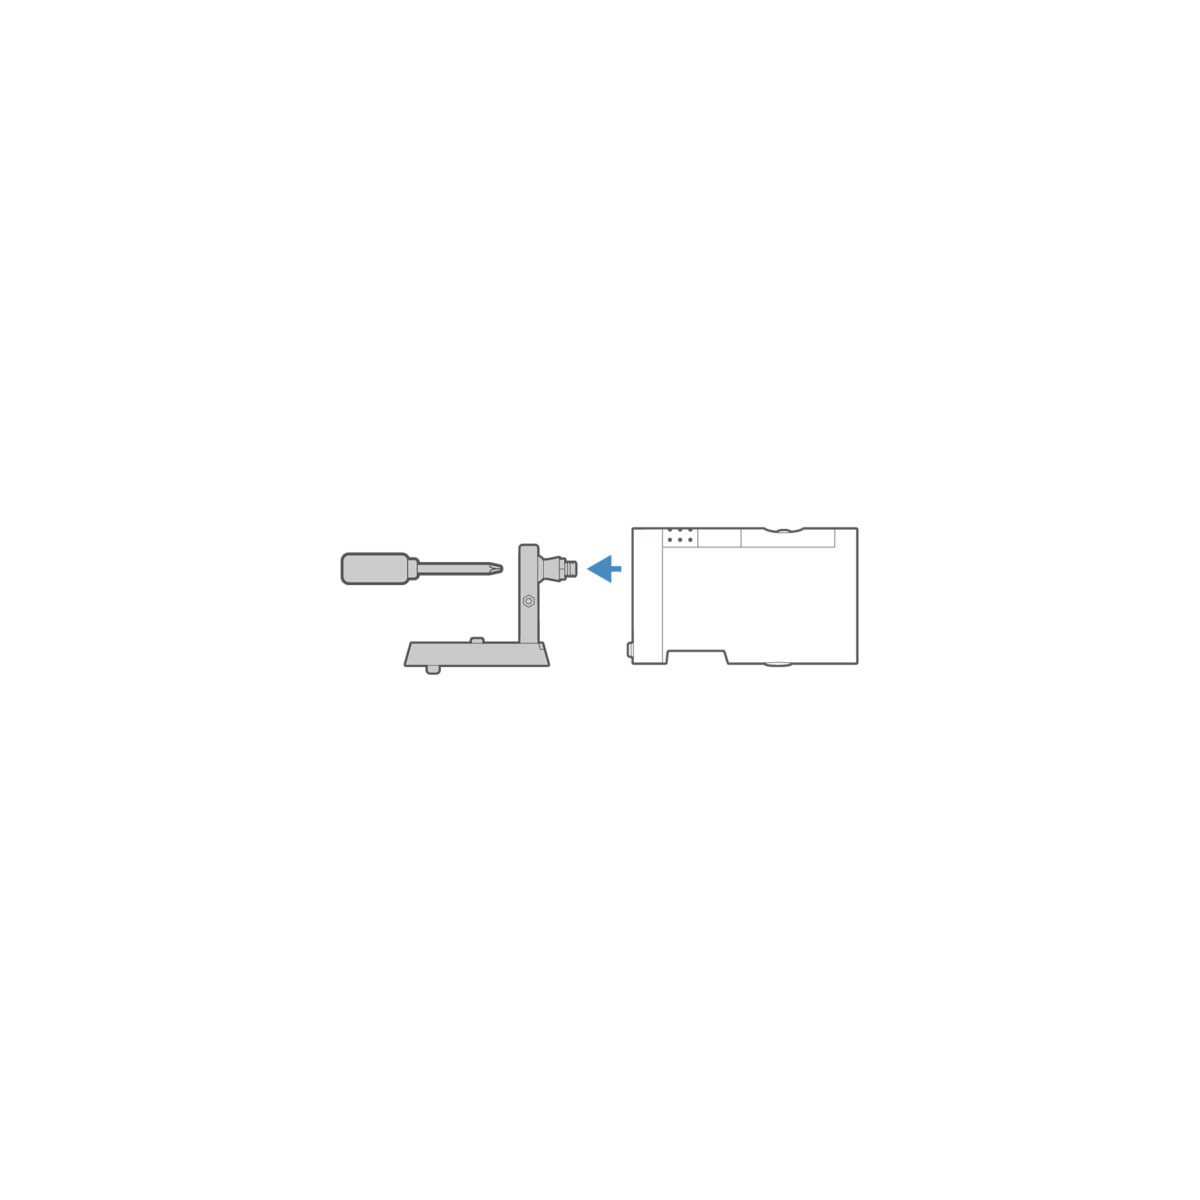
Choose a location.

3. Remove the weather cover and wired mount arm plate adapter.
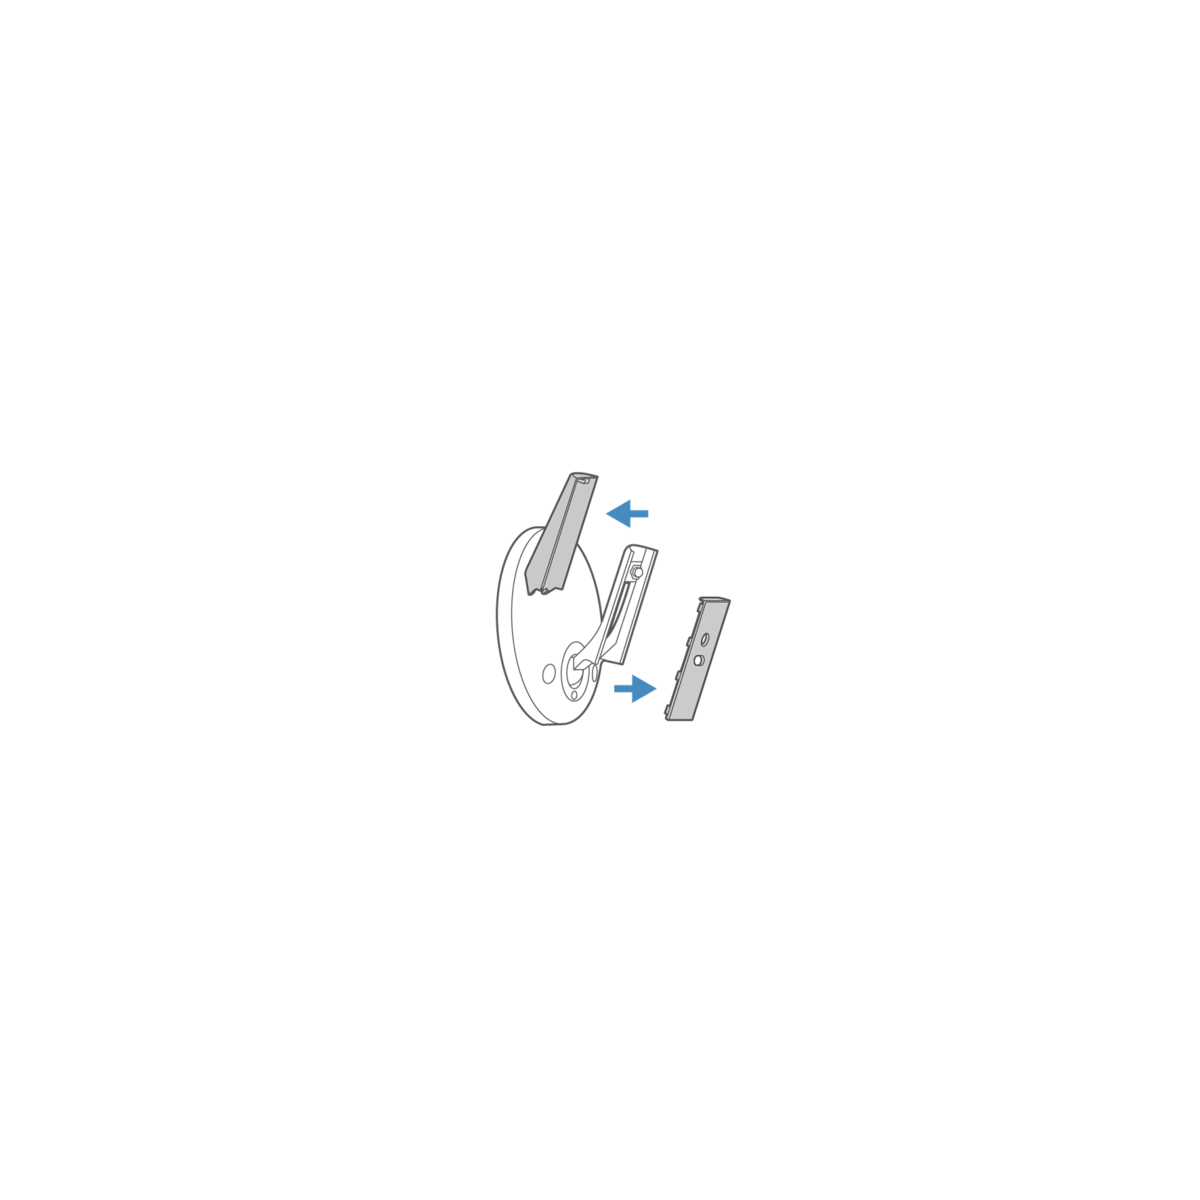
4a. If installing on the wall, slide the hand screw to setting A or B.
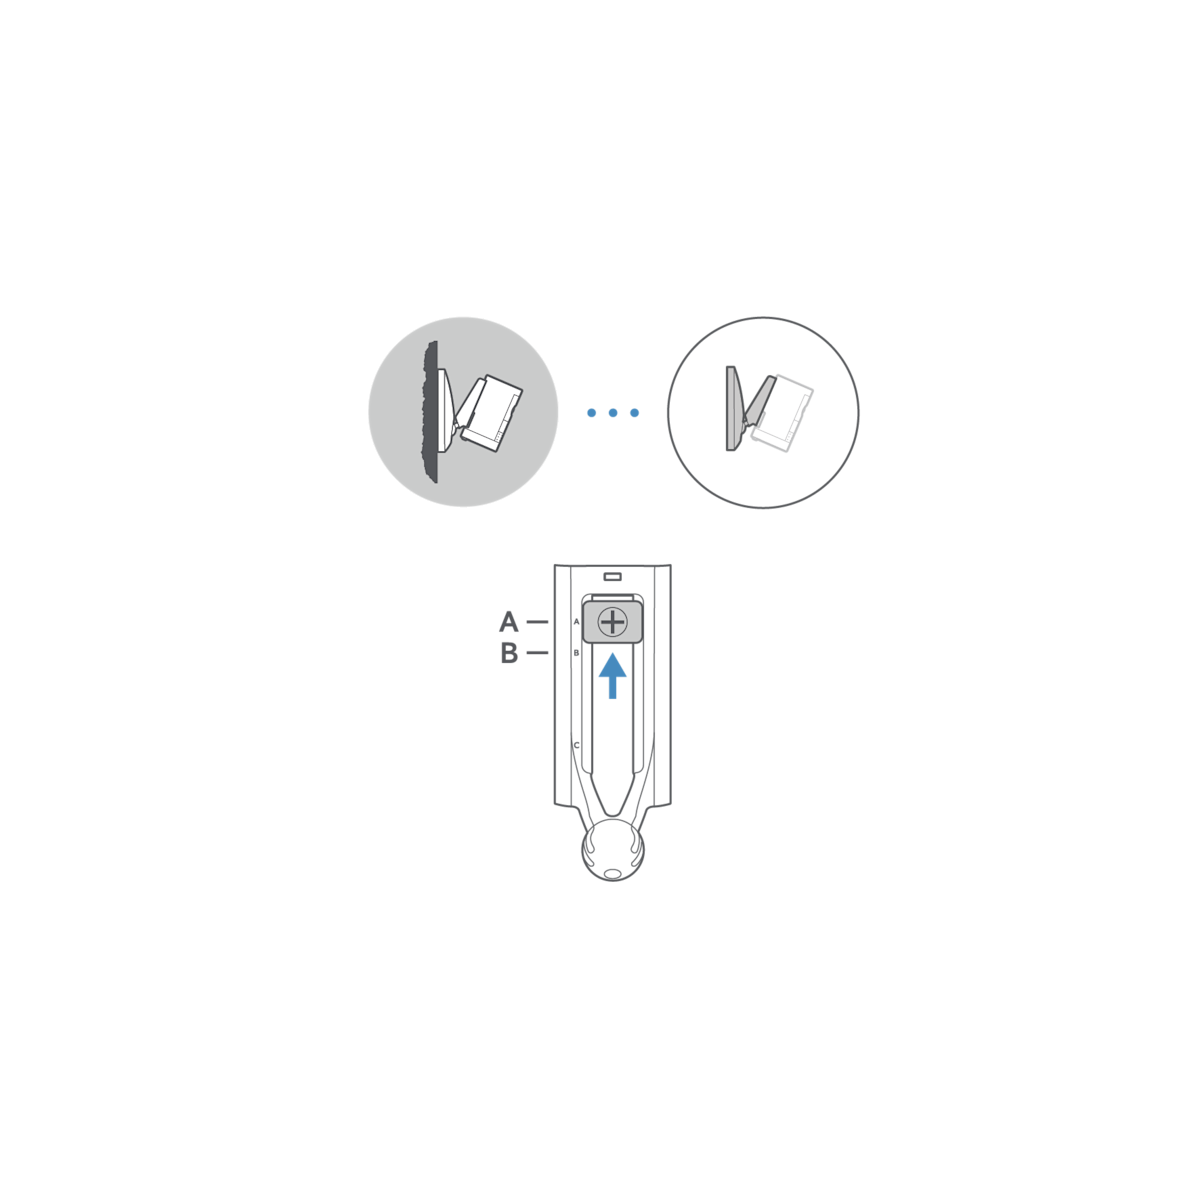
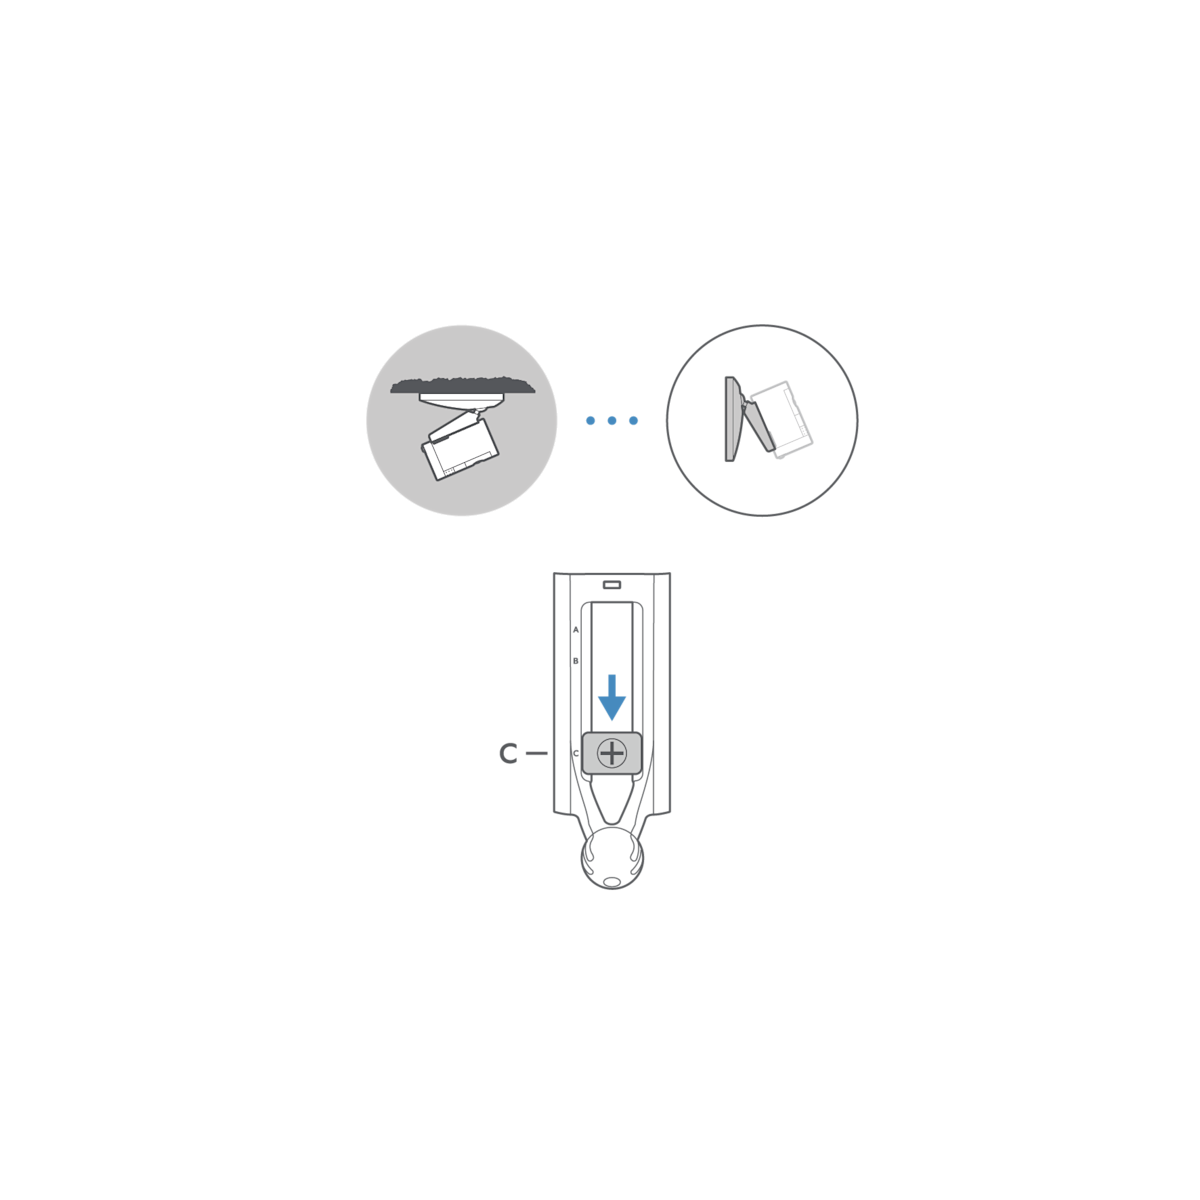
4b. If installing on the ceiling, position your camera facing down and slide the hand screw to setting C.
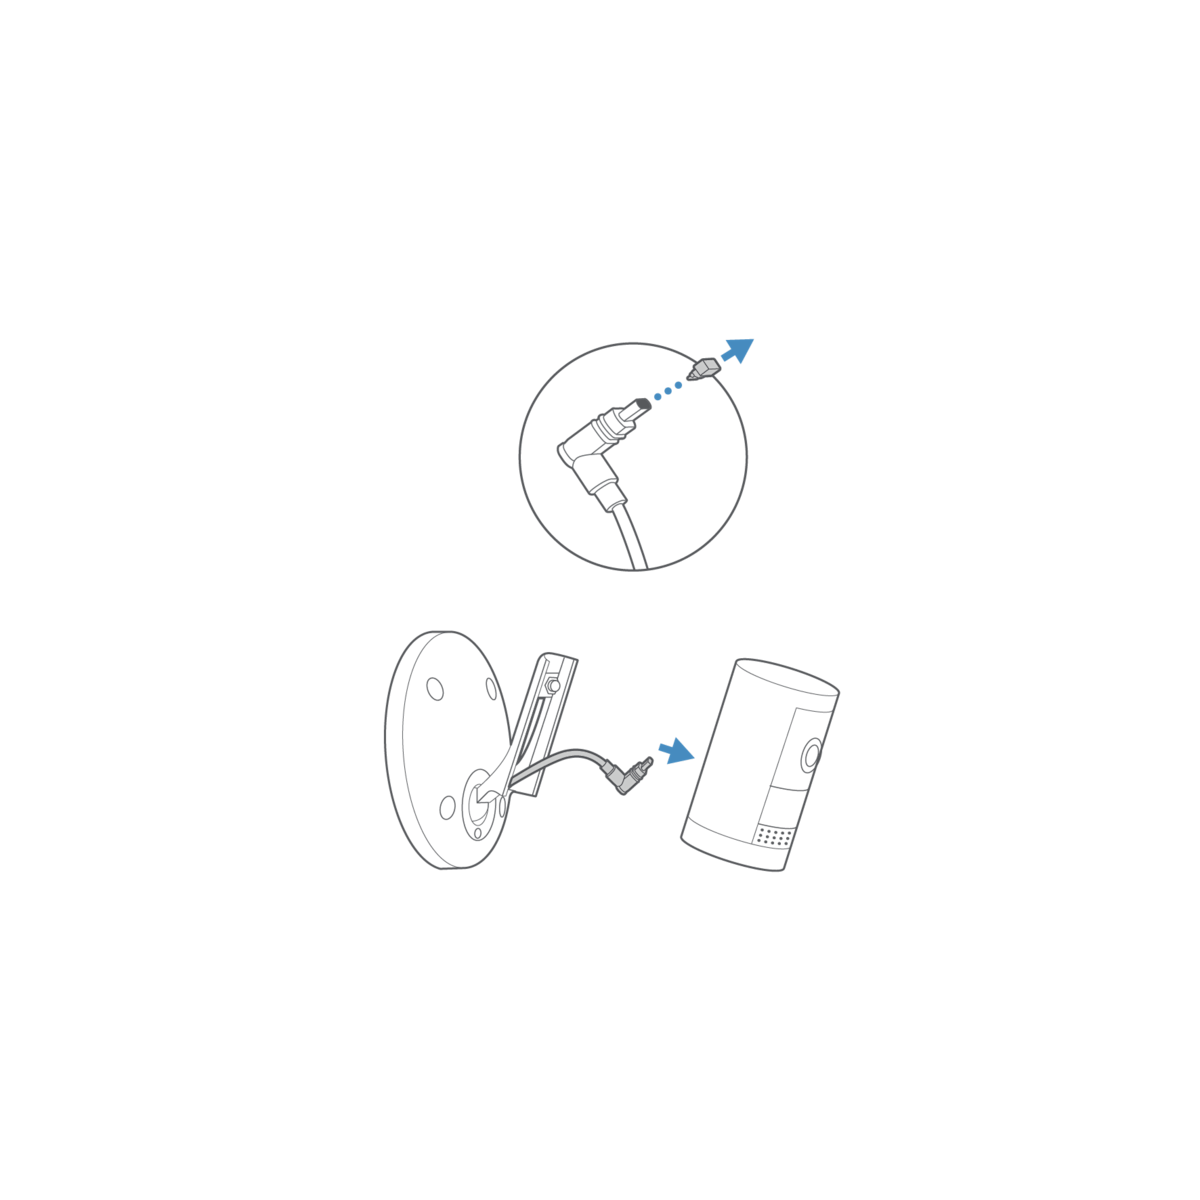
5. Connect USB-C cable.
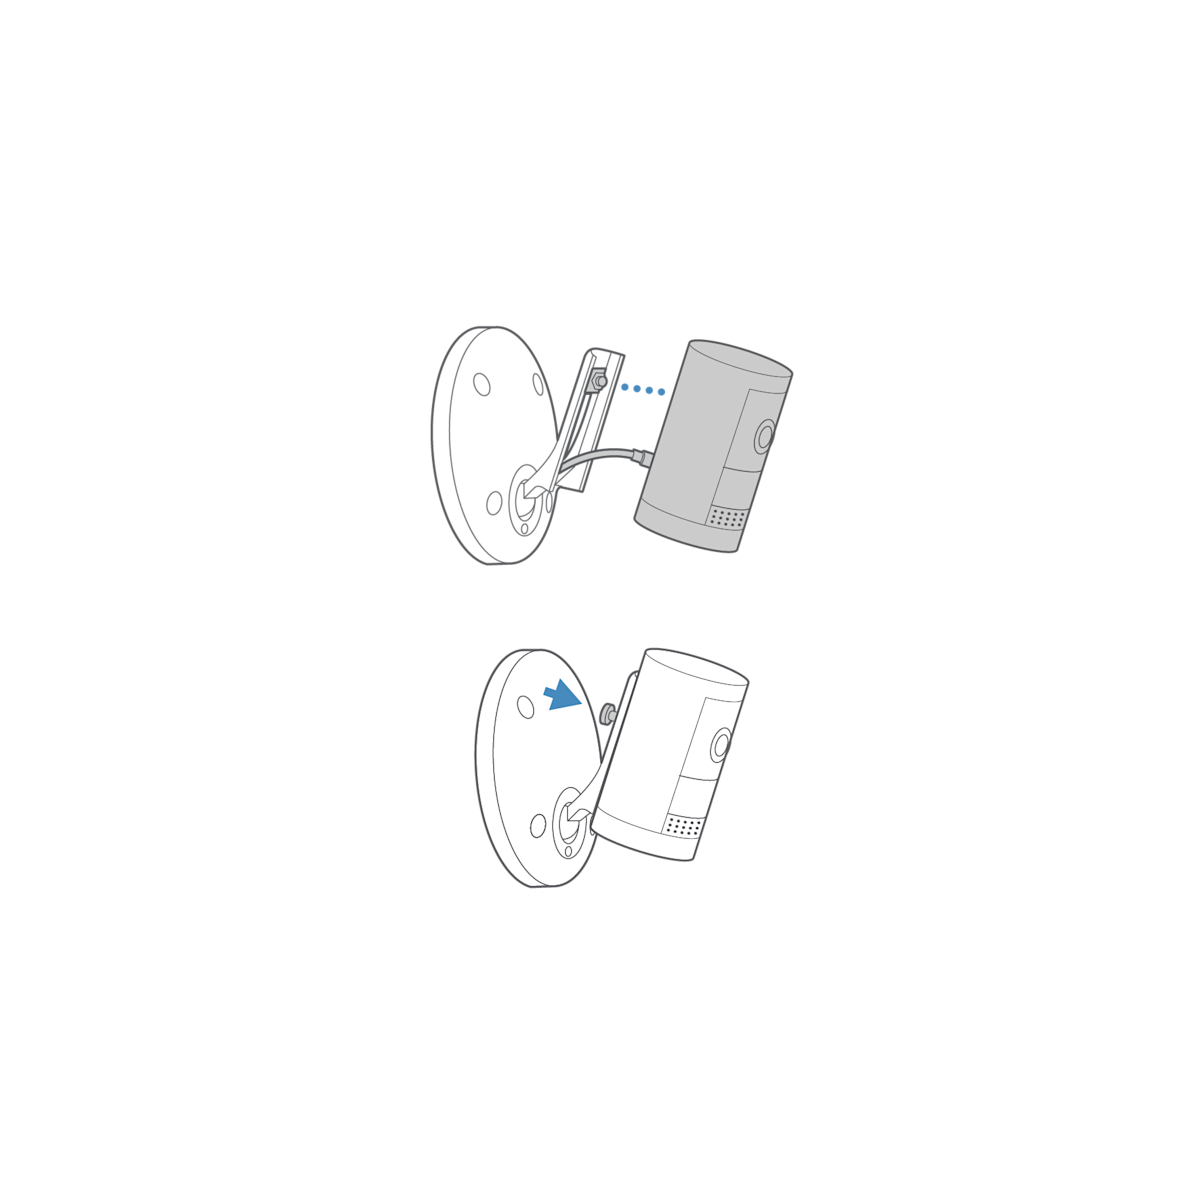
6. Tighten the hand screw until your camera is securely attached to swivel arm.
7. Attach the weather cover.

8. Adjust the camera angle.
