Replacing the cable on your Door View Cam
If you need to replace the cable that came with your Door View Cam, simply follow the instructions below.
Note: Before you replace the cable, you will need to uninstall your Door View Cam, including the battery and tightening nut from the indoor assembly and the door hole adapter (if installed).
Get instructions on uninstalling your Door View Cam.
Unplug the old cable
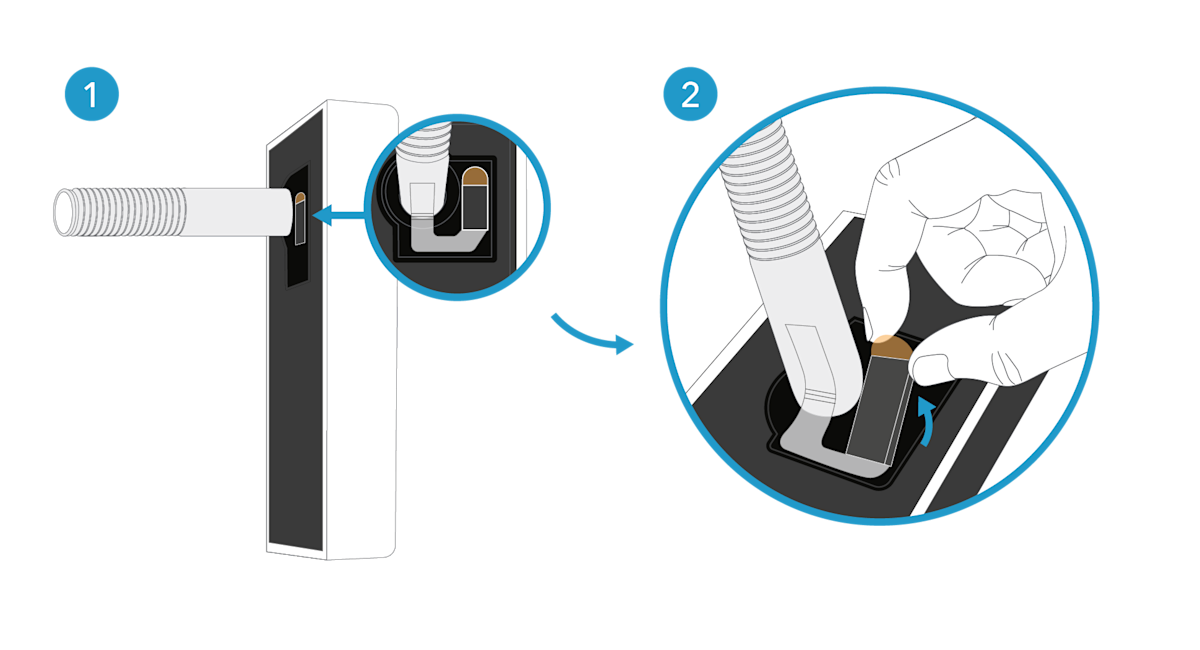
On the outdoor assembly, grasp the small tab above the port (located next to the tube) and pull firmly to disengage it.

Remove the old cable
Once unplugged, remove the old cable from the assembly and tube (it might be glued to the assembly and/or tube).

Remove the adhesive
The replacement cable will have an adhesive strip that is used to attach it to the tube. Peel the backing off the adhesive strip and attach the cable to the tube in the same location you removed the old cable.

Plug in the new cable
With the old cable removed, plug the connector of the new cable into the port on the rear of the outdoor assembly. Pull gently to make sure the connection is secure.
Tuck the end of the cable into the tube
Take the connector at the end of the new cable and tuck it into the tube. This will protect the cable and make inserting your Door View Cam through the door easier.
Reinstall your Door View Cam
Once the cable is installed, simply reinstall the Door View Cam in your door.
Get instructions on installing your Door View Cam.
