Floodlight Cam Installation Guide
For an overview on installing the Ring Floodlight Cam, watch this video.
Video guides
Installing the bracket
For detailed instructions on installing your Floodlight Cam bracket, watch this video.
Wiring your Floodlight Cam
For detailed instructions on wiring your Floodlight Cam, watch this video.
Mounting your Floodlight Cam
For detailed instructions on mounting your Floodlight Cam, watch this video.
Before you begin
WARNING: Electrical shock hazard. Disconnect power to the installation area at your circuit breaker or fuse box before beginning installation. Always use caution when handling electrical wiring.
Installation by a qualified electrician may be required in your area. Refer to your local laws and building codes before performing electrical work; permits plus professional installation may be required by law.
- Turn off power at the fuse box before installing.
- Verify that the supply voltage is correct. Connect fixture to a 100~240 VAC 50/60 Hz power source.
- The earth wire must be connected to the light fixture. DO NOT INSTALL if a working earth connection is not available.
- Do not connect this light fixture to a dimmer switch or timer.
CAUTION: Risk of fire
Do not install near combustible or flammable surfaces.Floodlight Cam must be installed on a wall or eve.
Installation steps
To install your Floodlight Cam device, follow these steps:
1. Shut power off at the fuse box
Turn off power to your floodlight circuit at the fuse box to ensure no power is being sent.
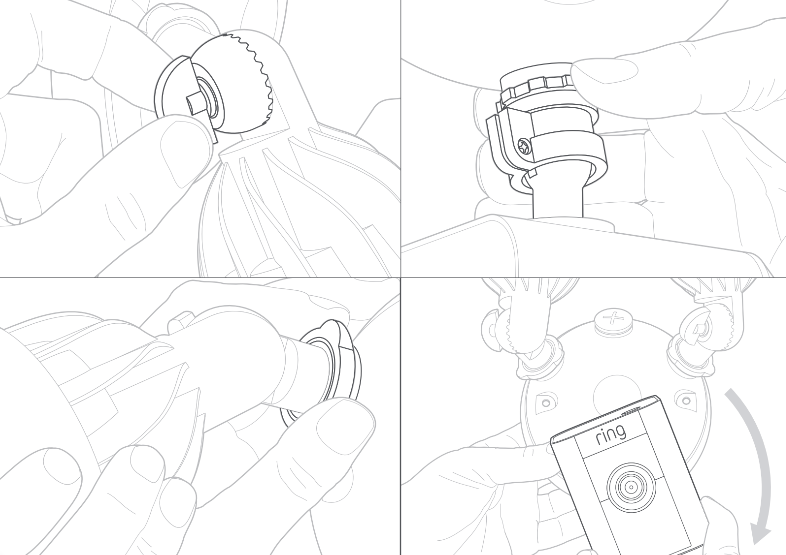
2. Prep your Floodlight Cam for installation
A) Loosen the knobs on the light fixtures to rotate them out of the way and allow access to the mounting screws.
Do not remove your Floodlight Cam from the ball socket on the base.
B) Rotate the camera 180 degrees since Floodlight Cam ships with the camera upside down on the fixture.
3. Remove your existing floodlight
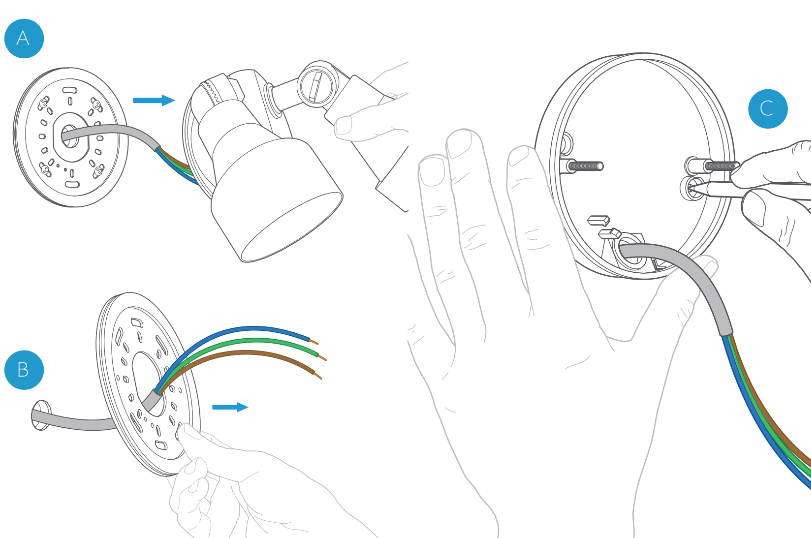
A) With power off at the fuse box, remove your existing floodlight from the wall and disconnect the wires.
B) If there is a bracket attached to the wall, remove that as well.
4. Install the mounting bracket
Cut a hole in the gasket to fit your wires, and run them through.
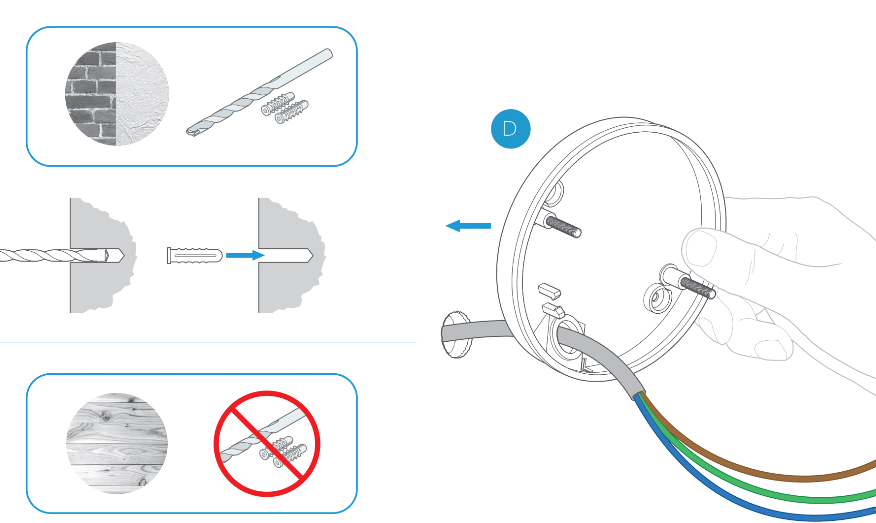
Install the mounting bracket with the two posts level with the ground (or level with your wall if mounting vertically on an overhang).
5. Hang Floodlight Cam
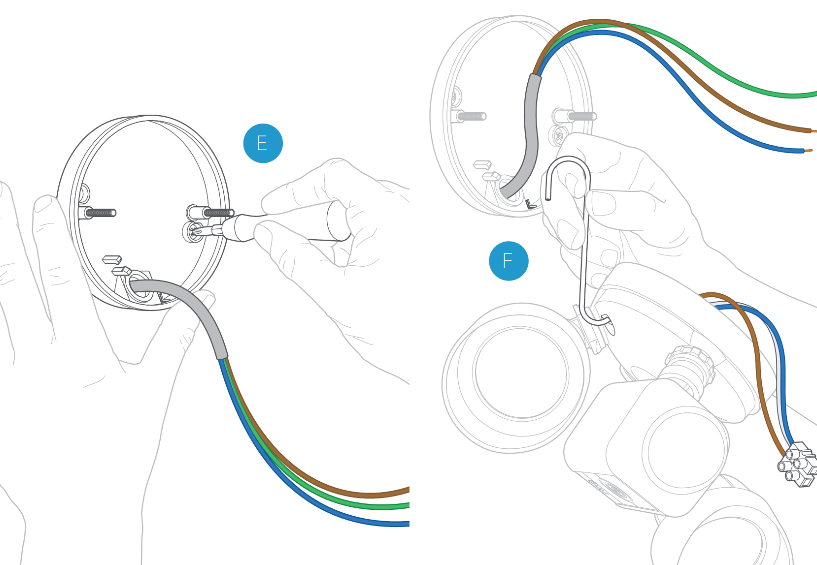
Use the provided hook to hang Floodlight Cam from the bracket while connecting the wires.
- Hook one end of the provided hook into one of the mounting holes on your Floodlight Cam.
- Hook the other end into the small hole on the bracket.
6. Connect the earth wire
Connect your earth wire to the earth post on Floodlight Cam, and secure it in place.
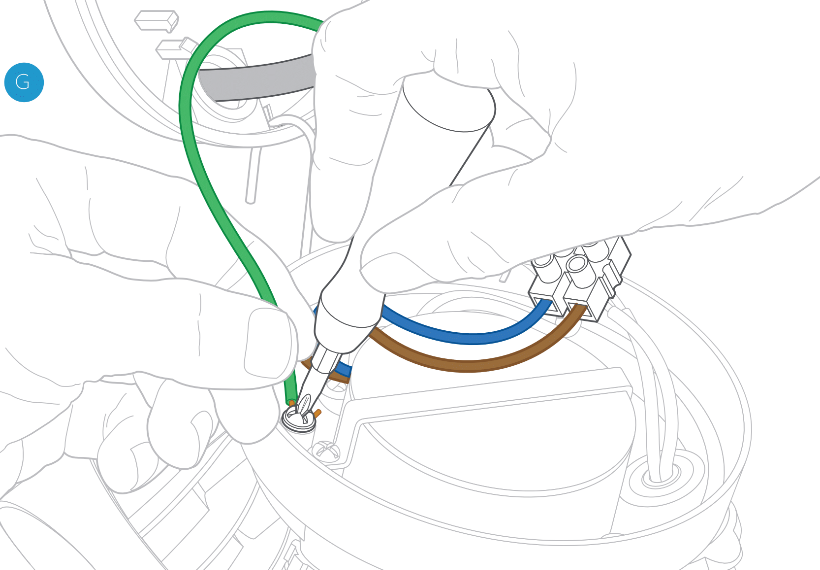
7. Identify the neutral and line terminals
The terminals on the Floodlight Cam are marked N (neutral) and L (line). Identify these and wire accordingly. Depending on the age of the home, the wires may not match the colours shown below. Consult an electrician if you are unsure.
8. Connect the power wires
Attach the line and neutral wires from your wall to the line and neutral terminals on your Floodlight Cam. Secure them using the small flat head screwdriver.
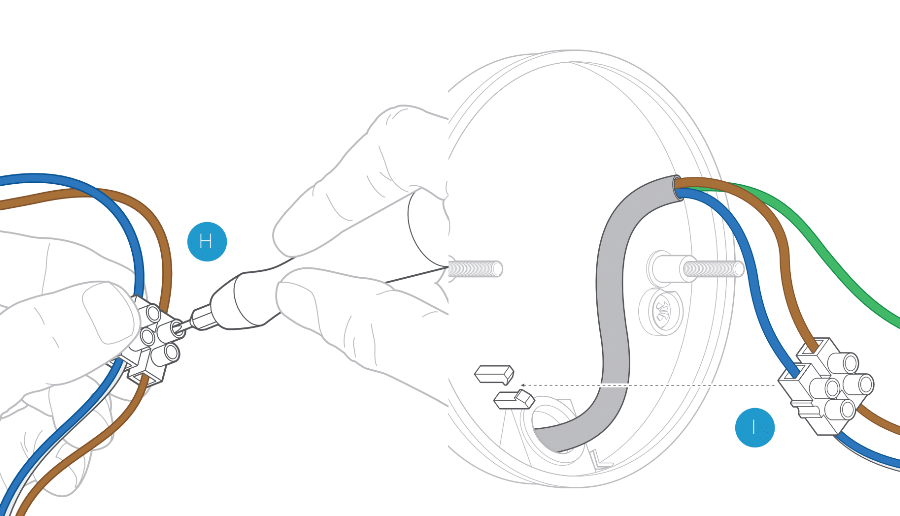
9. Snap the wire connector into place
After securing the wires, snap the wire connector into the base of the mounting bracket.
10. Place Floodlight Cam on the bracket
Carefully secure all the wires behind your Floodlight Cam. Align the mounting posts with the holes on Floodlight Cam and press together, securing the screw cap nuts with the orange Ring screwdriver handle.

11. Restore power
After restoring power, the lights will turn on and your Floodlight Cam will begin speaking to you to let you know it’s in setup mode.
App setup
Learn how to set up Floodlight Cam in the Ring app
Learn how to control your Floodlight Cam in the Ring app
