
Troubleshooting Ring Alarm Contact Sensors
Learn how to fix your Alarm Contact Sensor if you are experiencing these issues:
- Poor connection
- Unresponsive sensor
- Inaccurate open/closed reporting
 Contact Sensor (1st Gen) |  Contact Sensor (2nd Gen) |
 Outdoor Contact Sensor |
Understanding Contact Sensor light patterns
The light on your device will indicate its status. Learn more about Contact Sensor light patterns.
Fixing your Contact Sensor connection
If the Ring app reports a poor Z-Wave signal, or your device is falling offline, is unresponsive, or does not power on, try the following:
- Unmount the Sensor and move it to within 5 feet from the Base Station. If the connection improves, consider moving the Base Station to a more central location or adding a.
- Remove the batteries and reinsert them after a few seconds.
- For Outdoor Contact Sensor,to make sure it’s close enough to the Base Station.
If the Contact Sensor is still experiencing issues, try reconnecting in the Ring app:
- Open the Ring app to the main dashboard.
- Tap the Alarm tile under Devices.
- Tap Connected Devices.
- Tap the Contact Sensor you want to reconnect.
- Tap theDevice Settingstile.
- TapAdvanced Options.
- TapRetry Connection: Follow the prompts in the Ring app to reconnect the sensor to the Alarm Base Station.
If you are still having issues, factory reset your Contact Sensor.
Fixing tampered Contact Sensor
If your Contact Sensor is not reporting open and is closed correctly, make sure the magnet and sensor are in alignment, adjusting as necessary.
Learn how to troubleshoot Tampered Contact Sensors.
Learn more about proper positioning for Contact Sensors.
Factory resetting your Contact Sensor
If your Contact Sensor is not performing as expected and other troubleshooting steps have not resolved the issue, factory reset your device. Then reconnect it in the Ring app.
Contact Sensor (2nd Gen) and Outdoor Contact Sensor:
- Slide to remove the Contact Sensor from its base.
- Use a pin or paperclip to press and hold the pinhole reset button on the back. After the LED light turns off, release the reset button.
- Add the device back using the Ring app.

Contact Sensor (1st Gen):
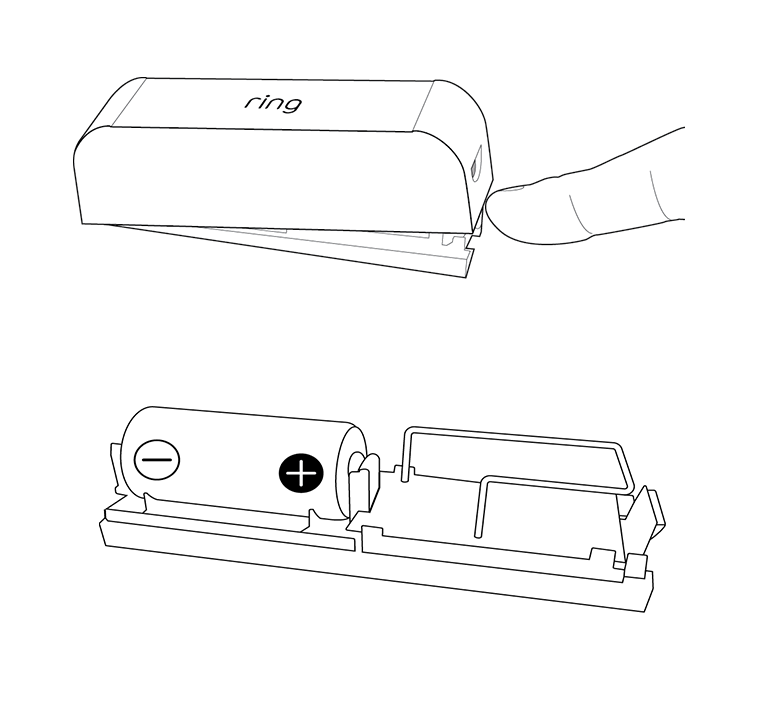
- Remove the cover from the device.
- Remove the battery from the device.
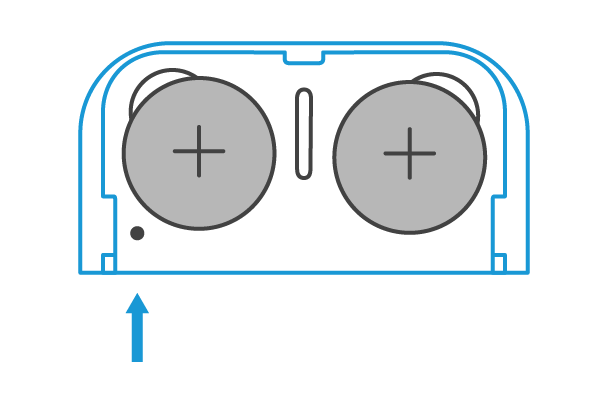
- Press and hold the tamper button (found near the antenna).
- Insert the battery while holding the tamper button. The LED light will flash. Hold the button until the LED light stops flashing, OR until you see a solid LED light.
- Put the cover back on the device.
- Add the device back using the Ring app.

After the Contact Sensor has been factory reset, you will need to set it up again in the Ring app. Learn how to set up and use the Ring Alarm Contact Sensor.